Flying with 40 Pots Across the Country
What my first wood-firing was like, and how everything came out
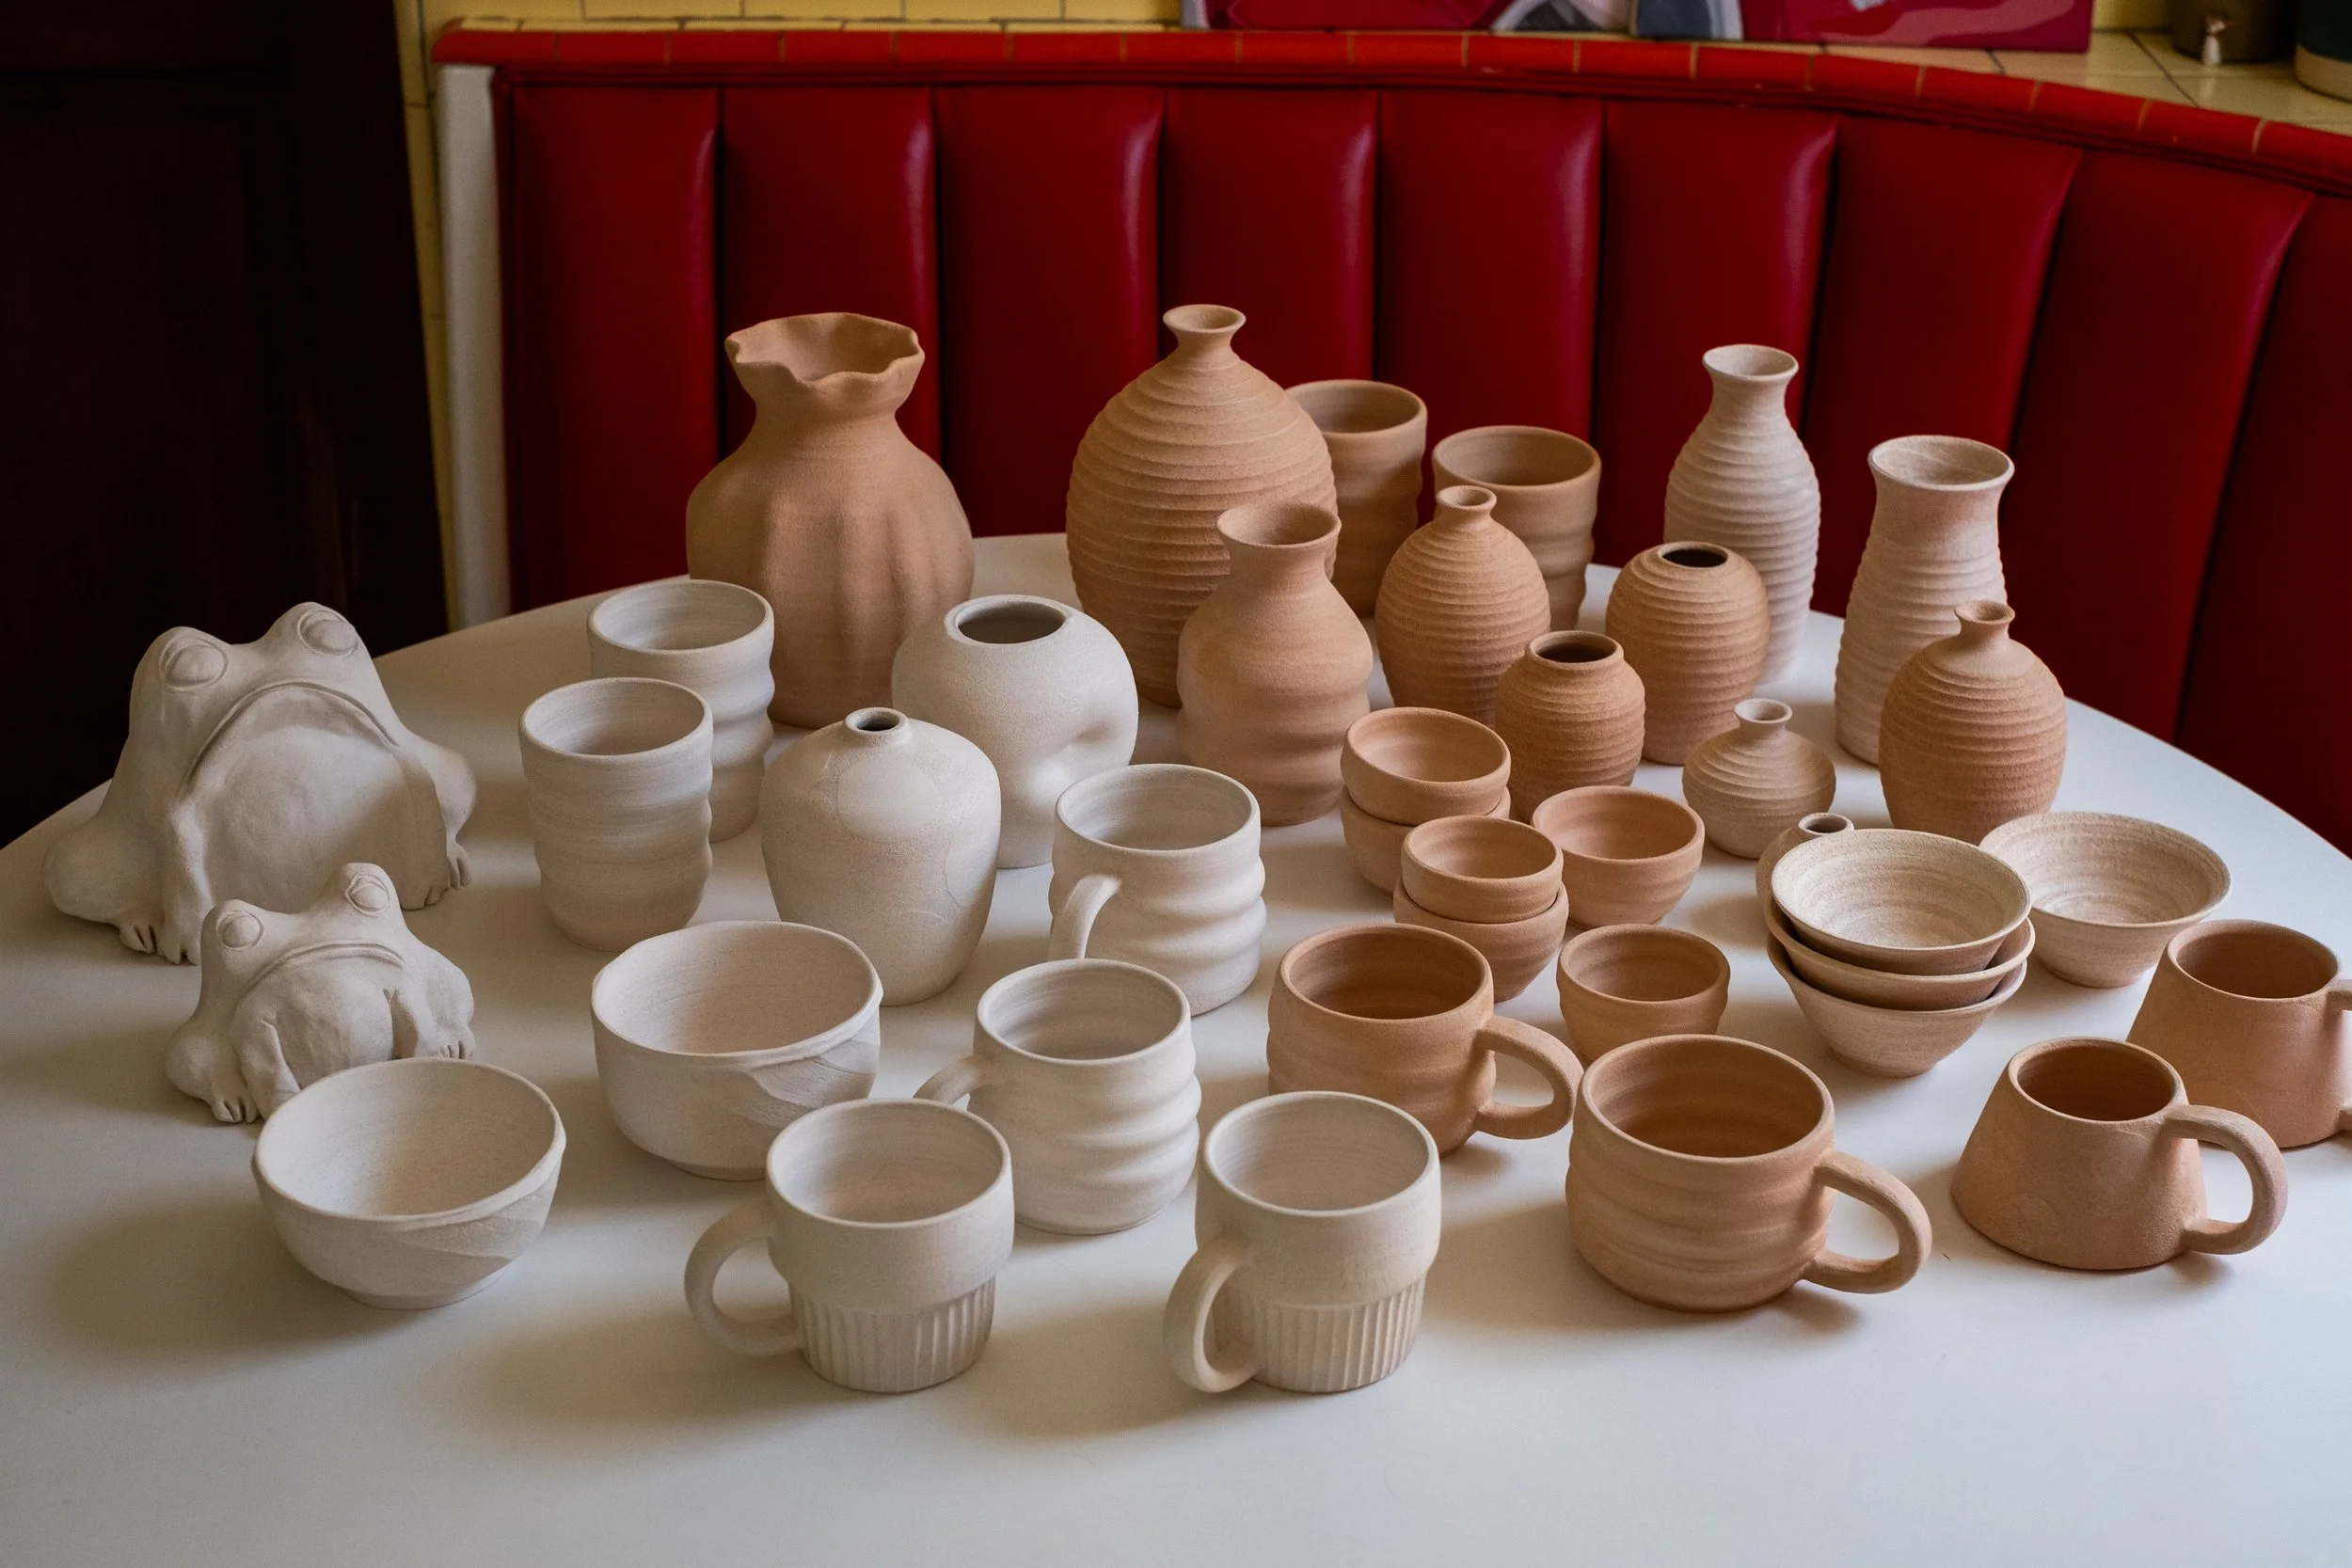
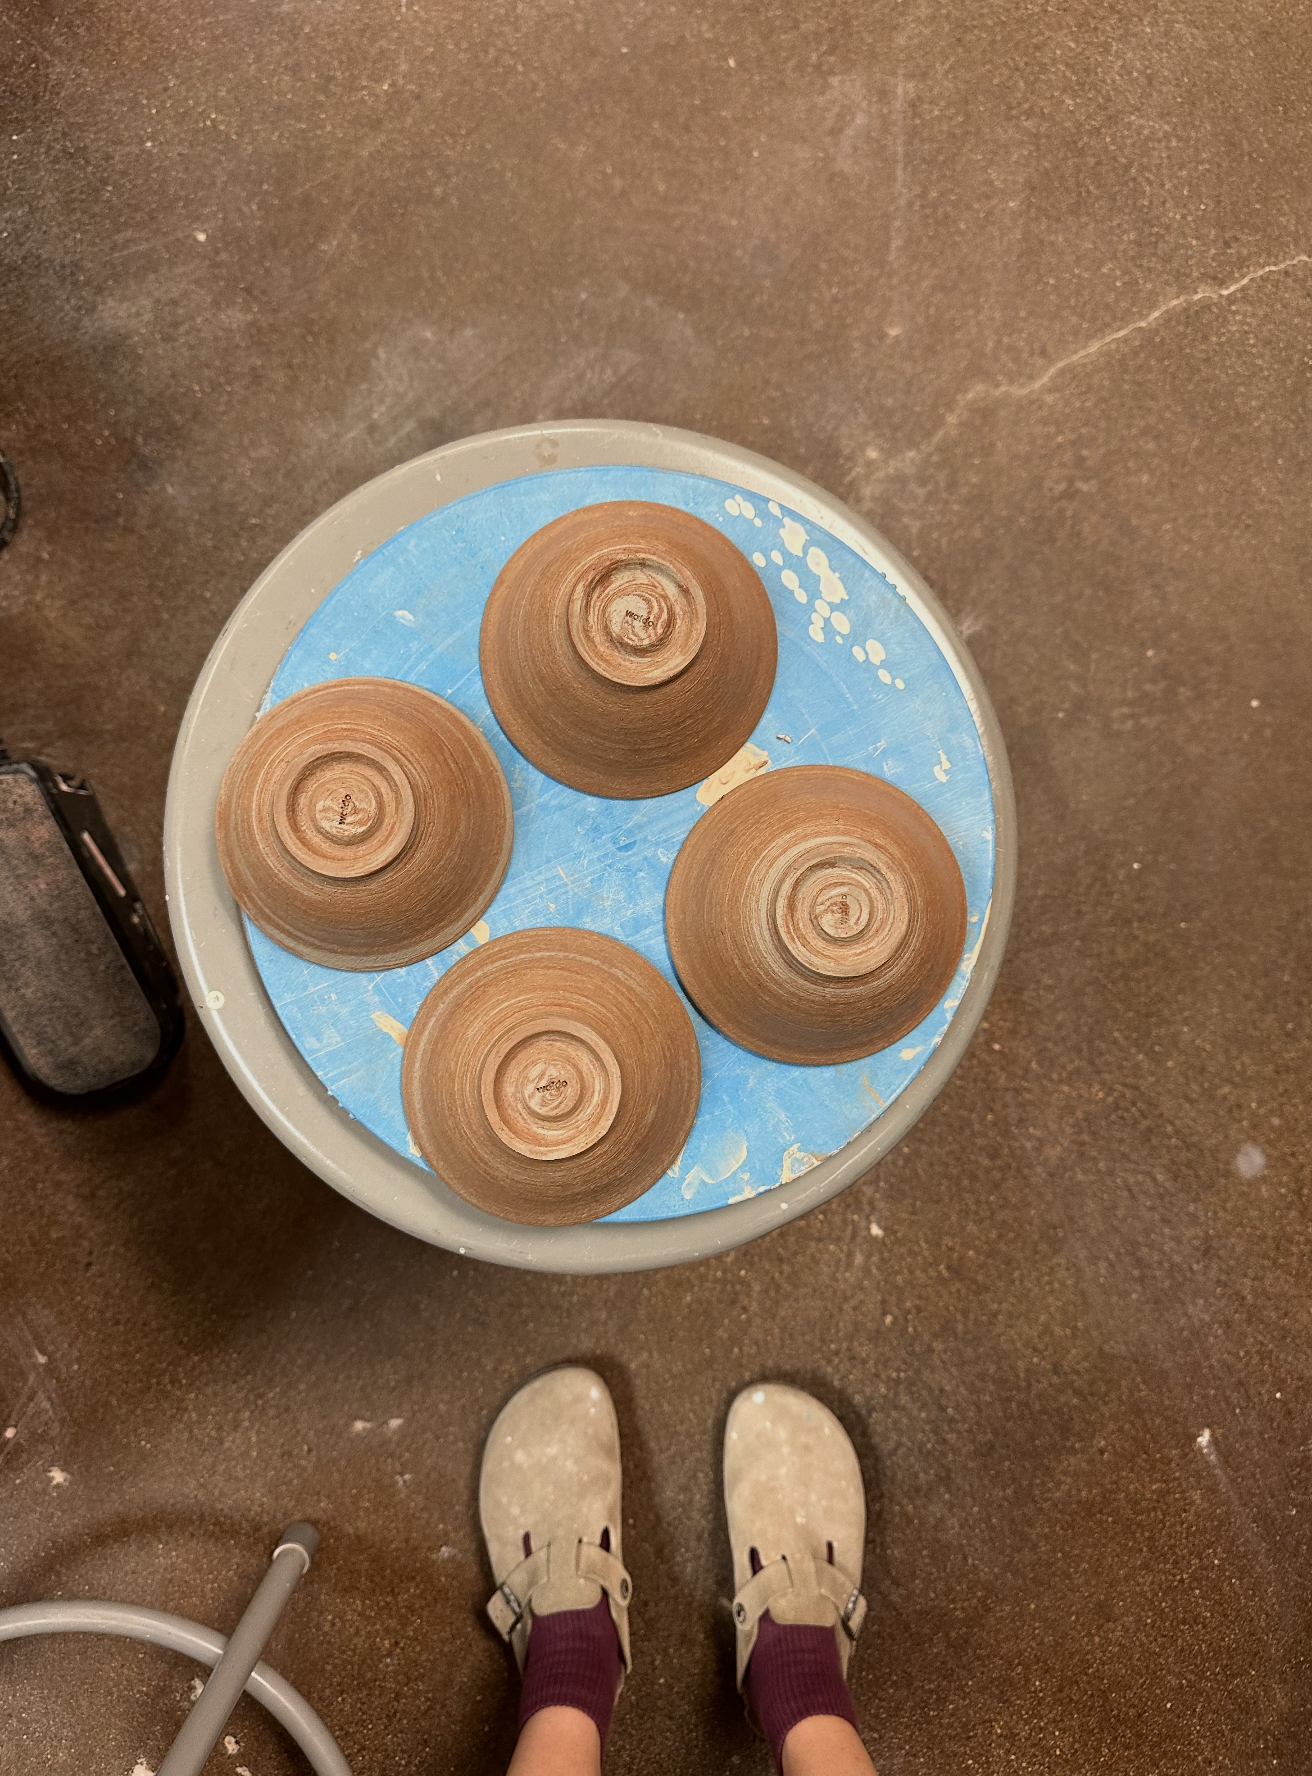
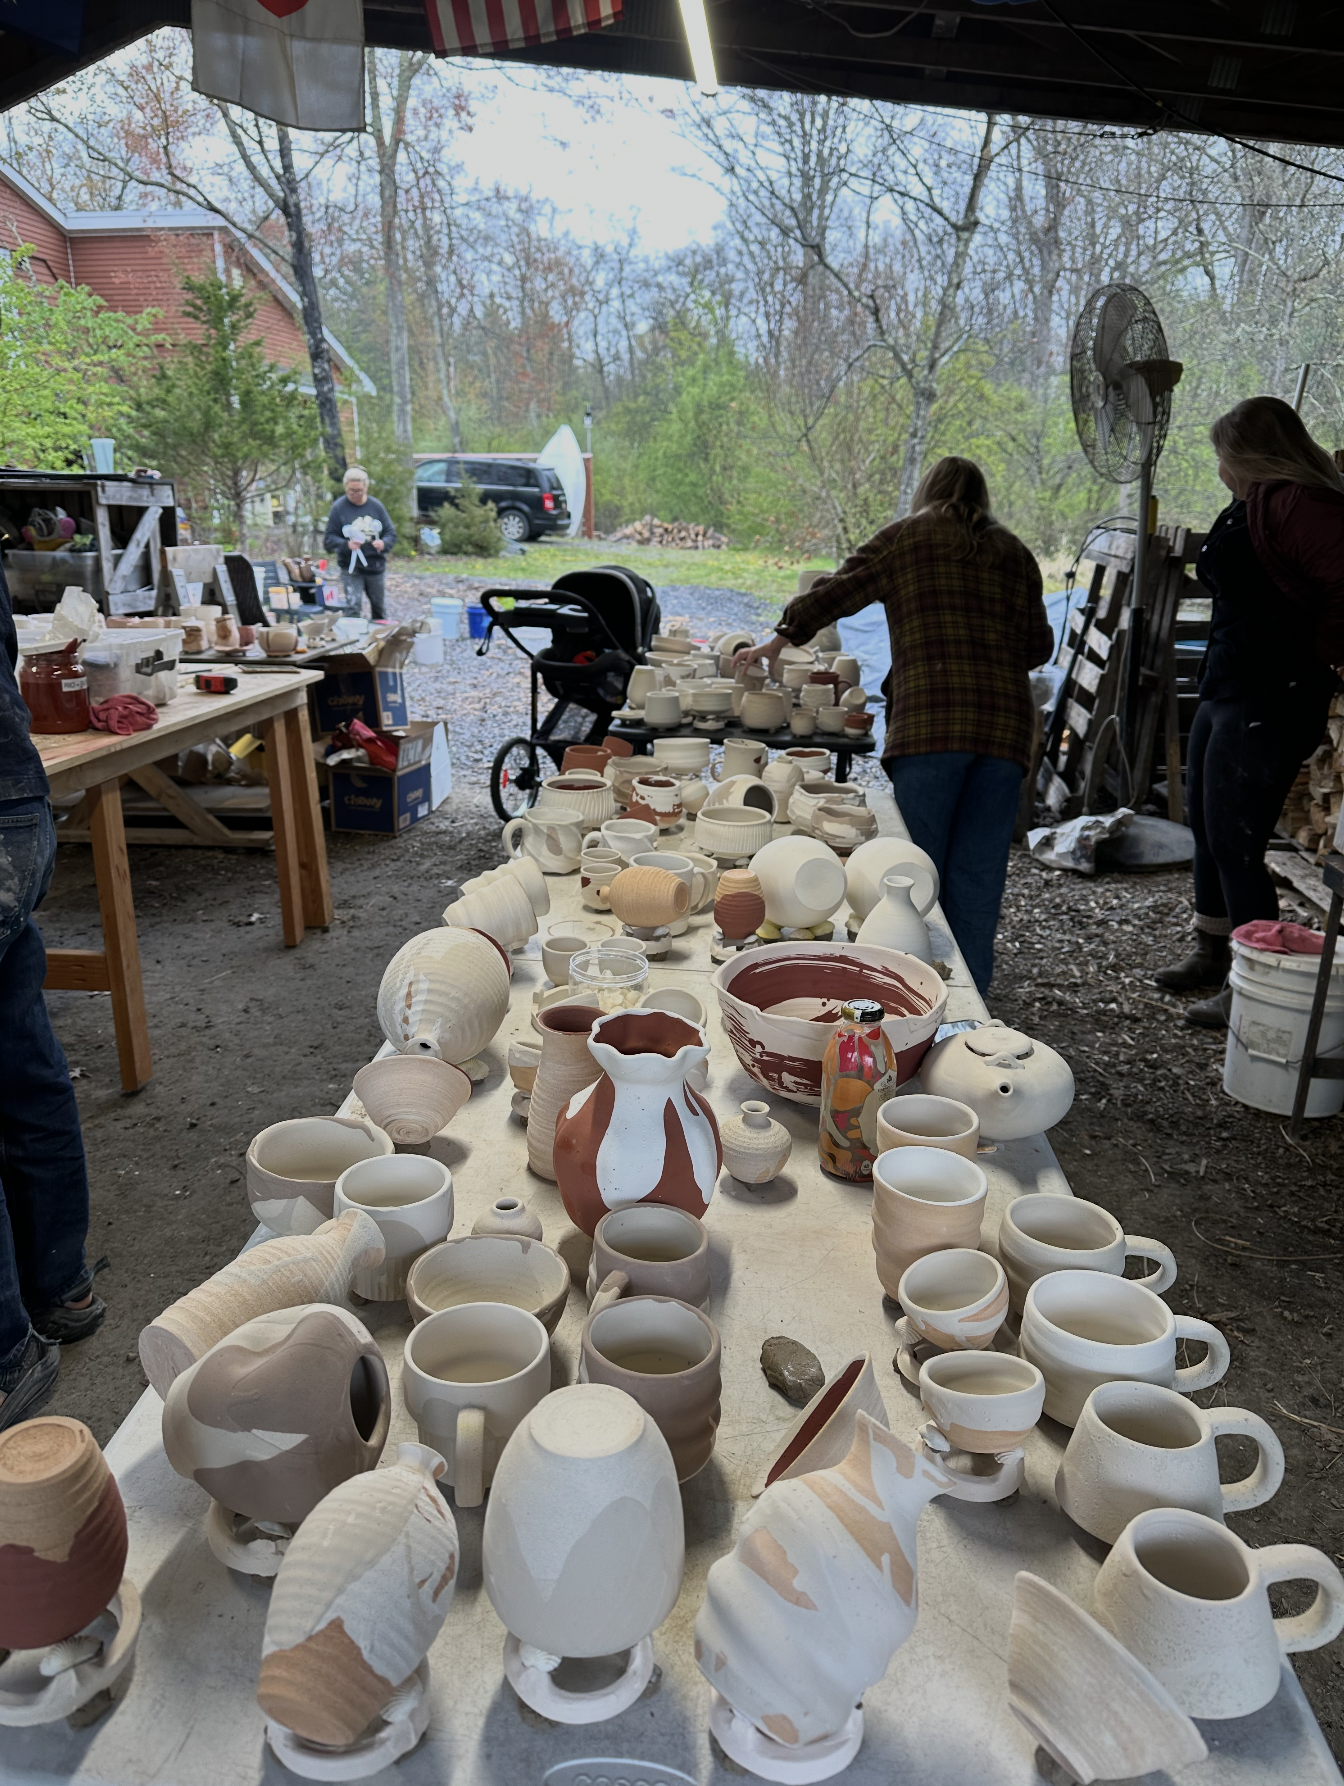
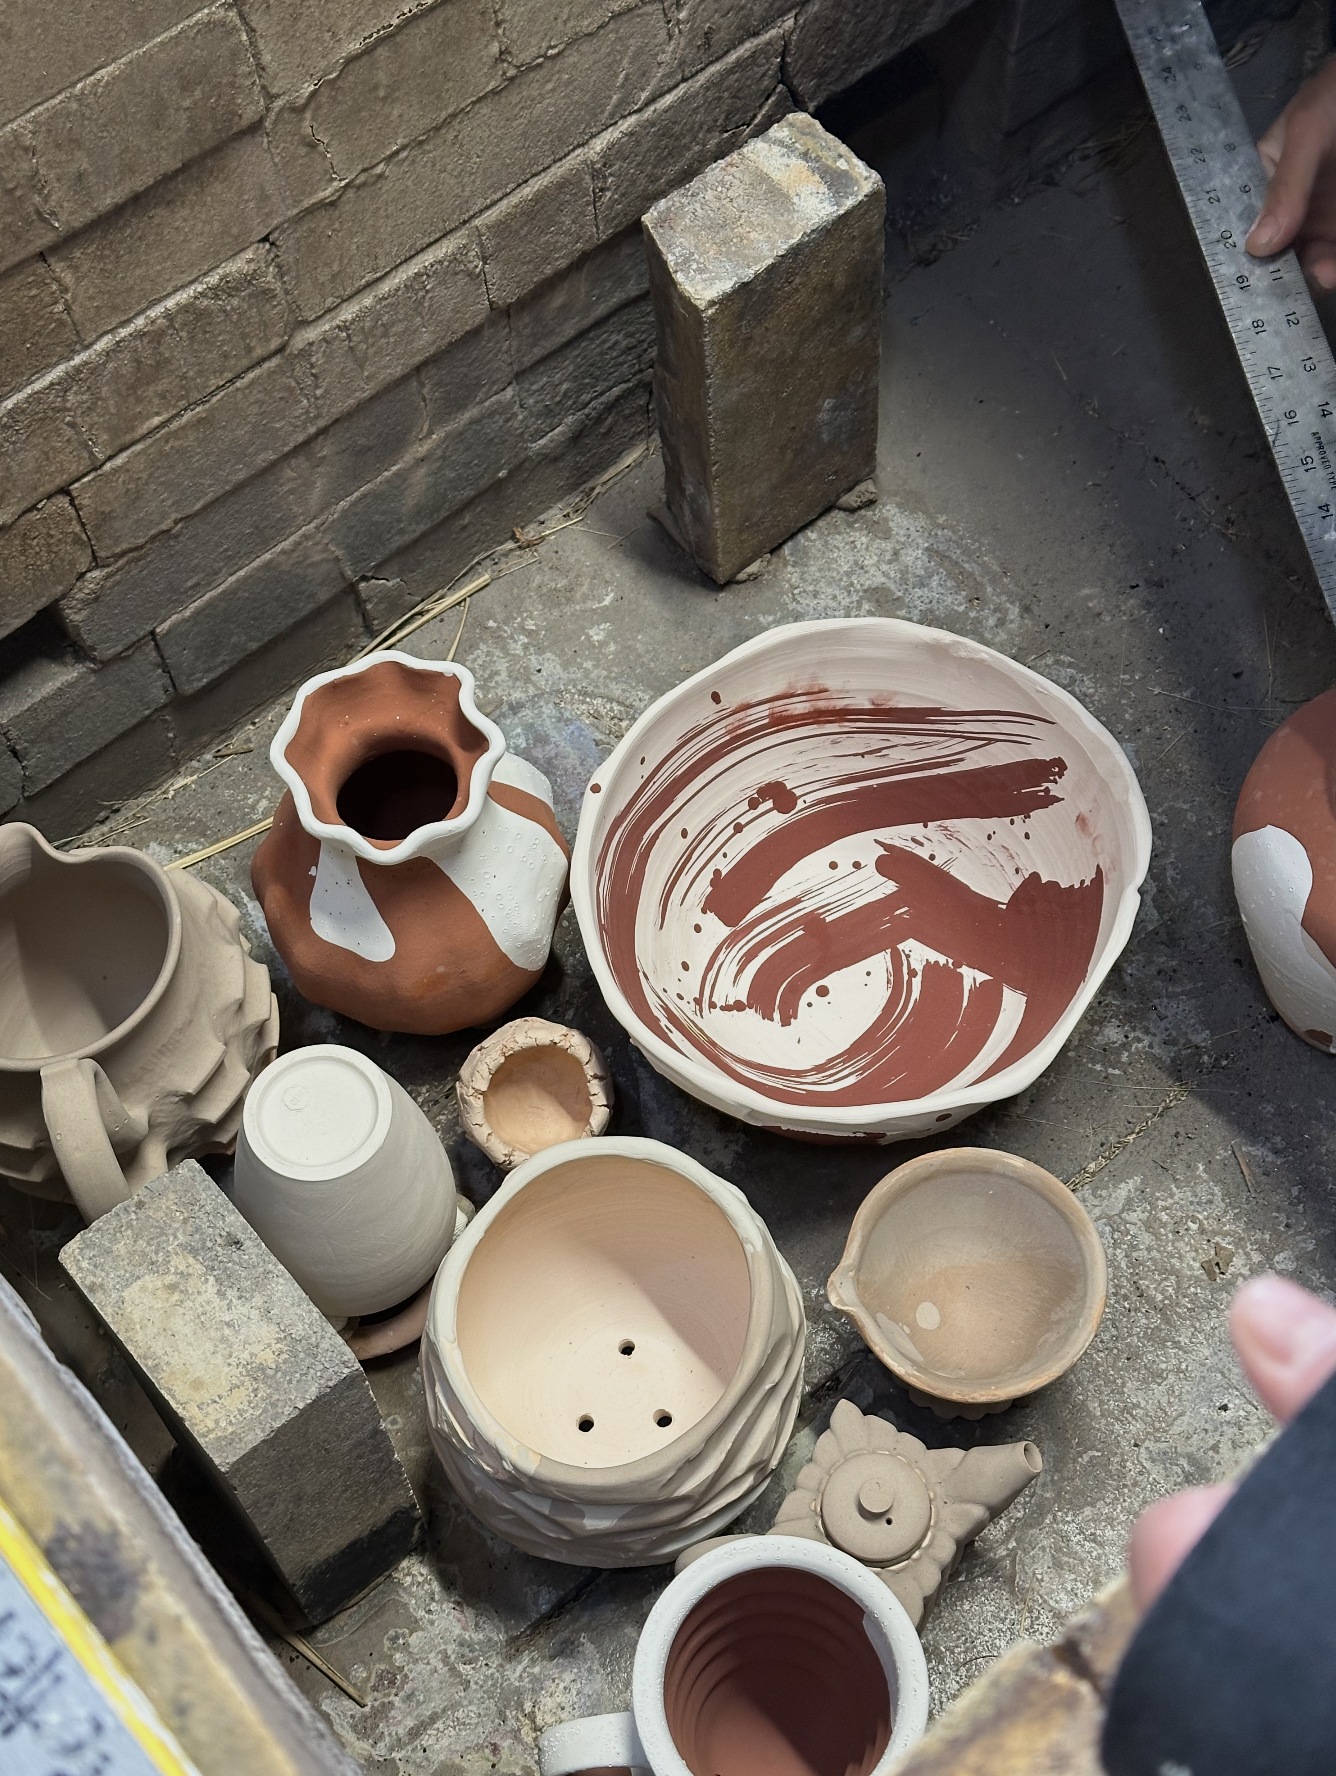
All the pots that I packed up and flew with across the country before my wood-firing
But why
When I told friends and family that I was flying across the country with 40 pieces of pottery to do a special firing, they were confused.
“But a wood firing is special!” I tried to explain. This year on my 2026 pottery goals listed “do an atmospheric firing.” 2025 left me feeling a bit burnt out on production pottery, even at my smaller scale. I hoped to set aside some intentional time to have a new experience, fail a lot, and hopefully feel creativily replenished.
I have to admit, I had no idea what to really expect. All I knew was that the kiln was totally different to an electric kiln, what I typically use at home and at my community studio. One of the humbling things about clay, is that there are so many areas of the craft to explore—so I find myself a beginner again and again and again.
In February, Okidoki Studio released their year of workshops, and when I saw that they had a train kiln workshop opportunity listed on my birthday, it felt aligned that I should take a chance and go for it.
The only catch? The studio was across the country. And I’d need to bring all my pots with me.
The Prep
The workshop asked that we each bring 2 cubic feet of cone 10 bisqued pottery. To translate, I needed to make a lot of new pottery out a new clay body that can be fired up to a hotter temperature than what I normally use.
I popped by a local studio and picked up Laguna Granite and Laguna Amador. I wanted to try at least two different clay bodies, and went for a clear contrast of one that would be a lighter color when fired, and one that would be a rich brown.
Making the pieces on the wheel felt totally new, the clay bodies were both super coarse and groggy feeling, and it took a bit to get used to.
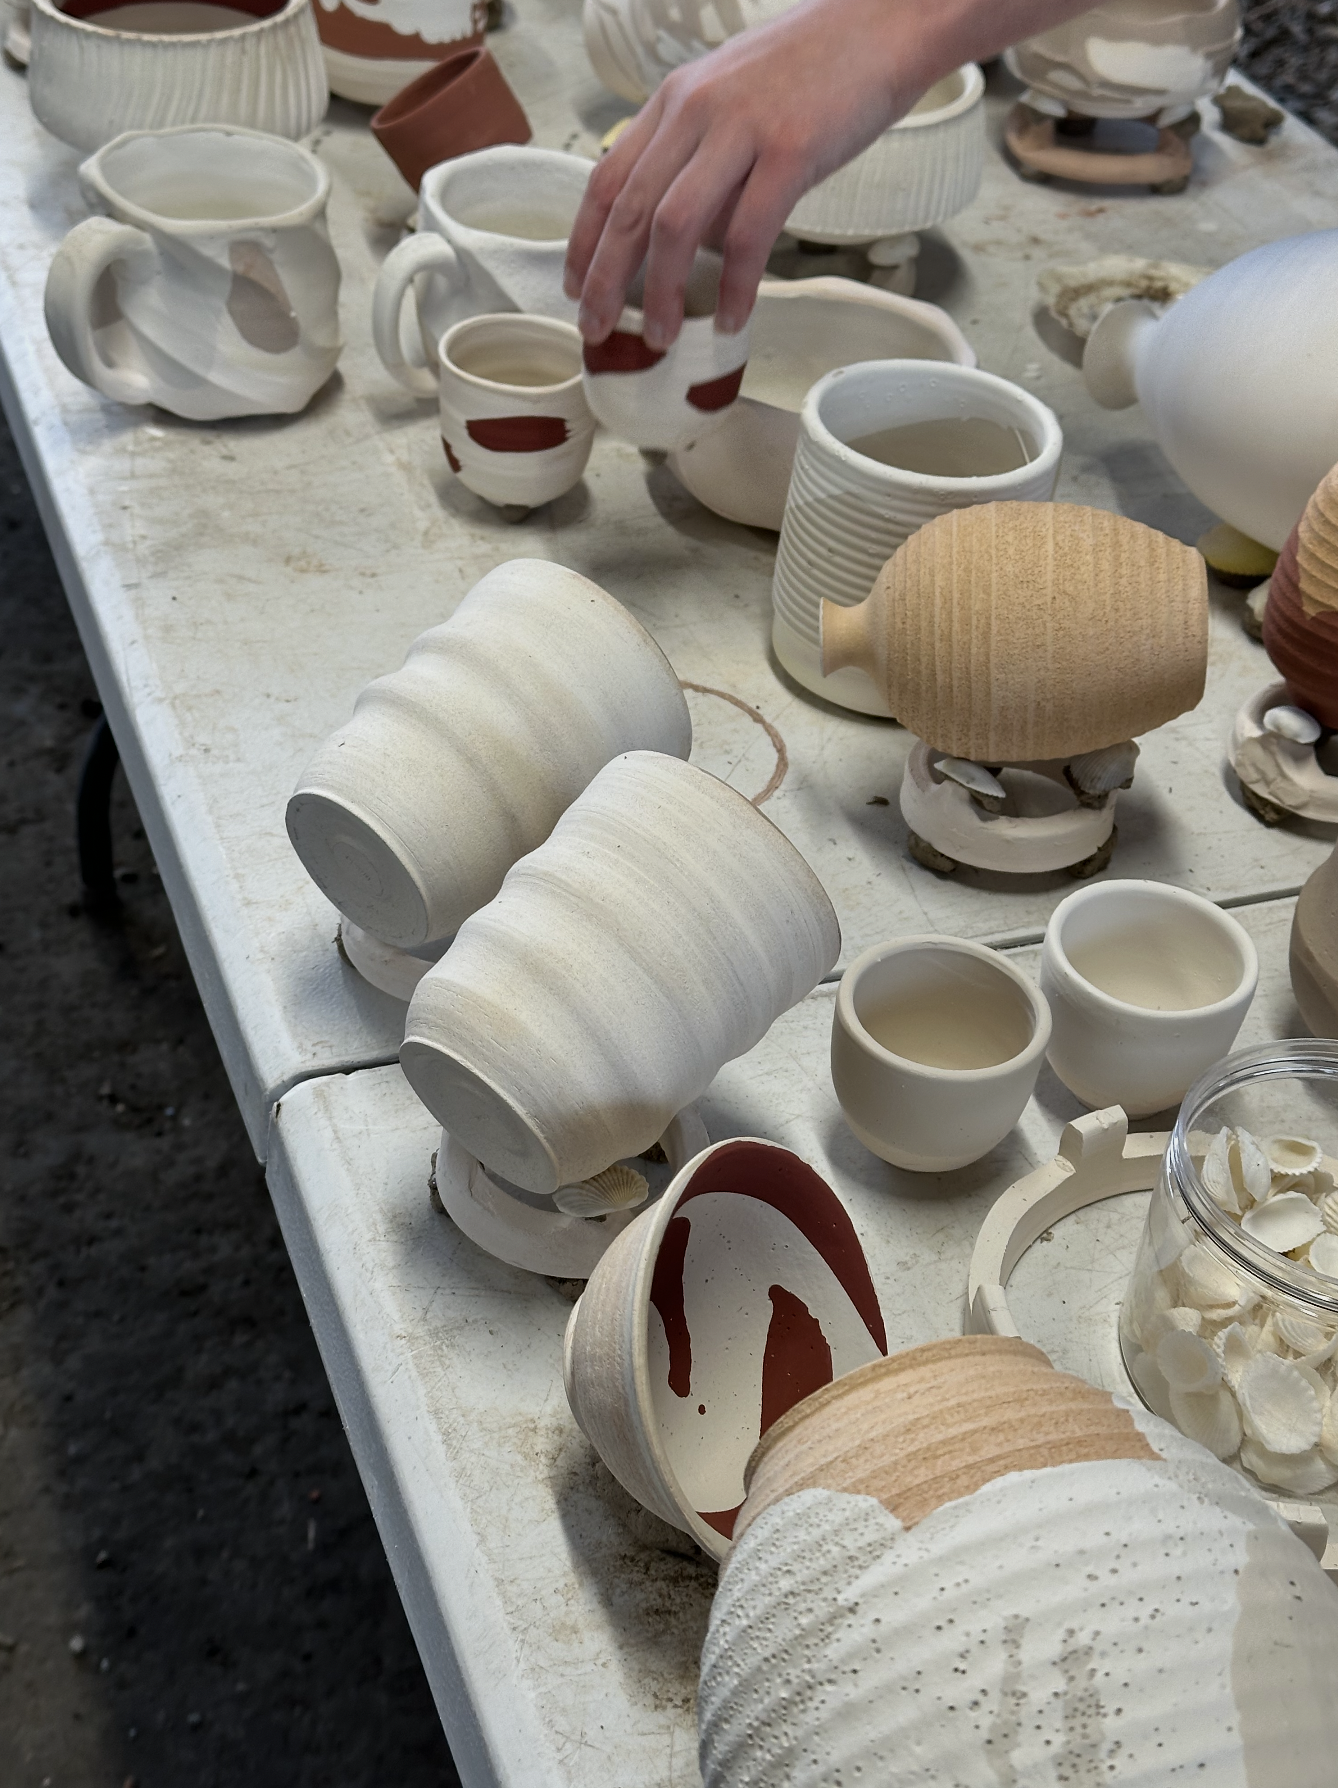
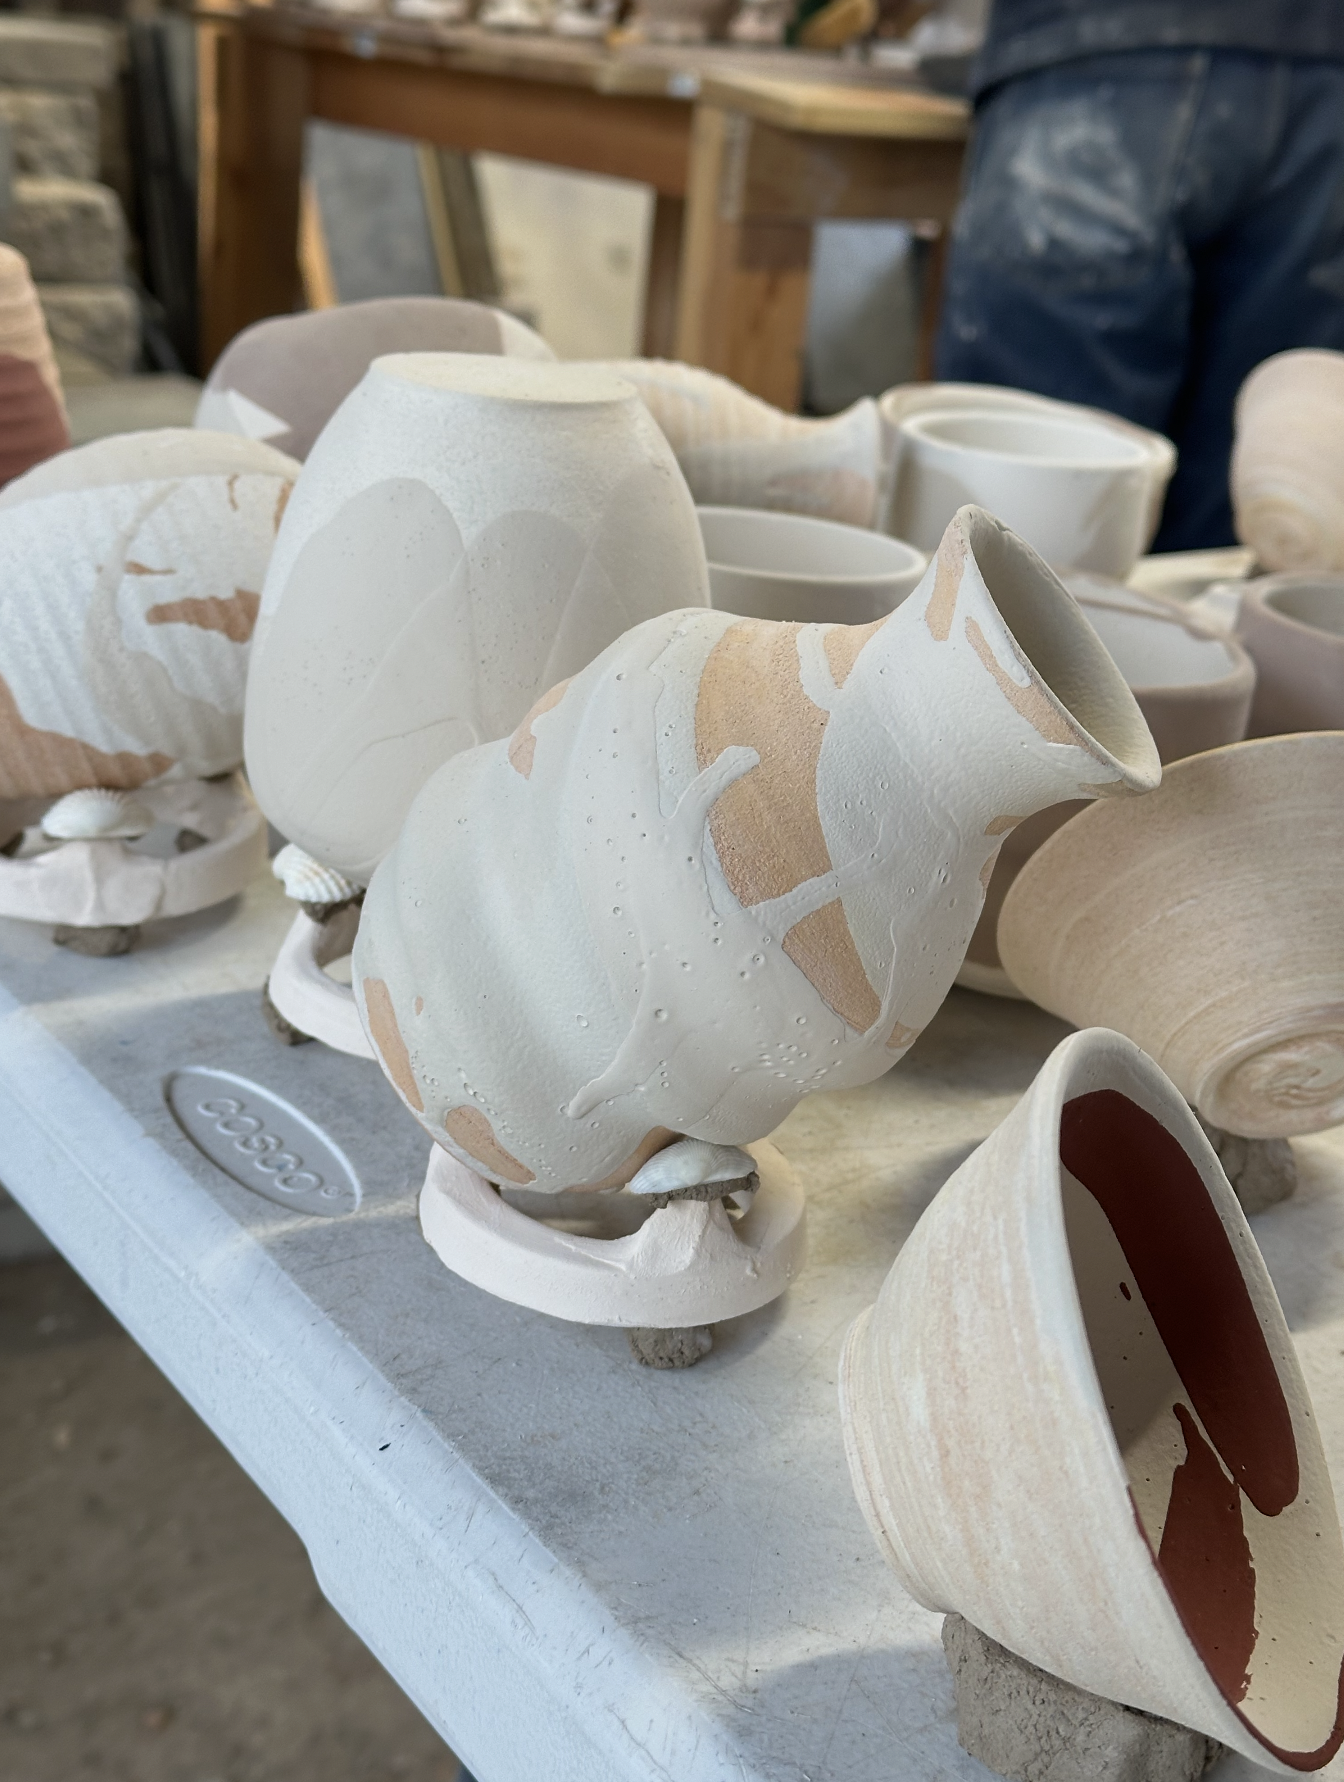
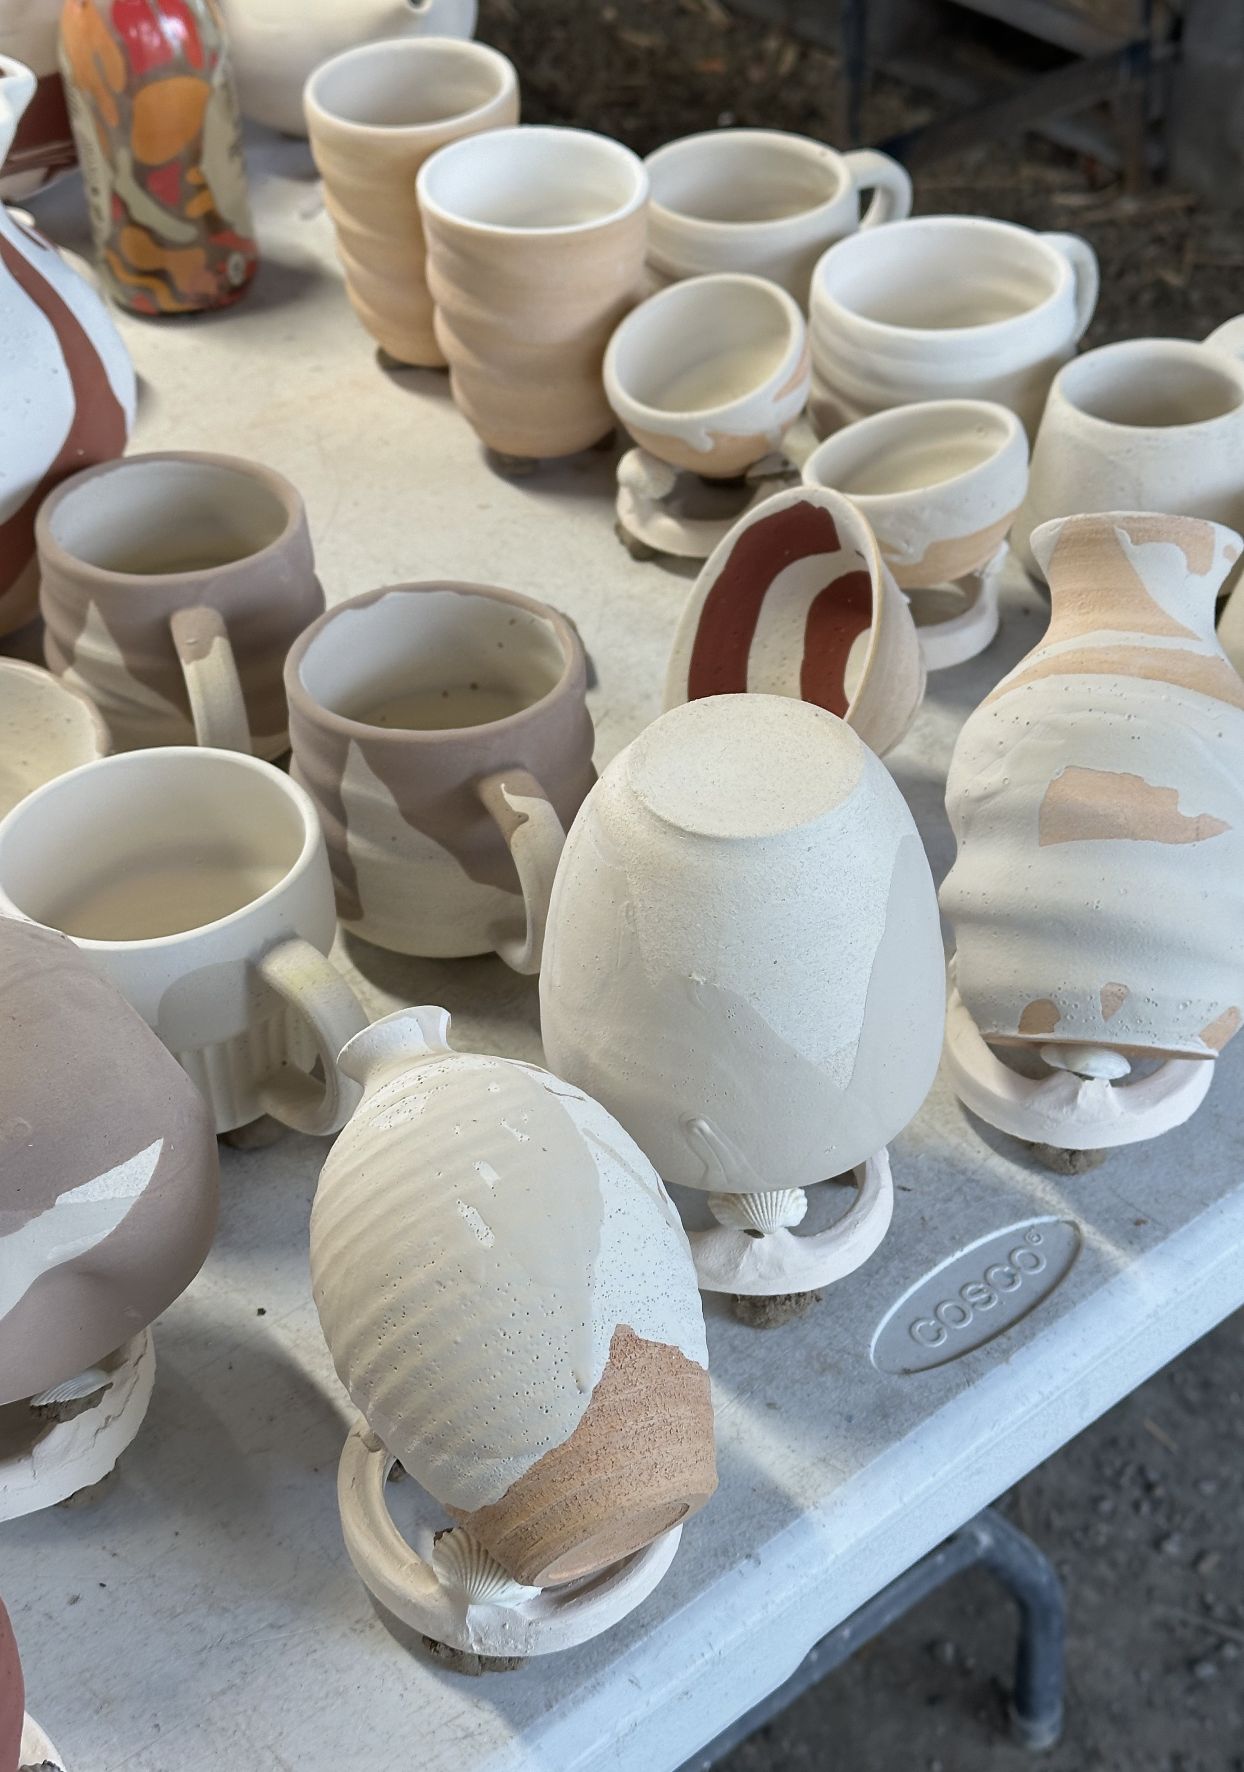
I really started focusing on these pieces in early March, knowing that everything would need to be fired and done by April 24. In total, I made 39 new pieces of varying sizes. I used up every last piece of clay from my two bags, including making a few marbled pieces that used both bodies together. I had to keep in mind not to make anything too big, everything would have to fit in a suitcase when I brought it over to the workshop.

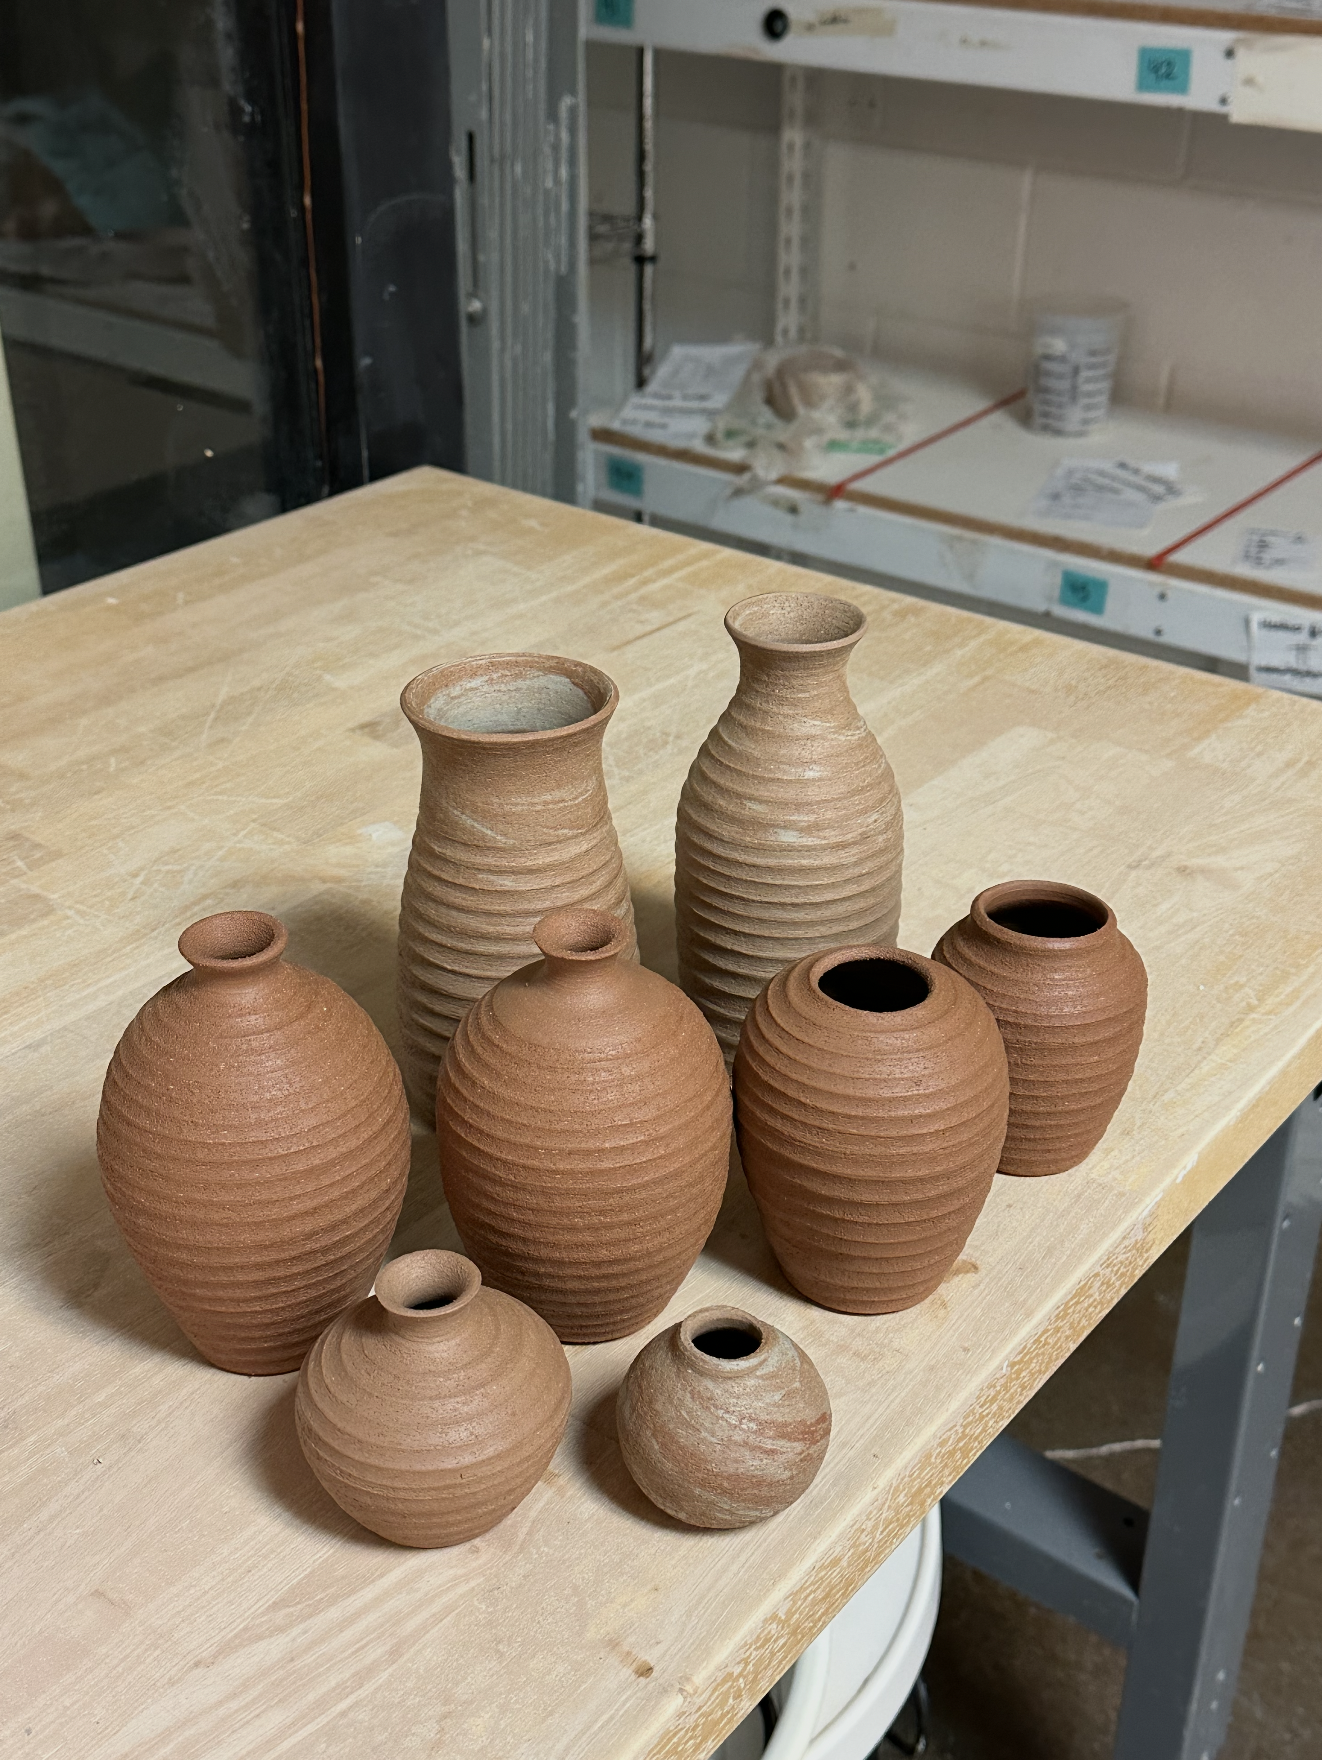
Cone 10 Granite by Laguna bisque fired and ready to be packed up
Workshop Day 1: Arriving to the Oki Doki Studio and Loading the Train Kiln
I arrived to workshop day 1 with my suitcases full of pottery. The group gathered at 9am, and did a quick round of introductions. We met Andrew, the program manager at Oki Doki Studio, the team of studio assistants, our teaching artist Sophie K. Yoon, and my four fellow workshop participants. We got the breakdown of the day, and learned about the basics of how a train kiln functions.
Intro to wood-firing, briefly and poorly summarized by me:
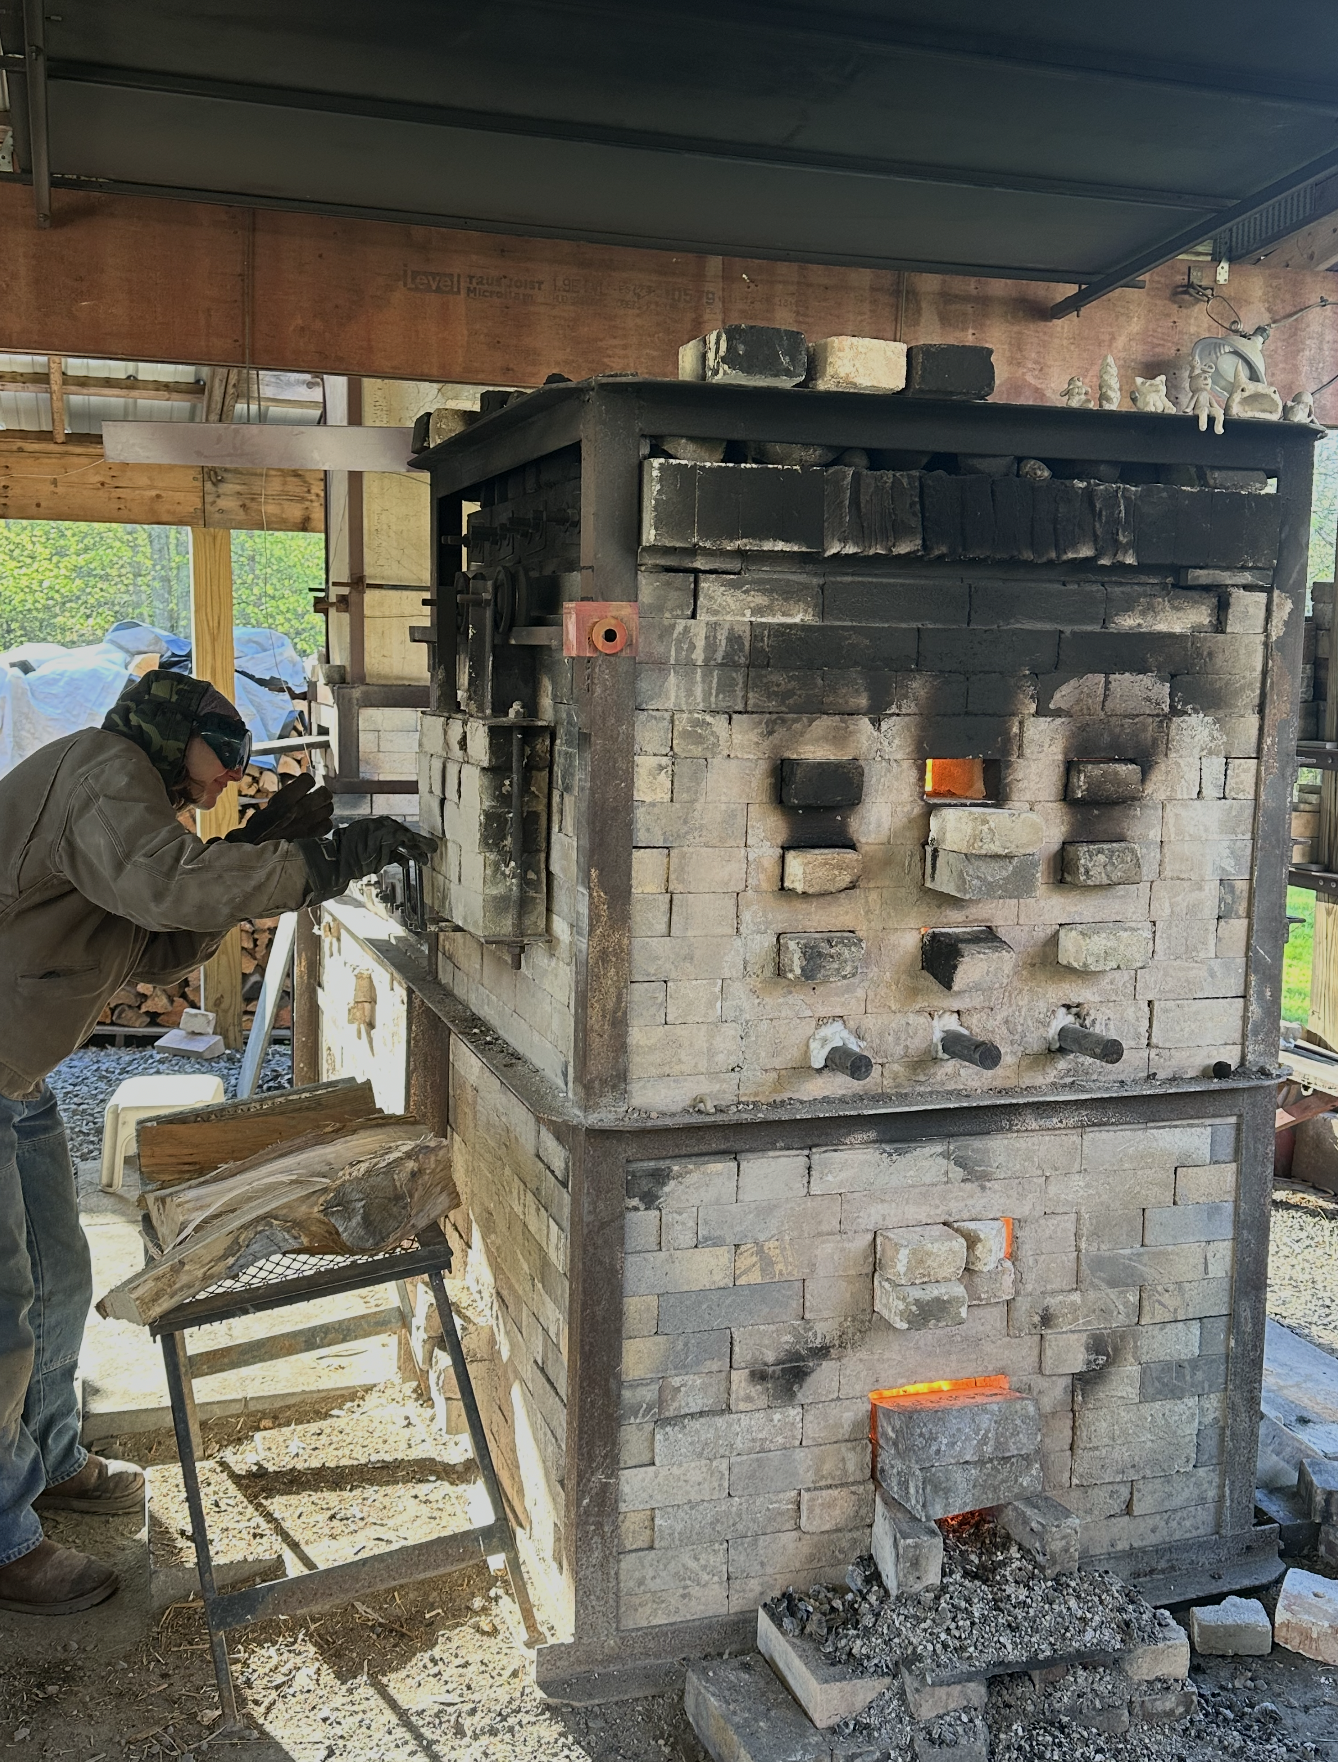
What is a train kiln?
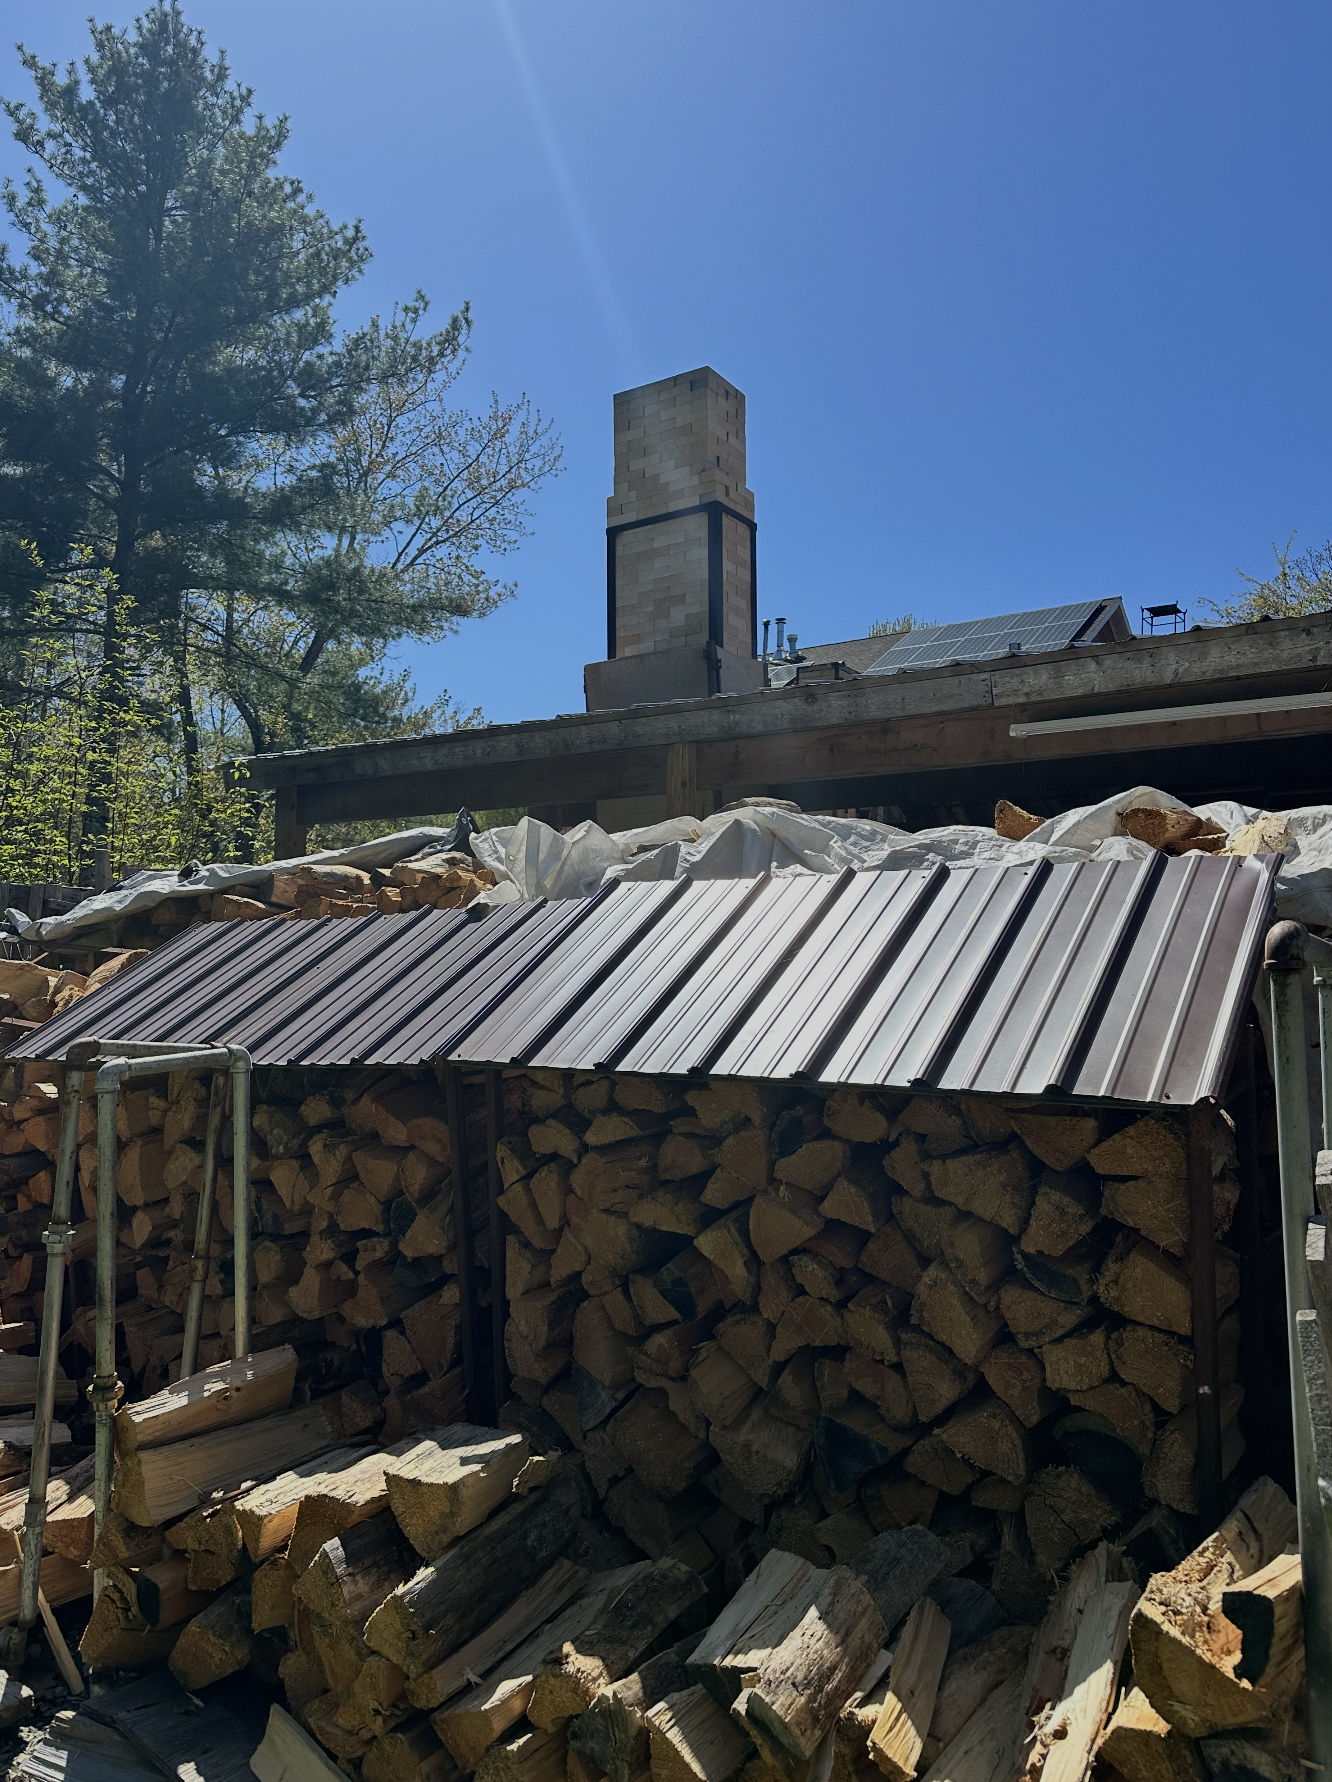
A type of wood-fired pottery kiln that is modeled after a Japanese anagama kiln, but with American efficiency. Designed by ceramicist and educator John Neely, the design achieves similiar results to an anagama but with less time and less wood.
What is different than an electric kiln?
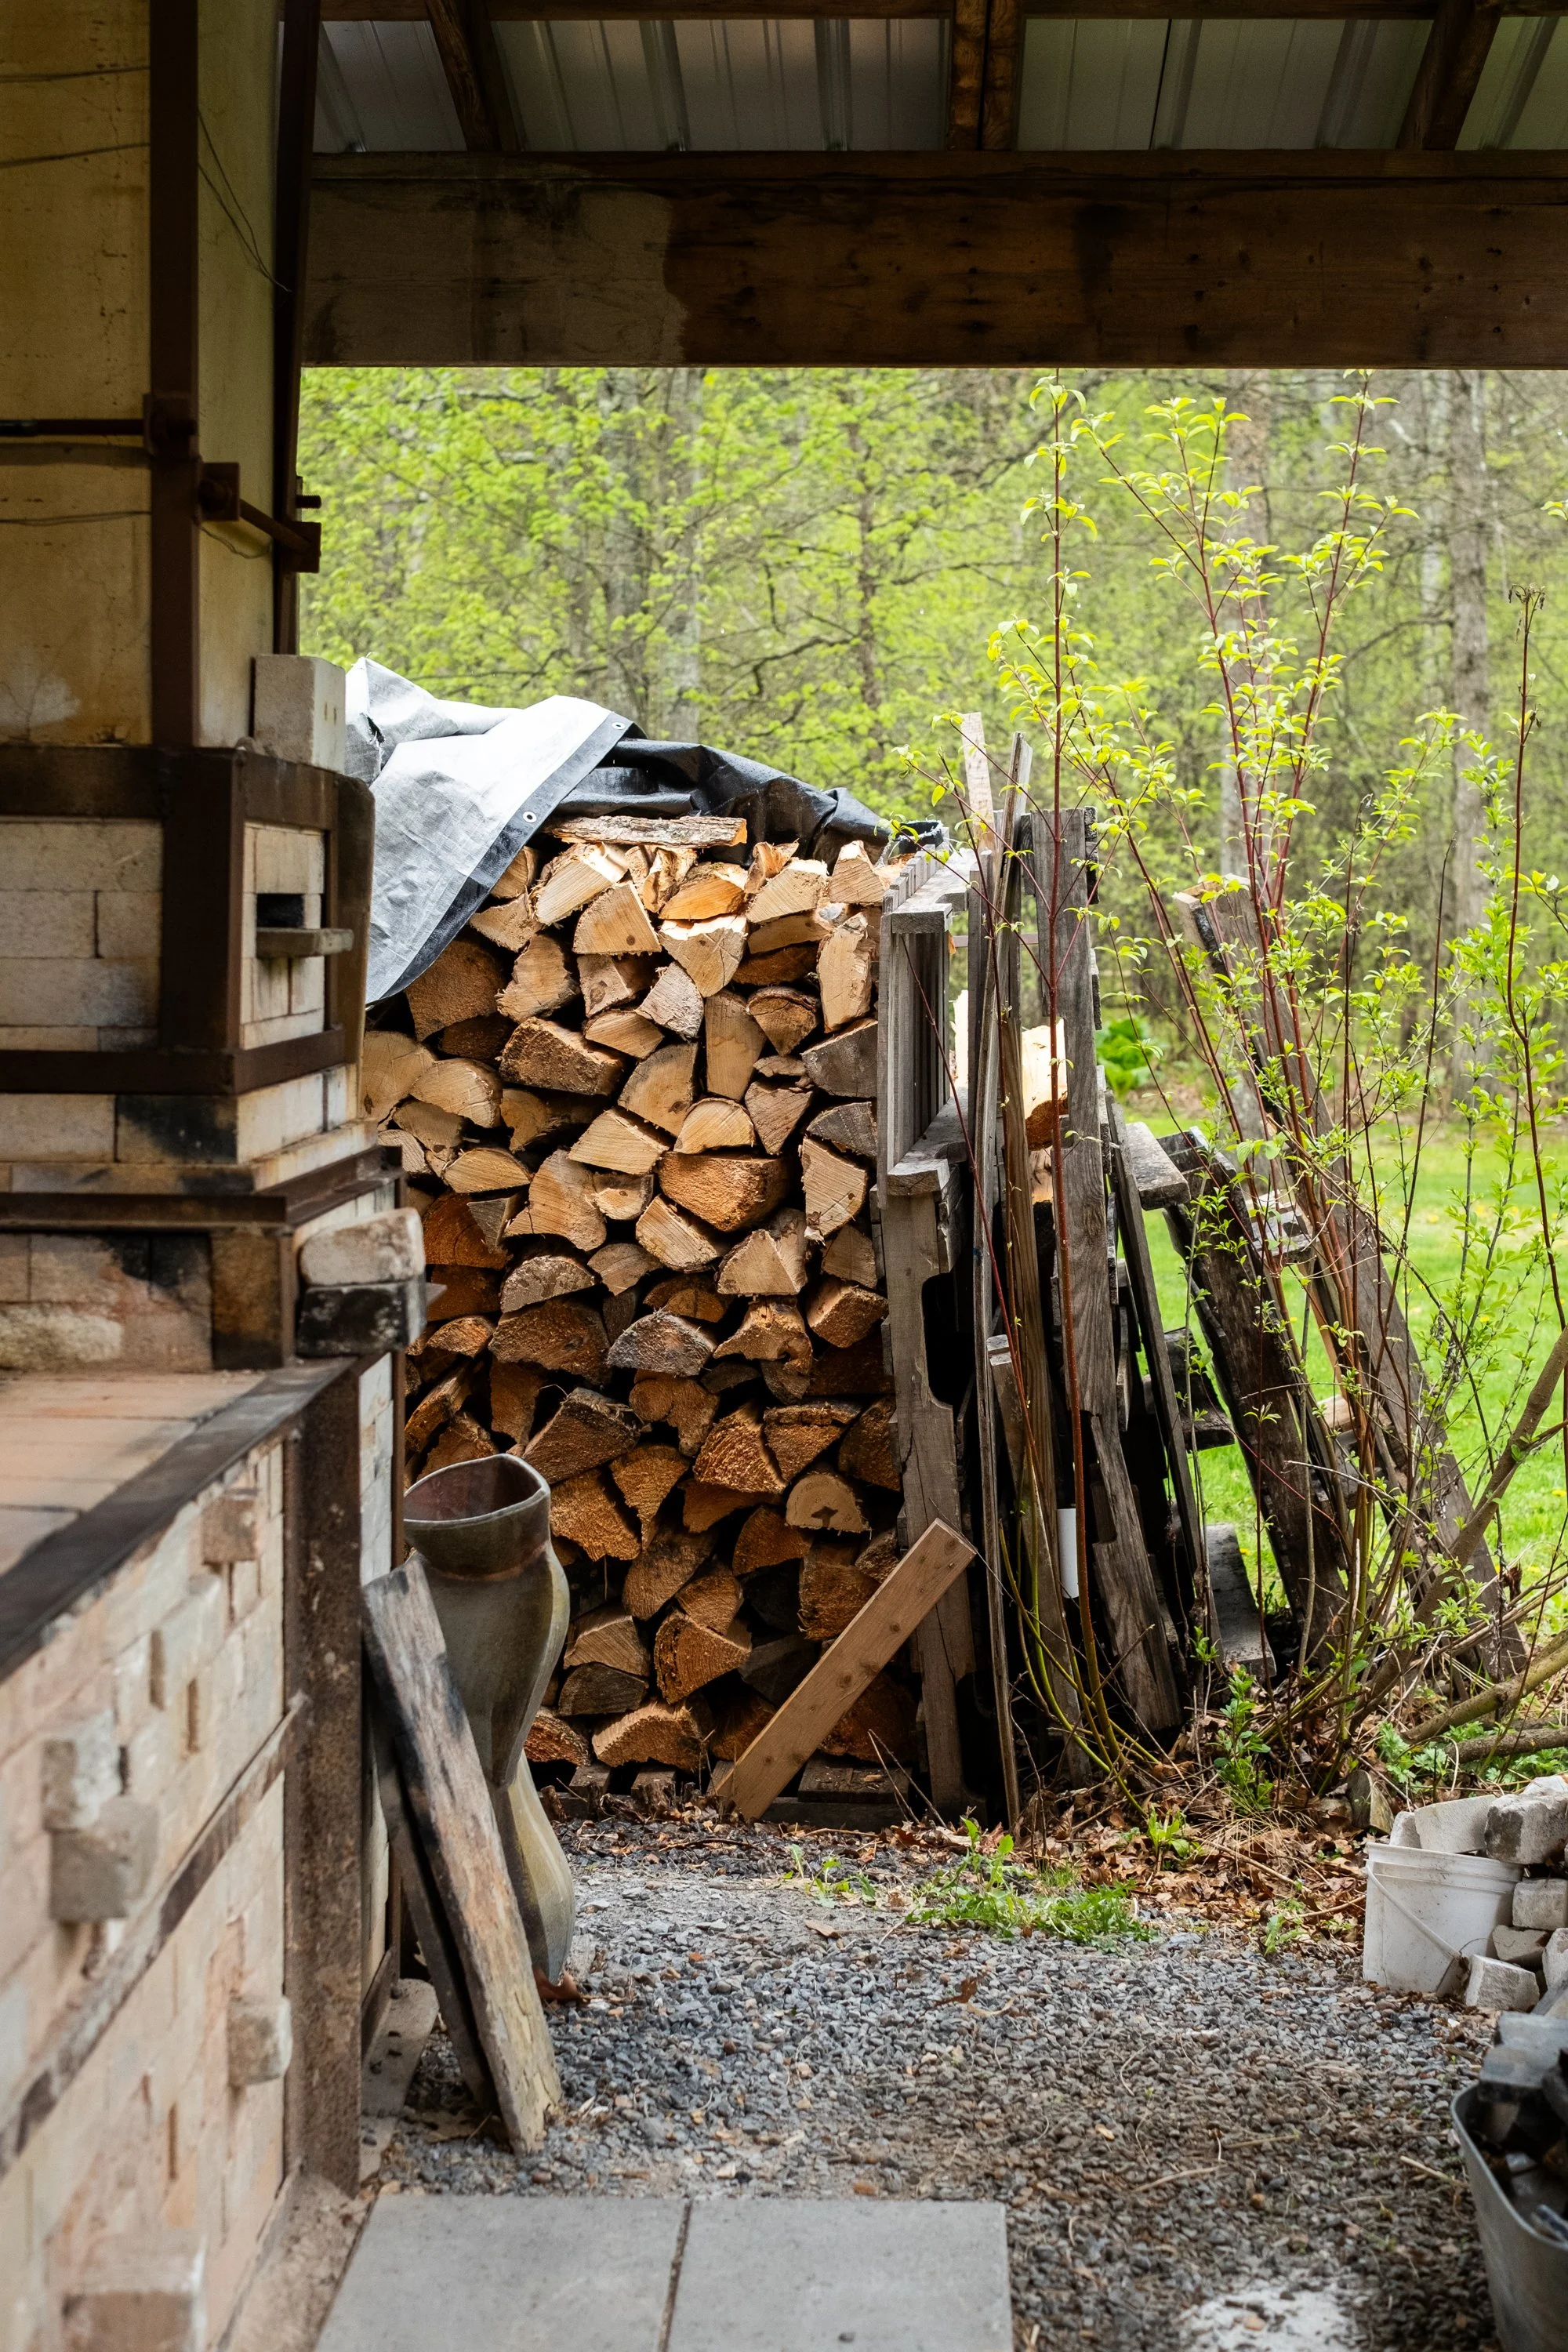
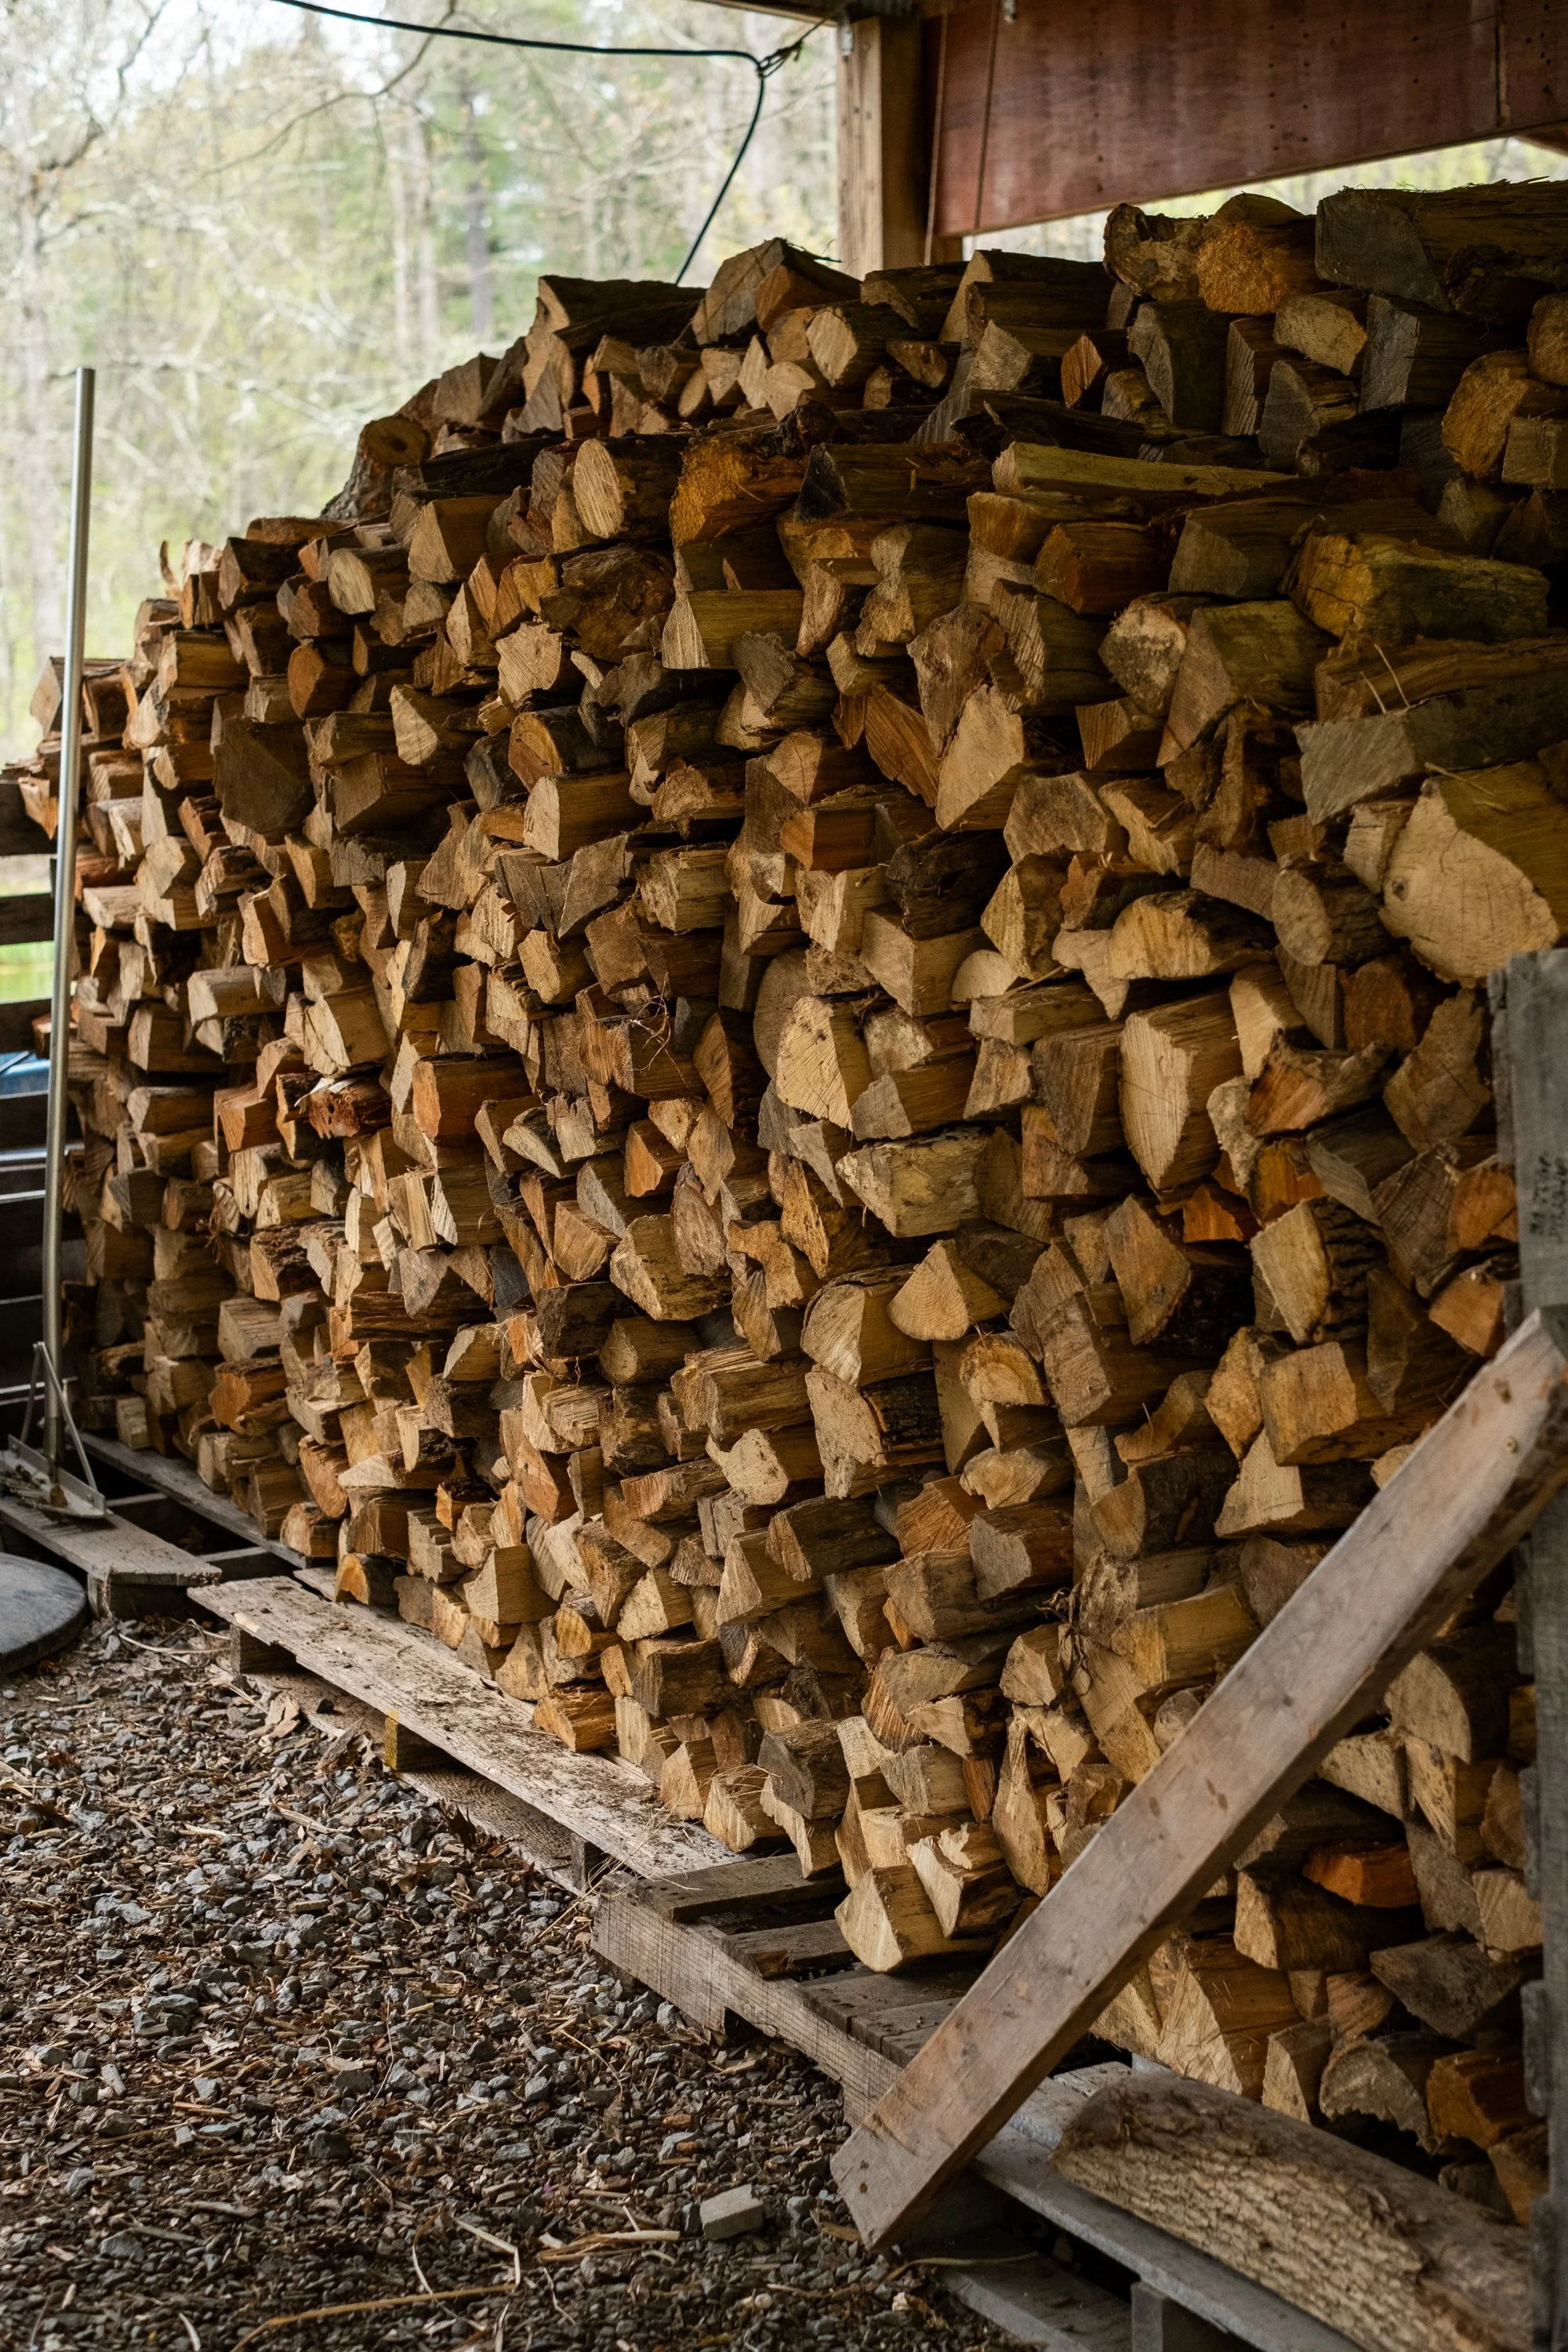
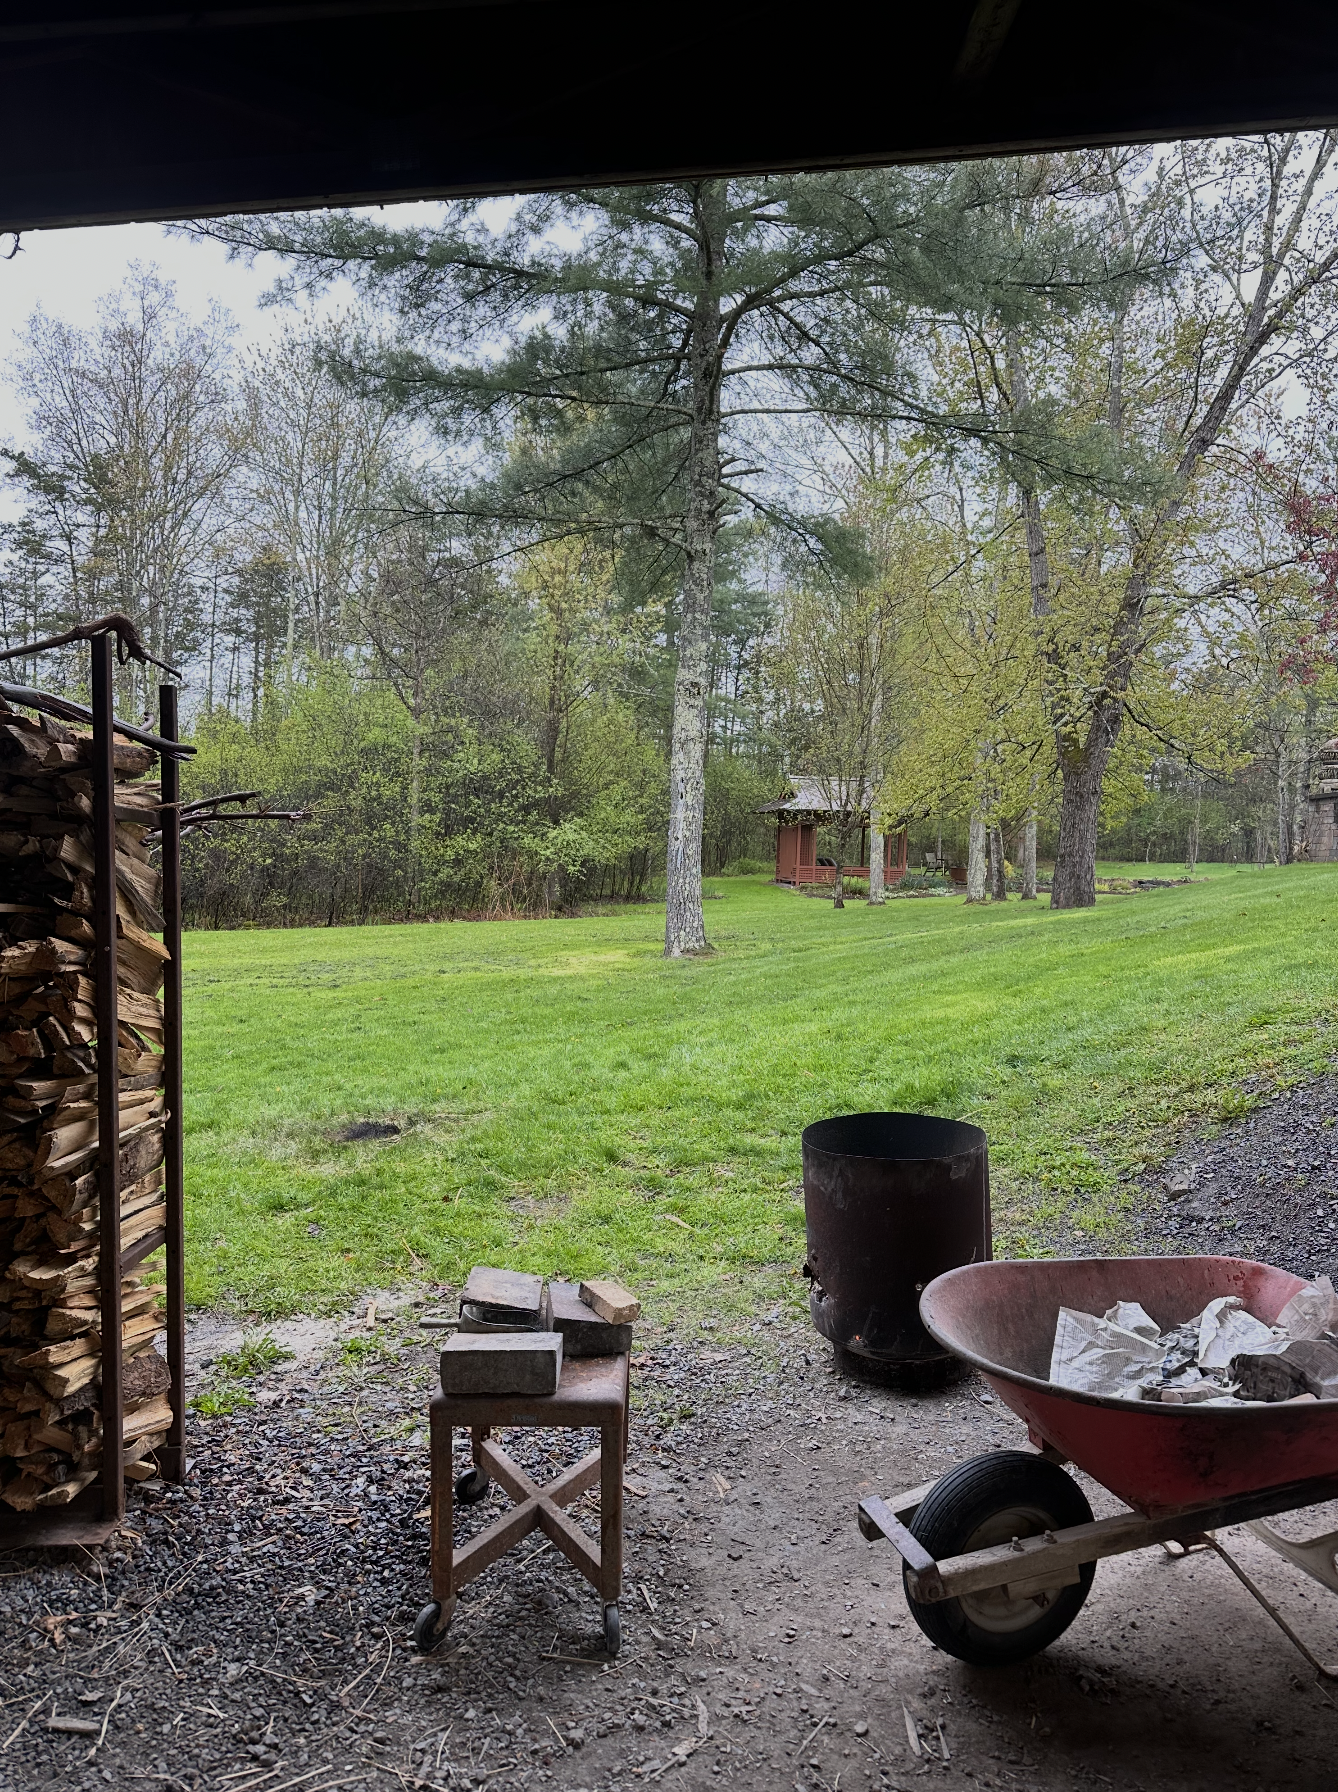
1. The convenience — electric kilns can live anywhere you have access to the right outlet, but a train kiln, anagama or other wood firing kiln is likely not something you can keep in your backyard or order from a ceramic retailer.
2. The group effort — firing the train kiln felt like a true “event.” That required people to come together to both produce enough work to fill the kiln, but also to get everything loaded in a timely manner. It felt like a real team affair.
3. The time — an electric kiln is really a “set it and forget it” experience. You program your electric kiln, and you can walk away. The train kiln required constant attention, routine stoking, and an expert’s care to oversee the whole situation.
4. The environment — inside the kiln it’s a hot and ashy affair with fire whipping its way from the front box through all the pottery and out through the back chimney. The electric kiln produces predictable and replicatable results, the train kiln produces completely unique and one-of-a-kind pottery with surfaces that come to life through a reduction atsmophere, the effects of flying ash, and the path of the fire.
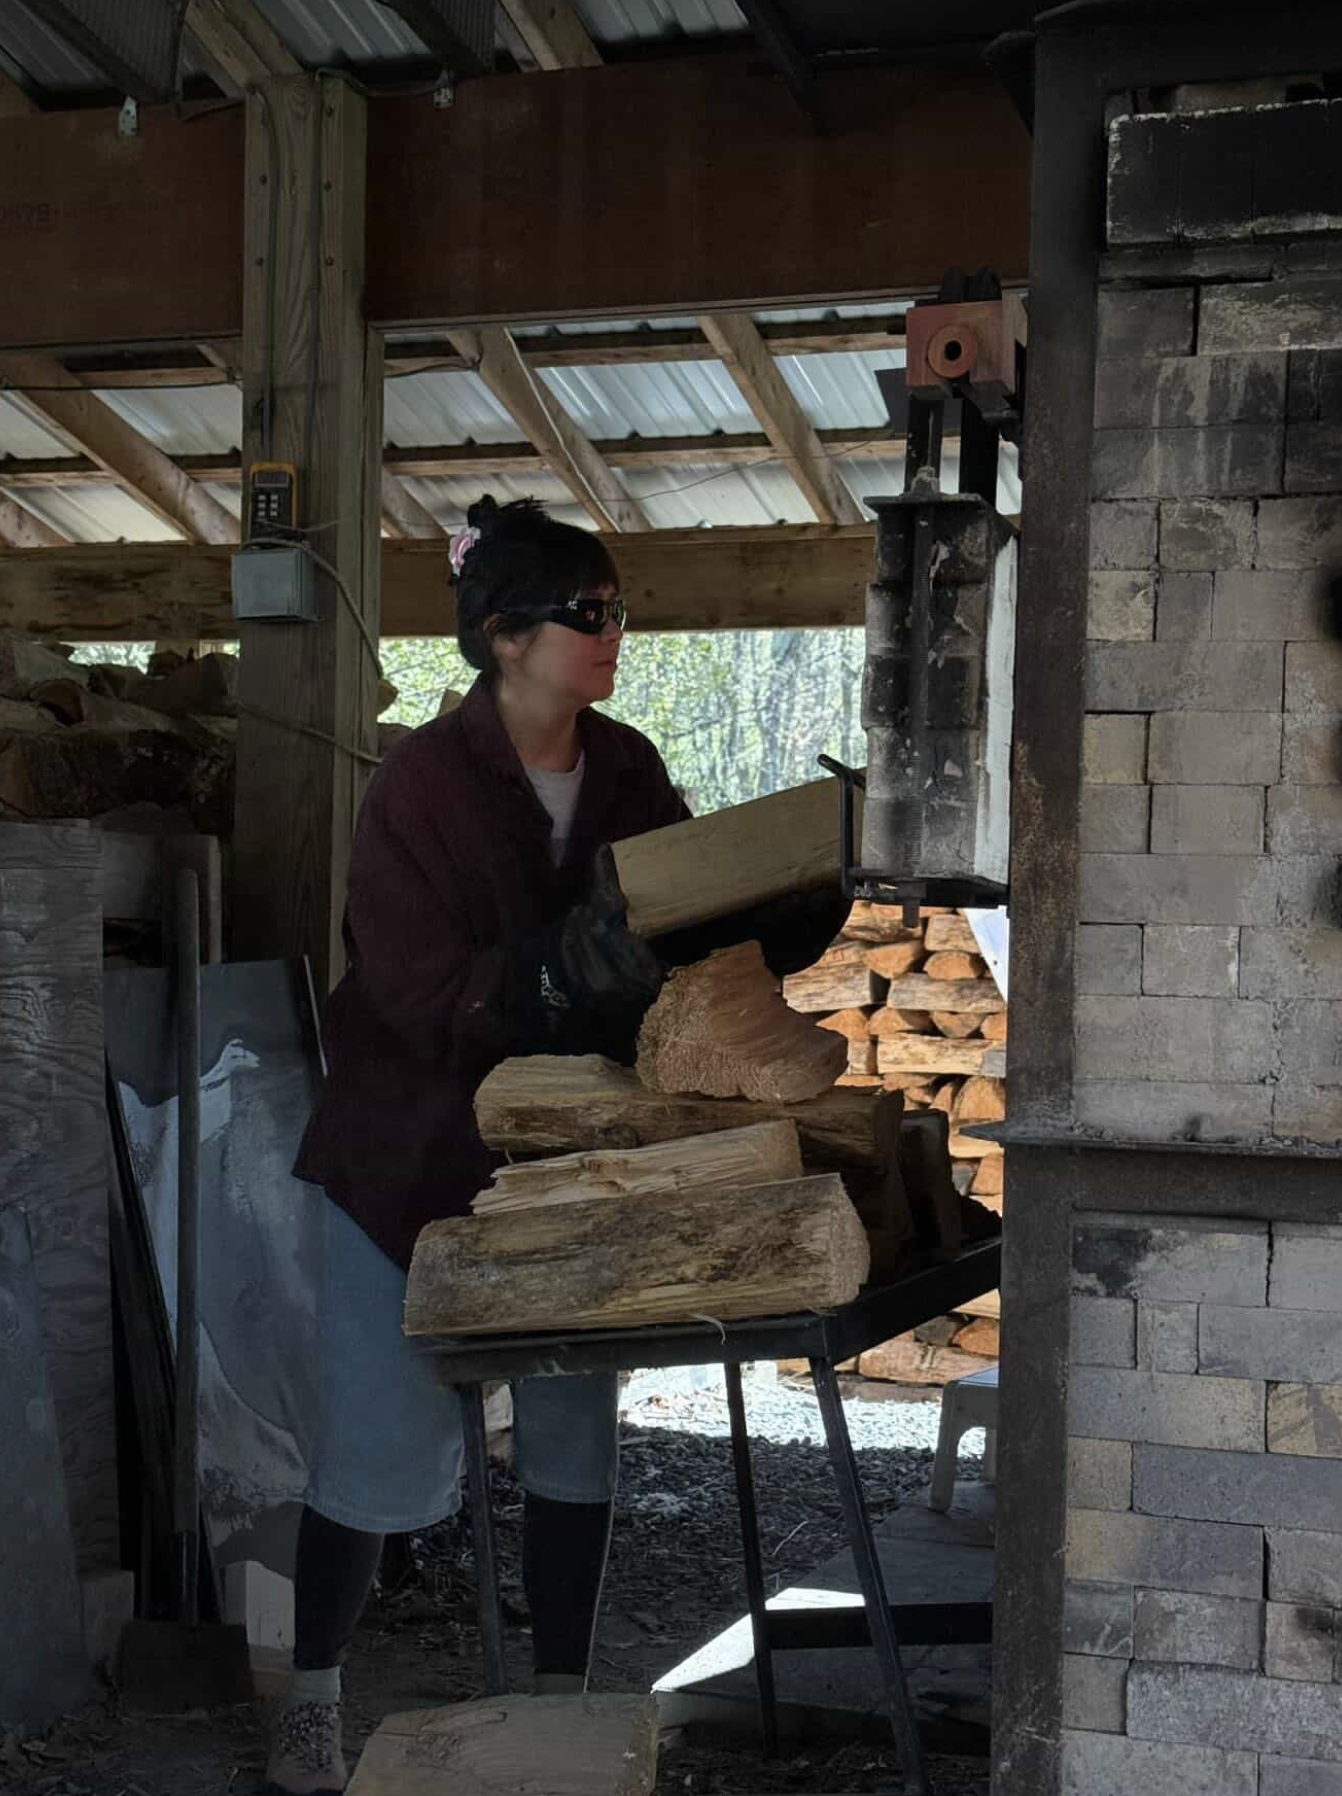
A shot of the long work table where three of us worked
A super chilly and wet April day
Glazing
We were given a crash course in the available glazes, most were shinos provided by Sophie and Oki Doki Studio, plus a few celadons and a tenmoku. It was stressed to us not to have any expectations about what a final color or glaze might look like, and to basically ignore any test tile.
One of piece of advice ringing in my ears still is shinos go first. Which means don’t layer a shino over another glaze, use it as the liner or the base.
At this point in the morning, it started to rain. All of the glaze buckets were out in the uncovered part of the work area, and dipping hands into water continually to wipe bottoms and clean up was proving to be a struggle.
We had about 1-2 hours to glaze all of our pieces, which is a super condensed amount of time. I made the choice to try each glaze at least one time, and to layer splashes of shinos and celadons where I could. Sophie recommended to line the interiors of everything at the very least. Glaze is not a requirement to have beautiful wood-fired surfaces, but from a tactile perspective it feels nicer on the interior of mugs, bowls, cups etc.
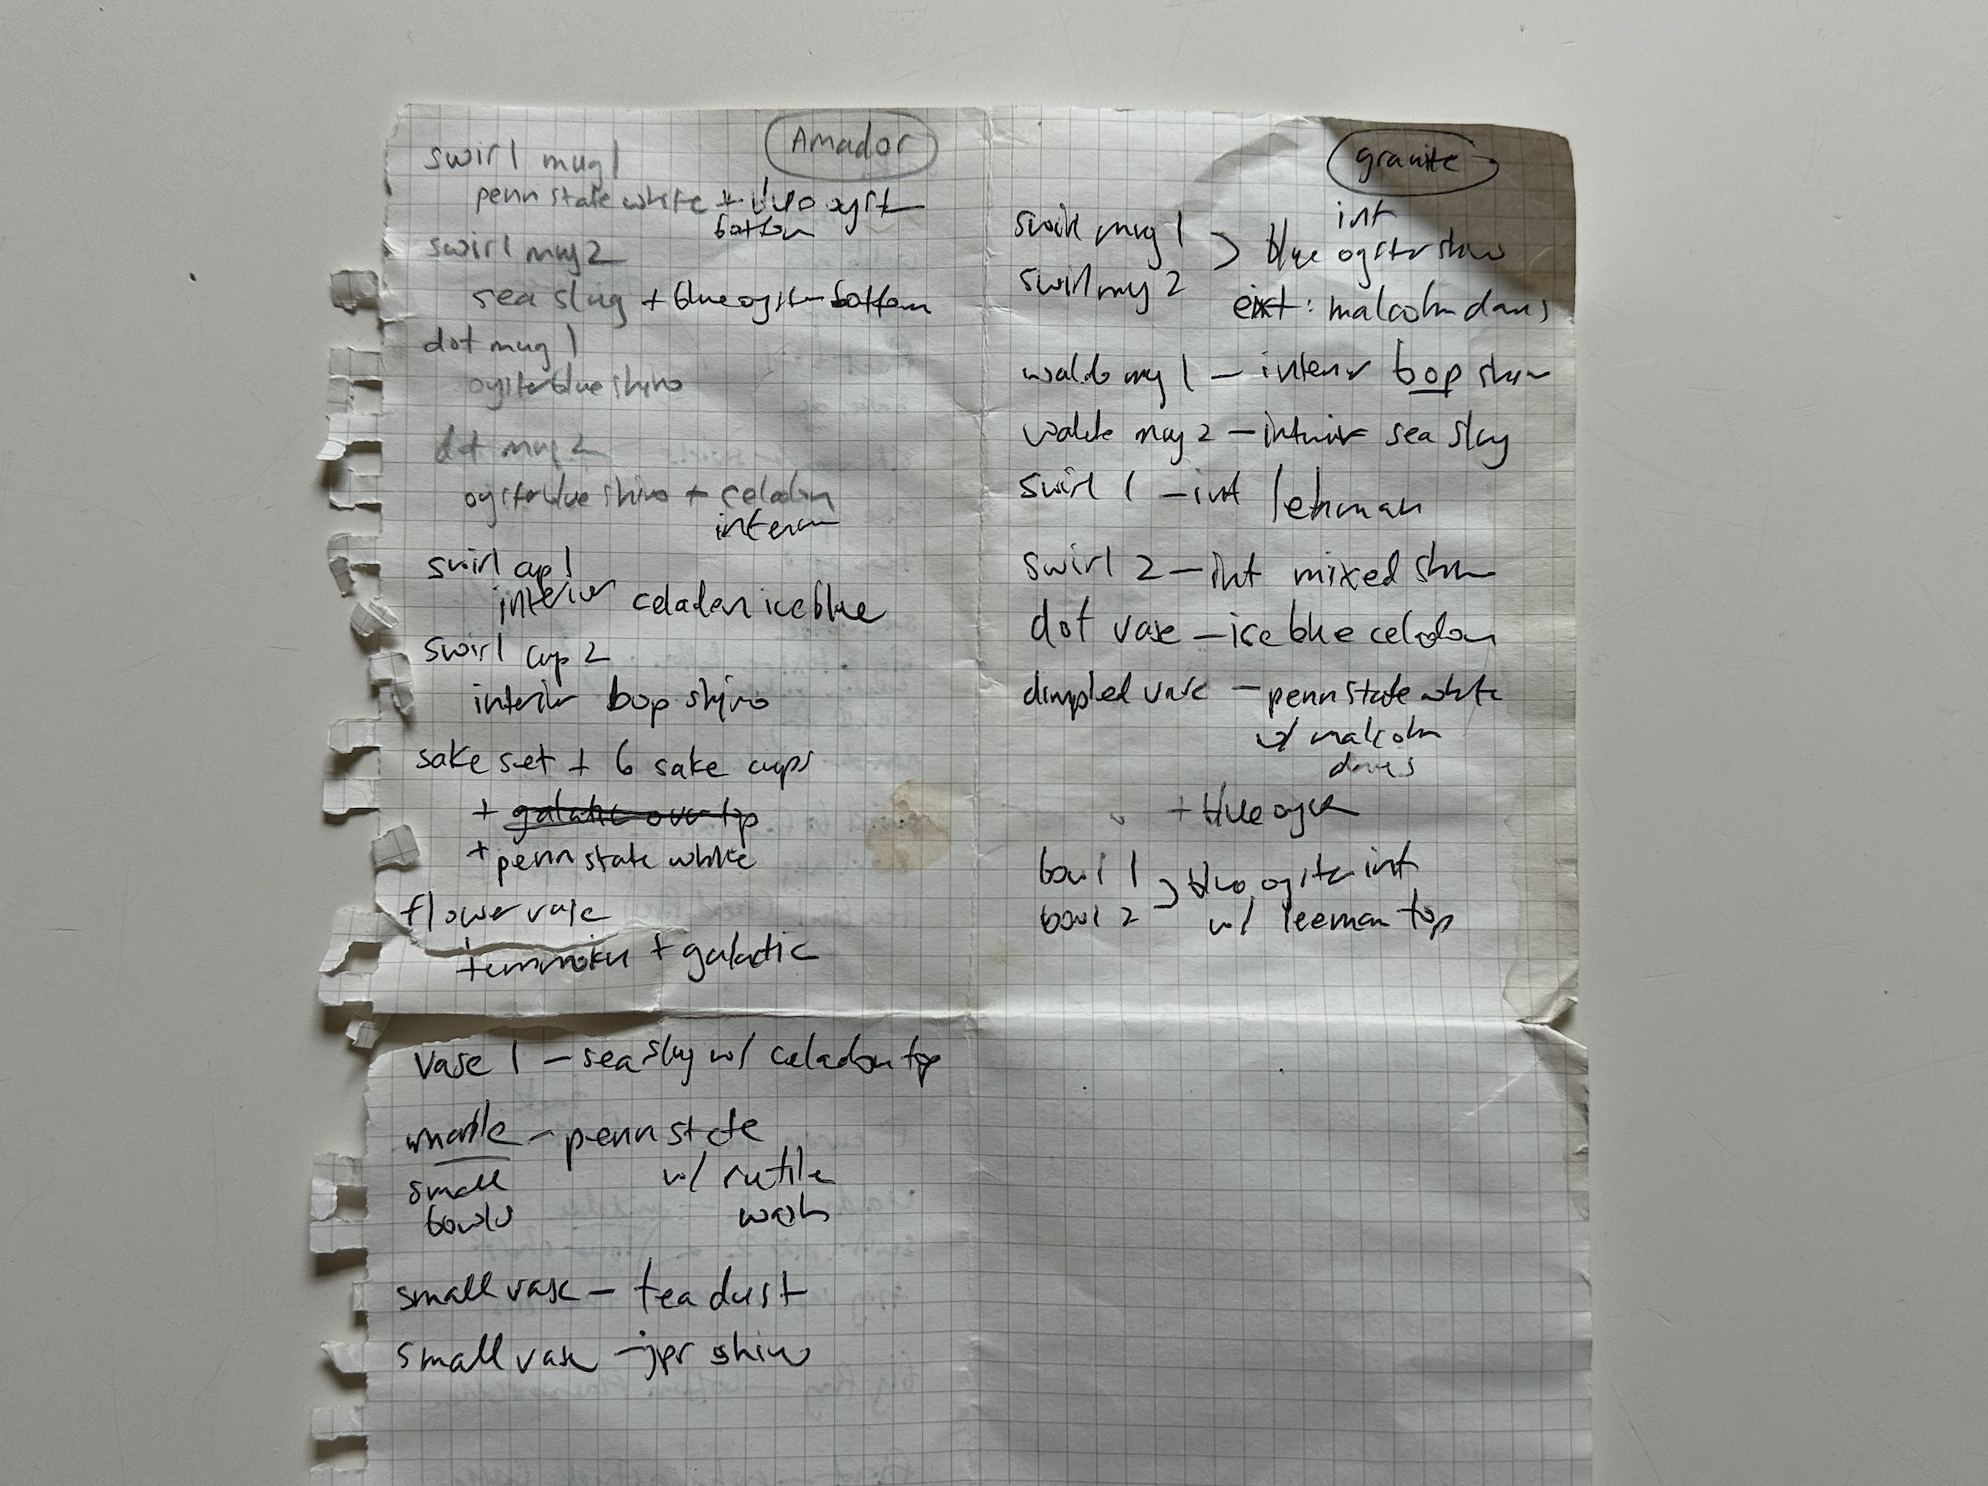
My very rushed glazing notes on a very flimsy piece of paper, damped by the weather.
Wadding
It was the first time I had ever used wadding before. Essentially, it’s a mixture of materials that can be shaped and formed like clay, but won’t melt or fire in the same way as your work. We were instructed to stick little balls on the bottoms of all of our pieces, to prop up the works so they weren’t directly on the kiln shelves. The space between the piece and the shelf can protect the piece in case the ash or glaze flows and runs.
Like with anything in pottery, there is no right way. But there are a few methods that are used to keep the pots stable and protected in the kiln.
For pieces that we were firing upright, we placed small balls of wadding in odd numbers, in most cases 3 or 5, strategically on bottom of pieces. A small dot of white glue went between the piece and the wadding, and then they were gently pressed onto a flat surface to ensure a level pot.
For pieces with a more, artistic firing angle, we used trivets (mini tripods made of bisqued clay) topped with wadding and sea shells. Pieces could be placed horizontally, at angles, or upside-down on these trivets. Why? For more interesting and exciting results. Imagine that in the kiln, gravity, plus the flow and direction of ash landing on the sides or bottoms of wares will produce unique runny patterns that have more visual interest.

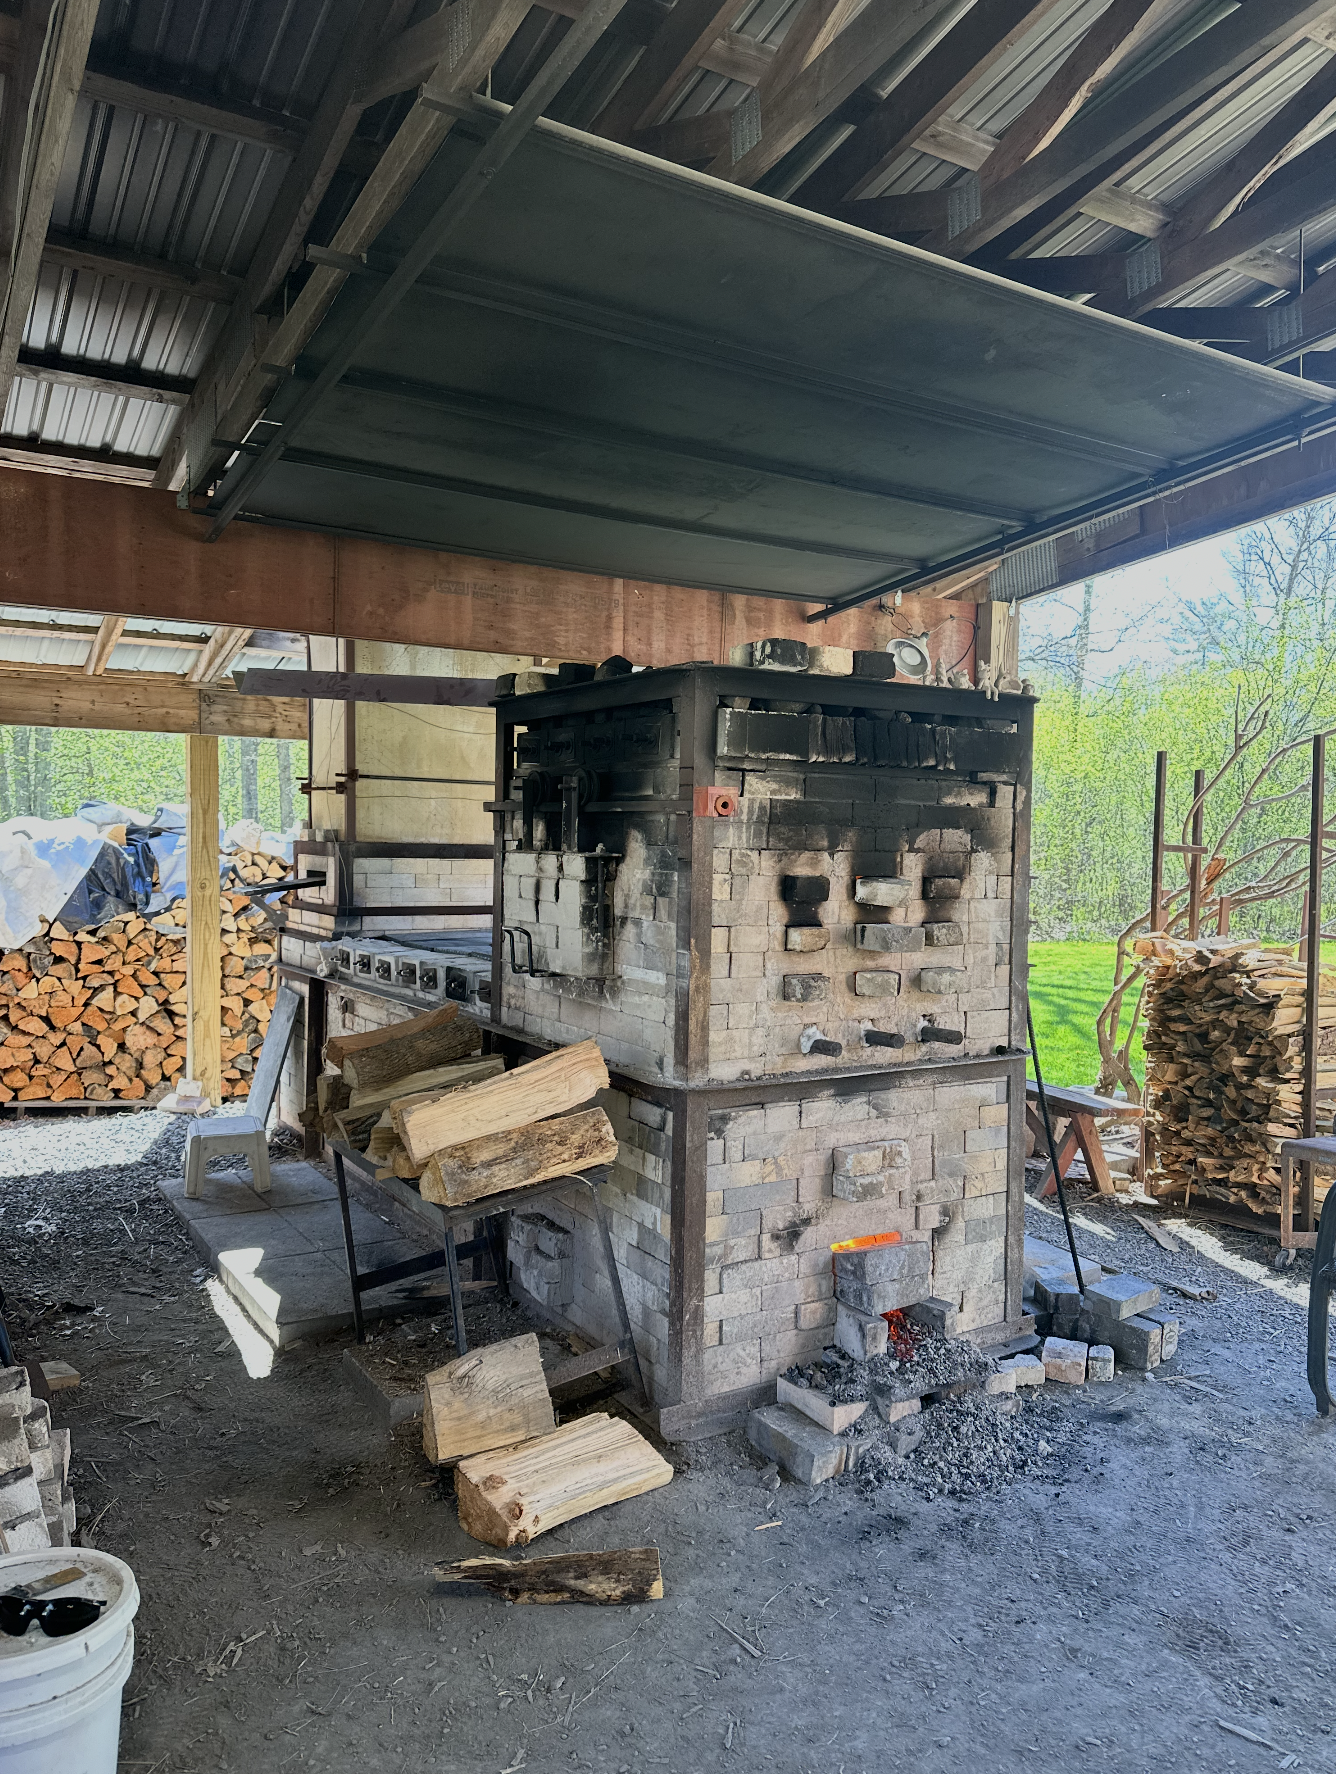
Loading the Kiln
Yes, it is still day one of the workshop. By this point, my brain was stuffed to capacity and I was making on the fly decisions because there wasn’t time to stop and be super thoughtful. All this new information was layered on other new information, so at this point I knew I had to let go and just let this be the learning experience it was meant to be.
The placement in the kiln effects the final look of the work. Closest to the fire (aka the “front”) will produce ashier and more “crusty” (in some cases) results. Andrew said to imagine standing stationary in front of a snowblower, that’s what’s happening to the pots in the front near the fire. In the middle of the kiln, we should see fluxy and juicy results, and toward the back where the kiln is technically coolest we should see “dry” or more matte results. These are all terms I jotted down in my notes that I still don’t know the full range of visual meaning of, but sharing with you anyways.
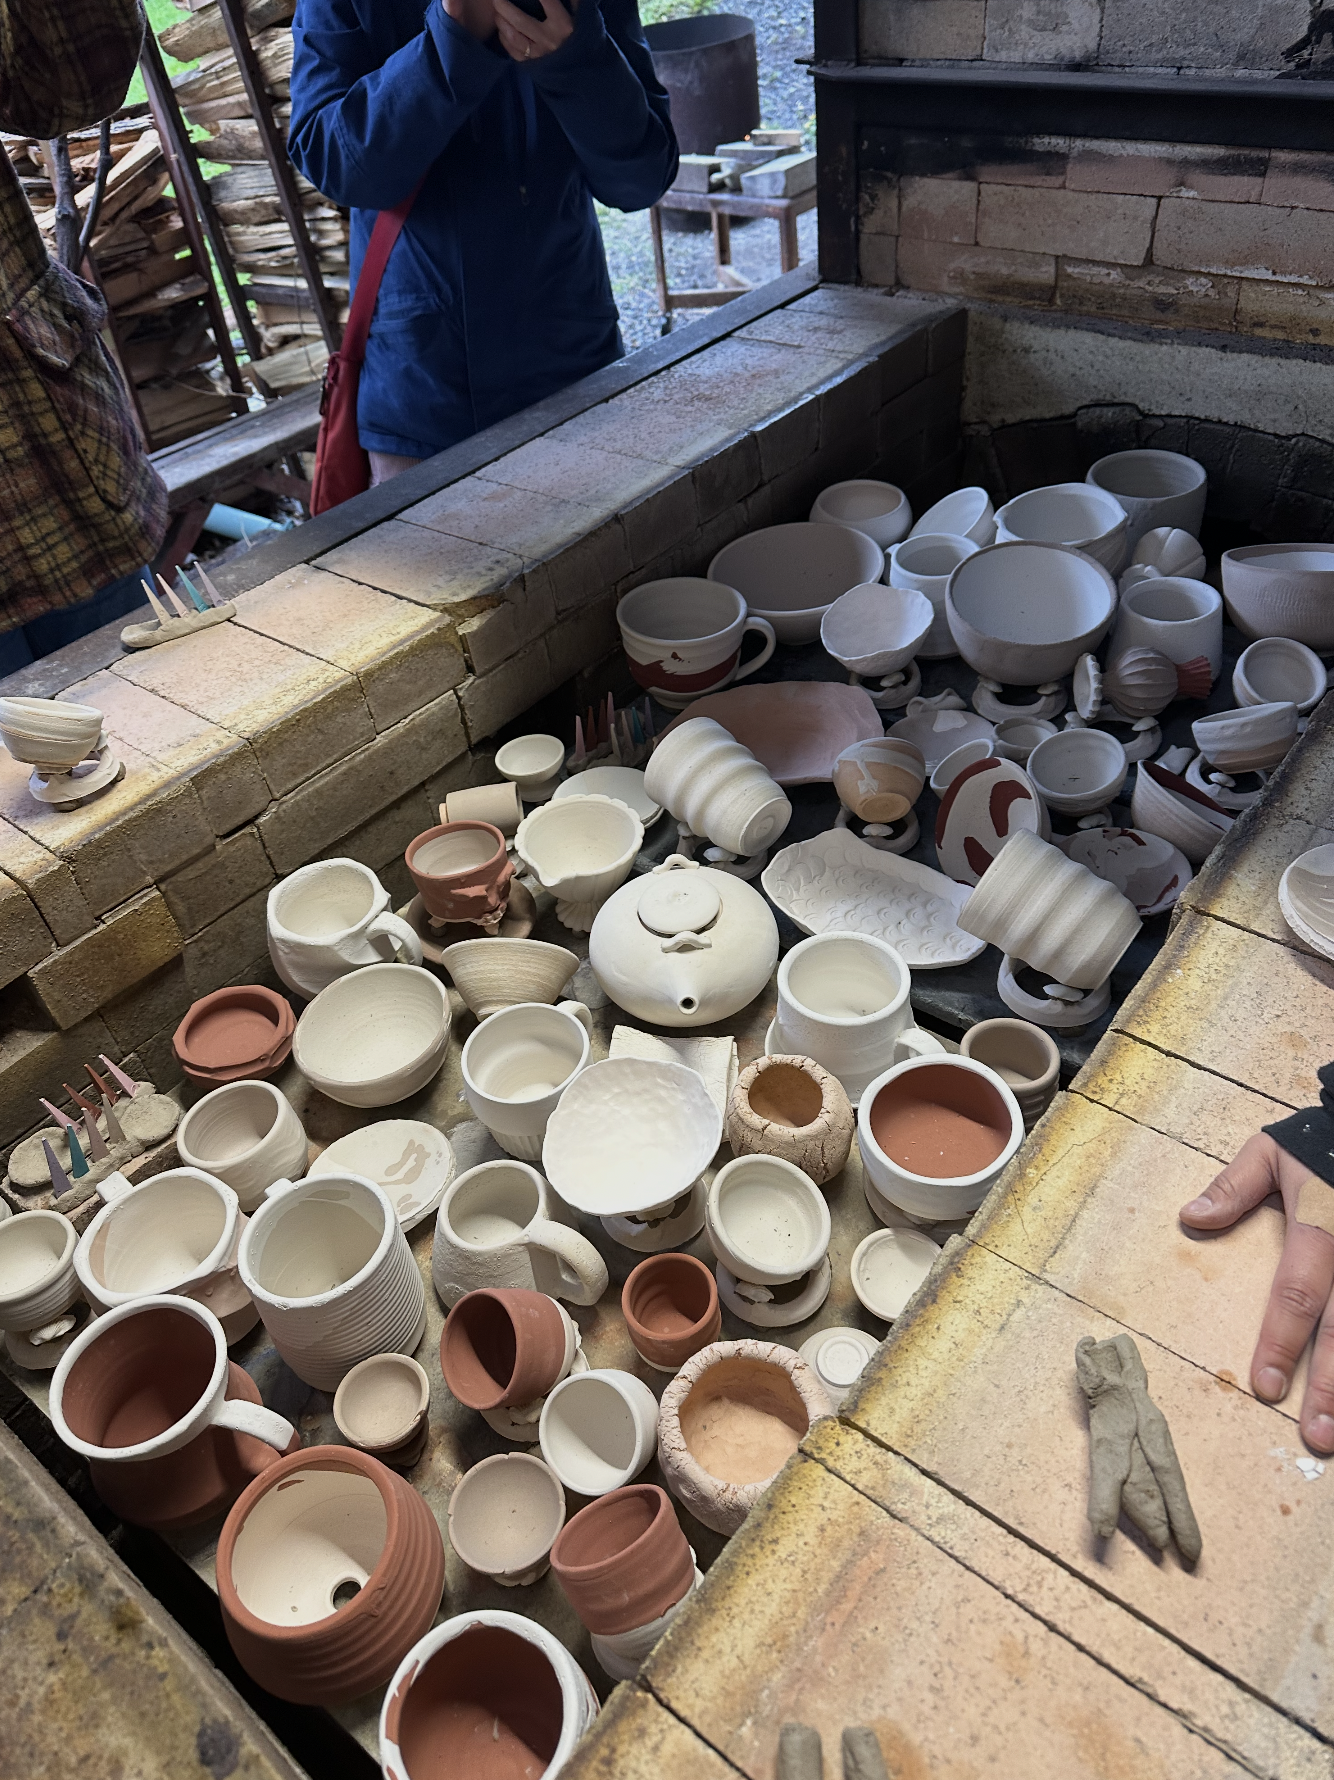
Loading the kiln was a super interesting process to observe. Sophie directed the creation of the different layers, and asked us to bring over pots to fill the shelves in the different parts of the kiln. She told us that “the best part of the kiln to have a pot in…is anywhere inside the kiln,” meaning that in a community firing like this, we shouldn’t be too precious about placement and instead have a group focused mentality. I liked that.
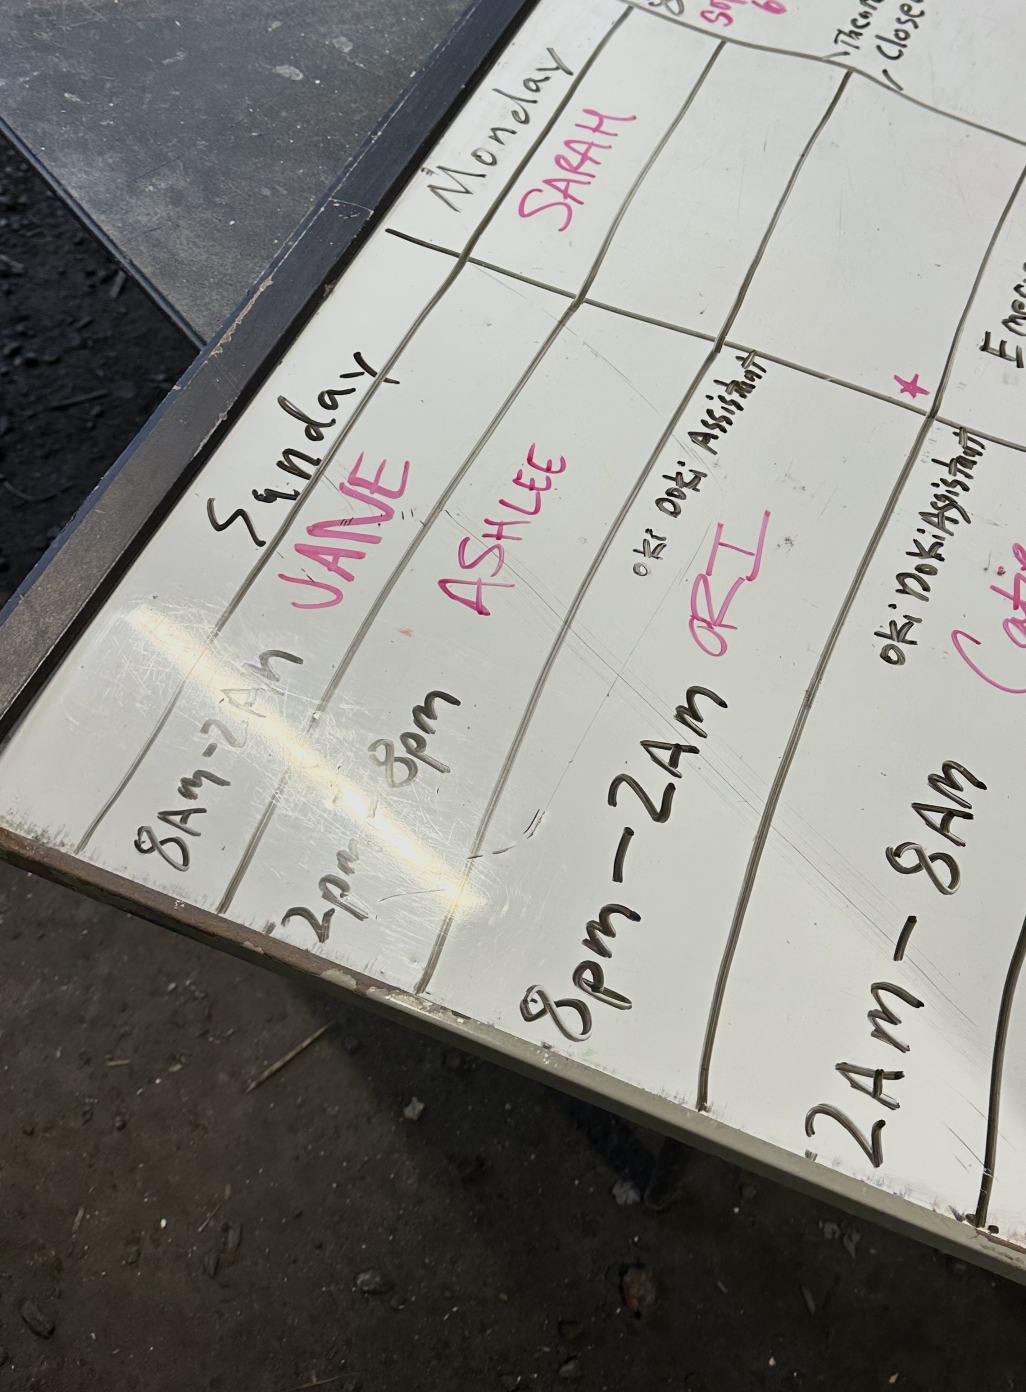
The different stoking shifts assigned
The participants helped with loading and placement, being mindful that no pots were touching. Andrew also told us to keep in mind to have variety with shapes and forms, as the path the fire takes through the kiln will also affect the results. More variety in heights, forms, and shapes will create better flashing and patterning on the pots behind them, think of a shadow in the sun.
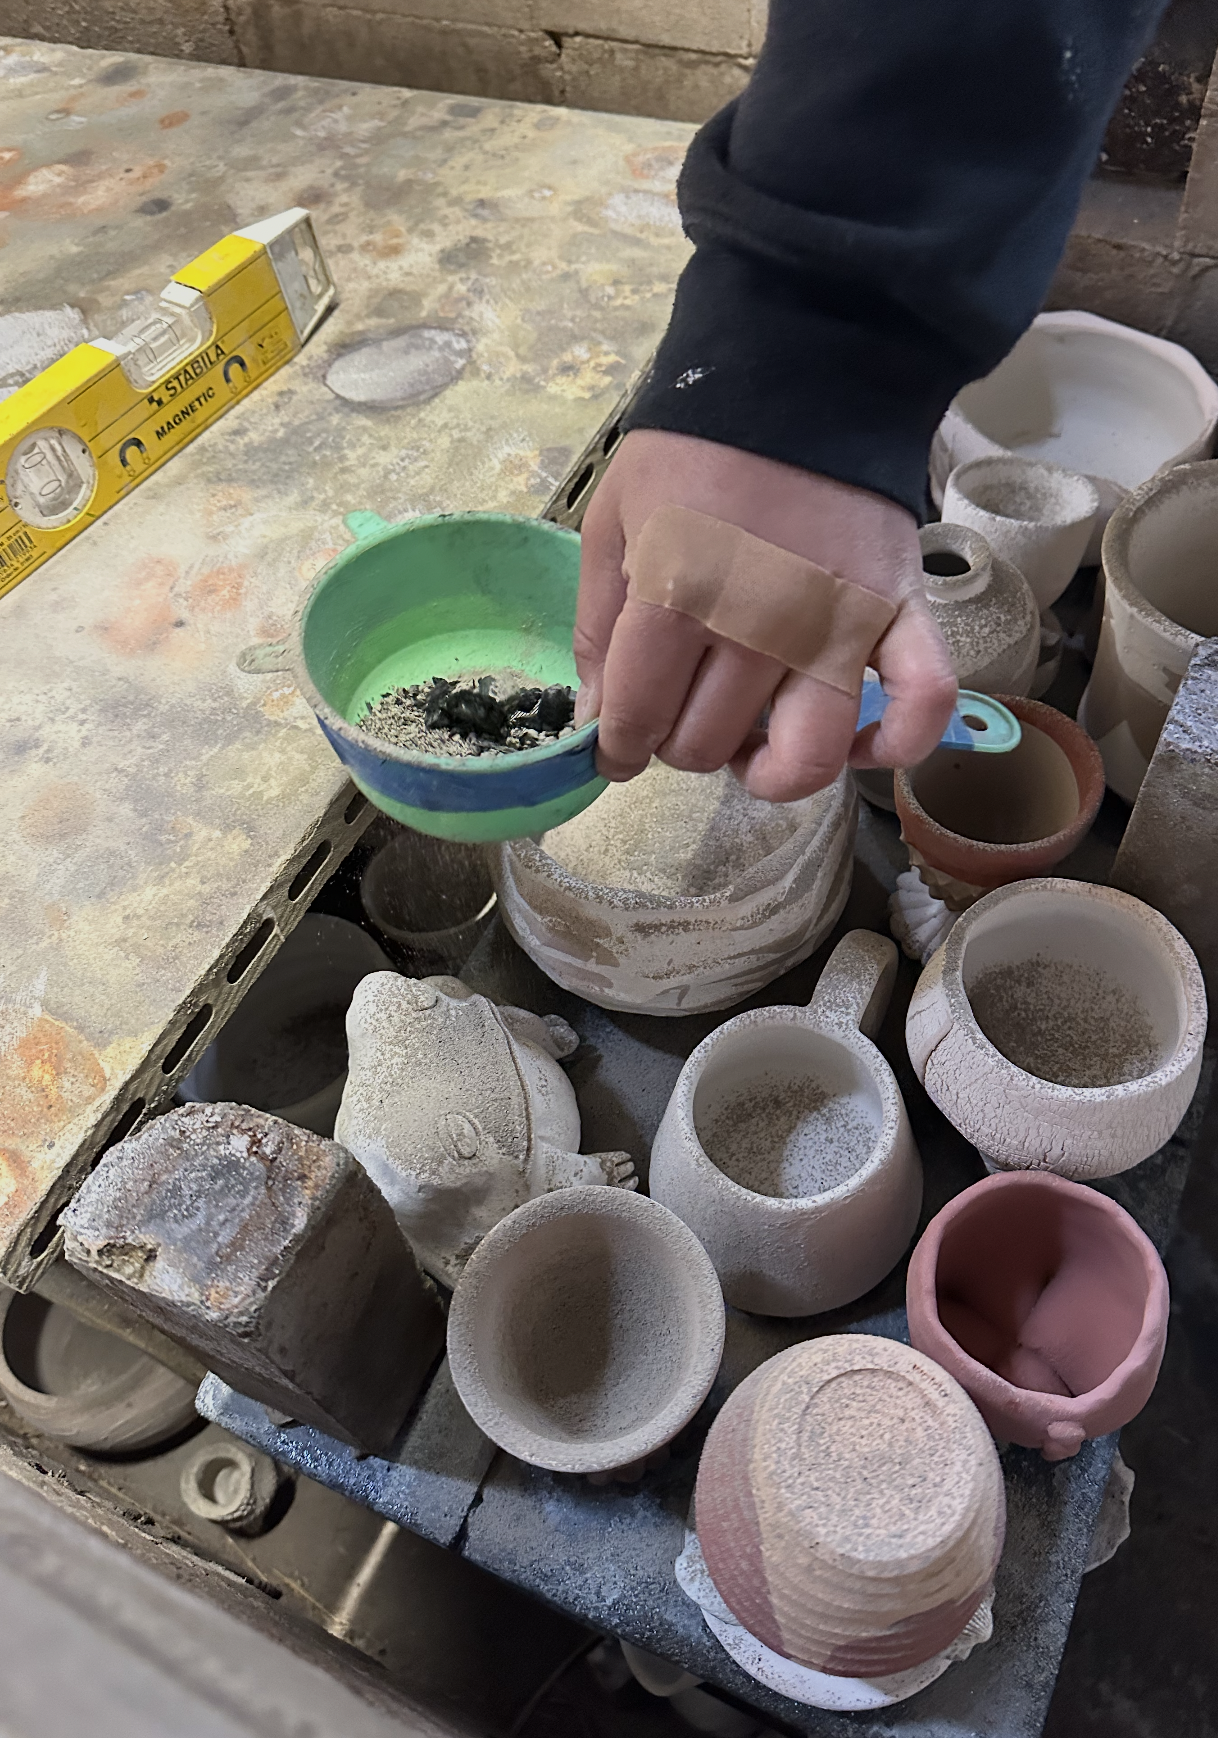
The tops of the pots were dusted with wood ash, which will run and melt in the kiln.
We finished loading around 5 or 6 pm. The studio assistants, Andrew, and Sophie explained how they would cover the pots and start the fire, and then the stoking shifts began.
Each participant took a 6-hour kiln shift where we’d return and work with Sophie and the studio assistants to keep the kiln firing according to the plan. Wood-firing requires a lot of manual labor, intention, and knowledge of fire. This was something I didn’t fully grasp until I was there, that the stoking process requires dedication, detail, and intuition.
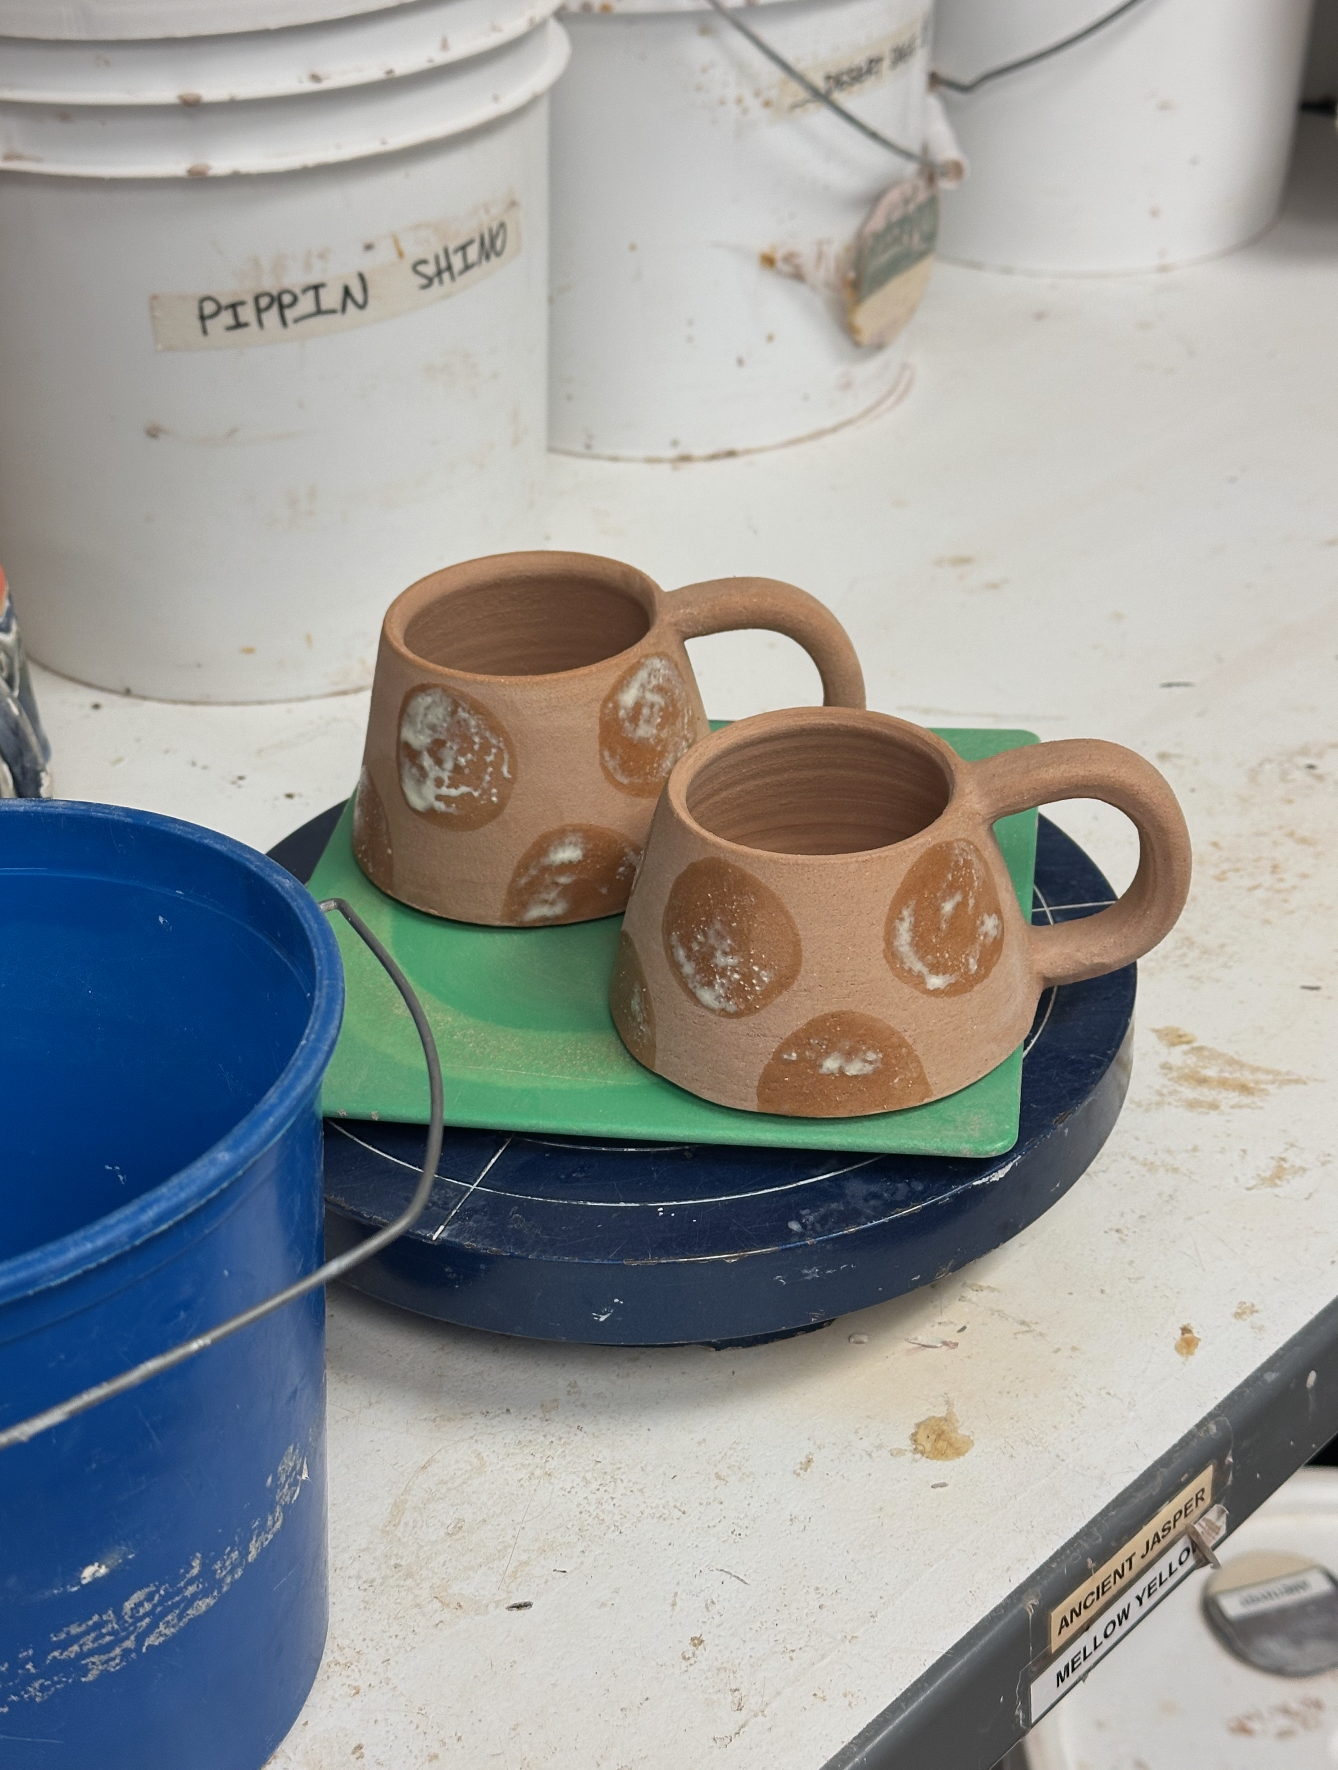
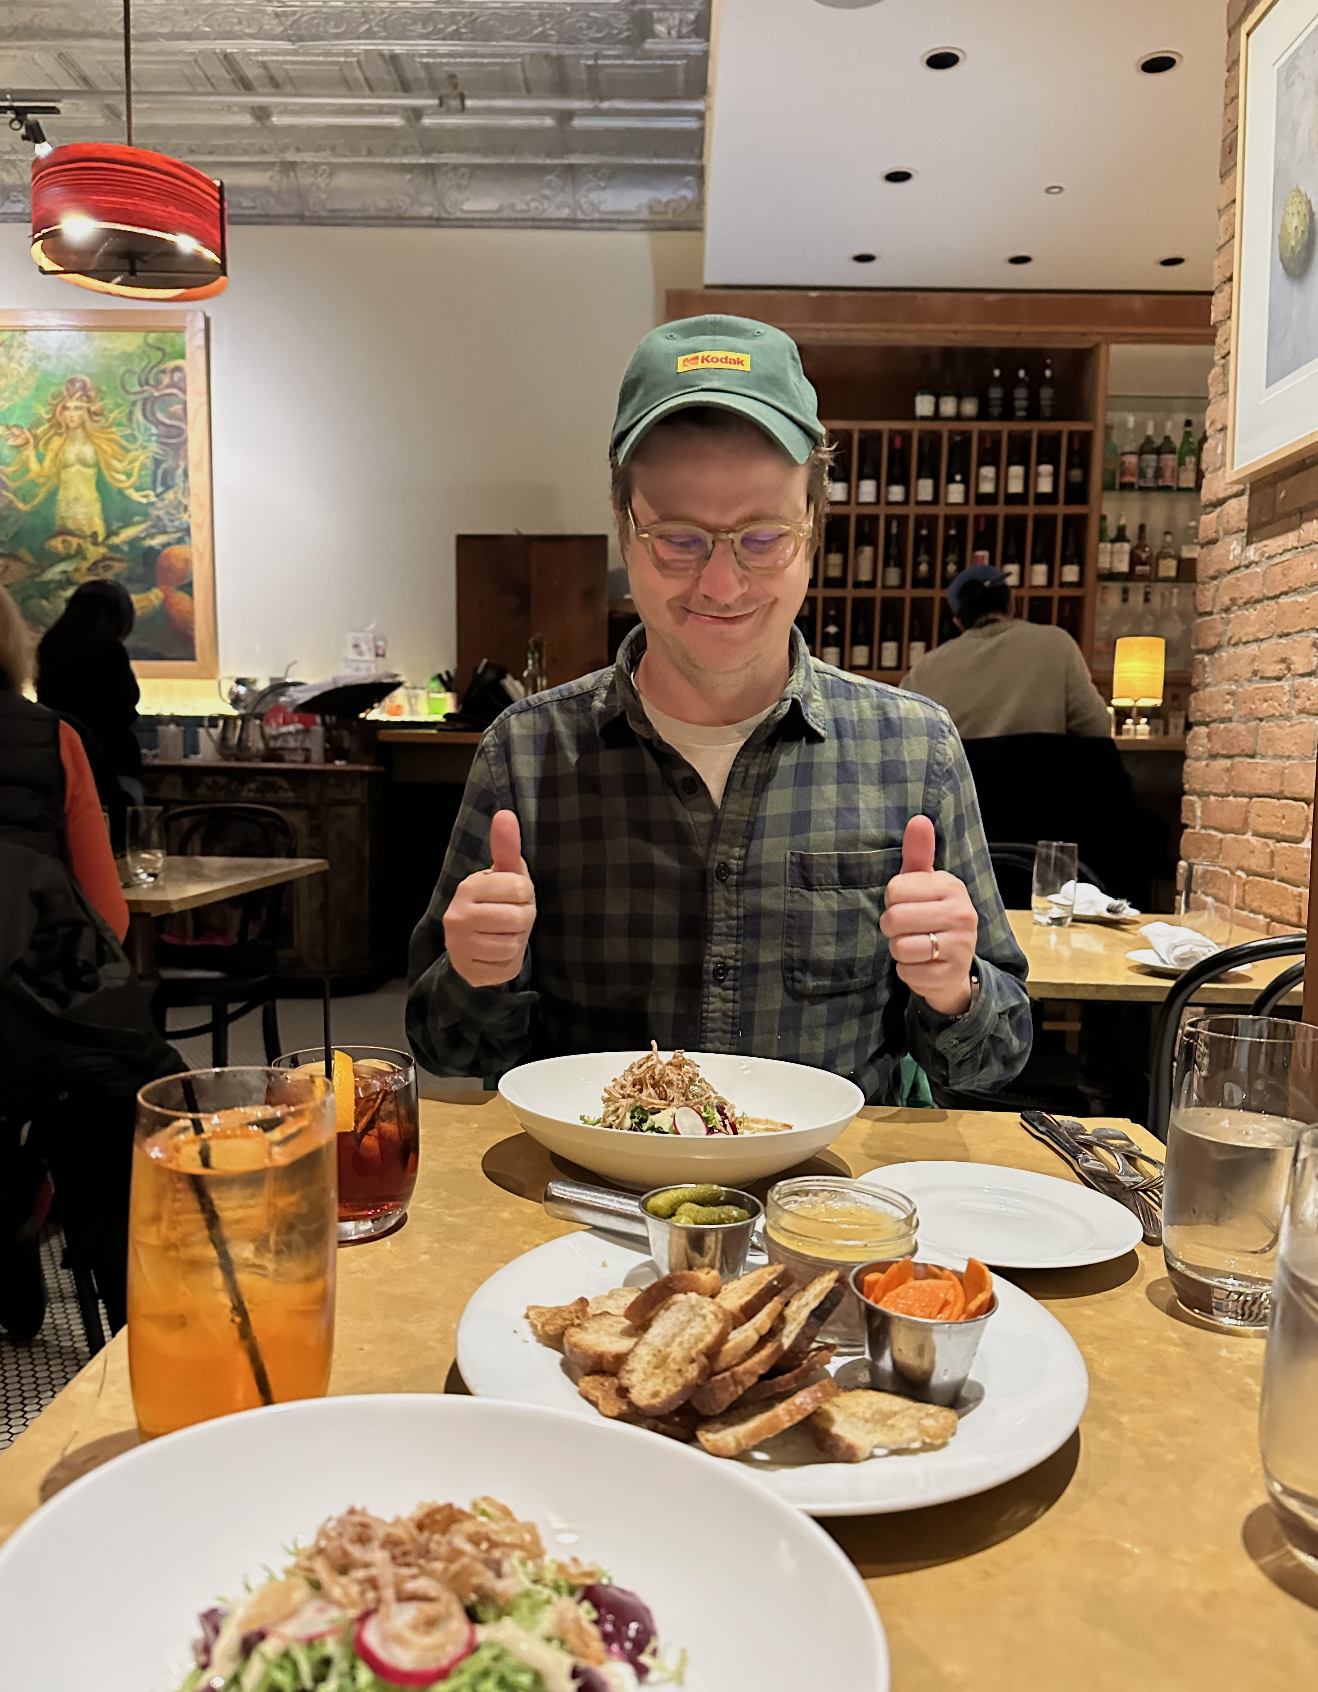
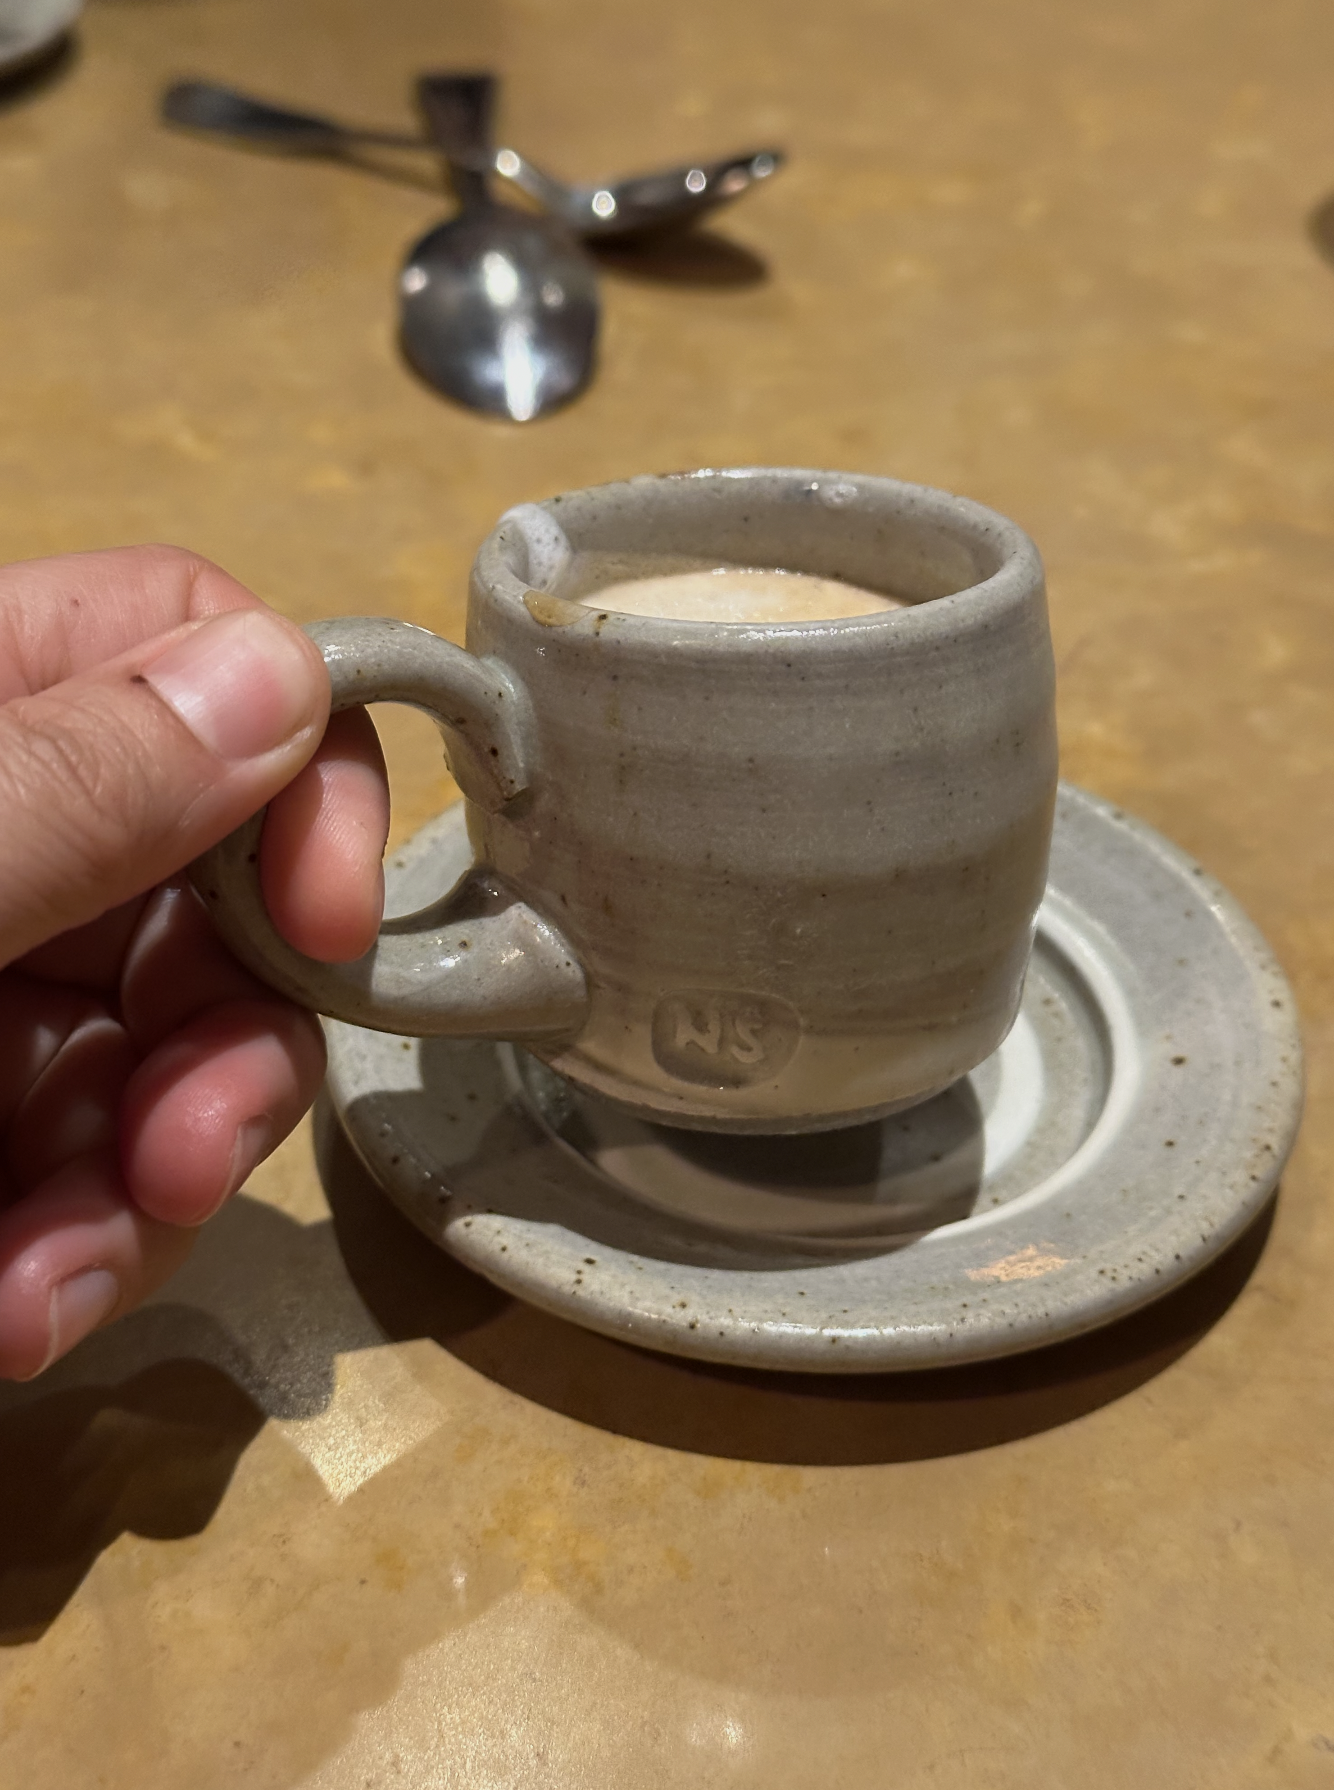
That night I returned to Hudson (where I was staying) and recounting the entire day to Zach over dinner and martinis. The espresso I had that night was also served in the most adorable handmade cup, love getting inspo wherever I go.

Workshop Day 3: Learning to Stoke the Kiln and Closing it up
I arrived back to the Oki Doki Studio at around 7:30 am to clock in for my 8 am stoking shift. I overlapped a bit with the overnight shift who had been on duty from 2 am until 8 am. The atmosphere was quiet and calm, and Eva and Catie both walked me through the basics of what they were doing, and how the shift had gone.
A beautiful morning at the Oki Doki Studio
They reported that the kiln hit a stall for a few hours, and after tinkering with the bricks at the front of the kiln, the kiln was happier and finally gaining temperature again. I thought to myself, I have no idea what they are talking about. I buckled up.
Soon Sophie arrived. I knew that she had been with them most of the night as she had sent an email at like 6 am sharing the status of the kiln. I understood then that the stoking shifts and the time with the kiln were an invaluable time to connect with the group, learn hands on how to listen to the kiln, and practice supporting those on shift before you.
I was given an overview of the firing log, when to check temperature, where to check cones, what piles to get the hard wood and the soft wood from, and how to actually open the kiln door and stoke. This was intimidating, as the hole to throw logs into the fire wasn’t super big and the kiln was already super hot at this point. Wearing safety glasses and gloves, I prepped logs (a mix of hard and soft woods), opened the door, threw them into the fire, and closed the door again. This happened on repeat with a careful attention to the temperature, watching it rise and fall in cycles.
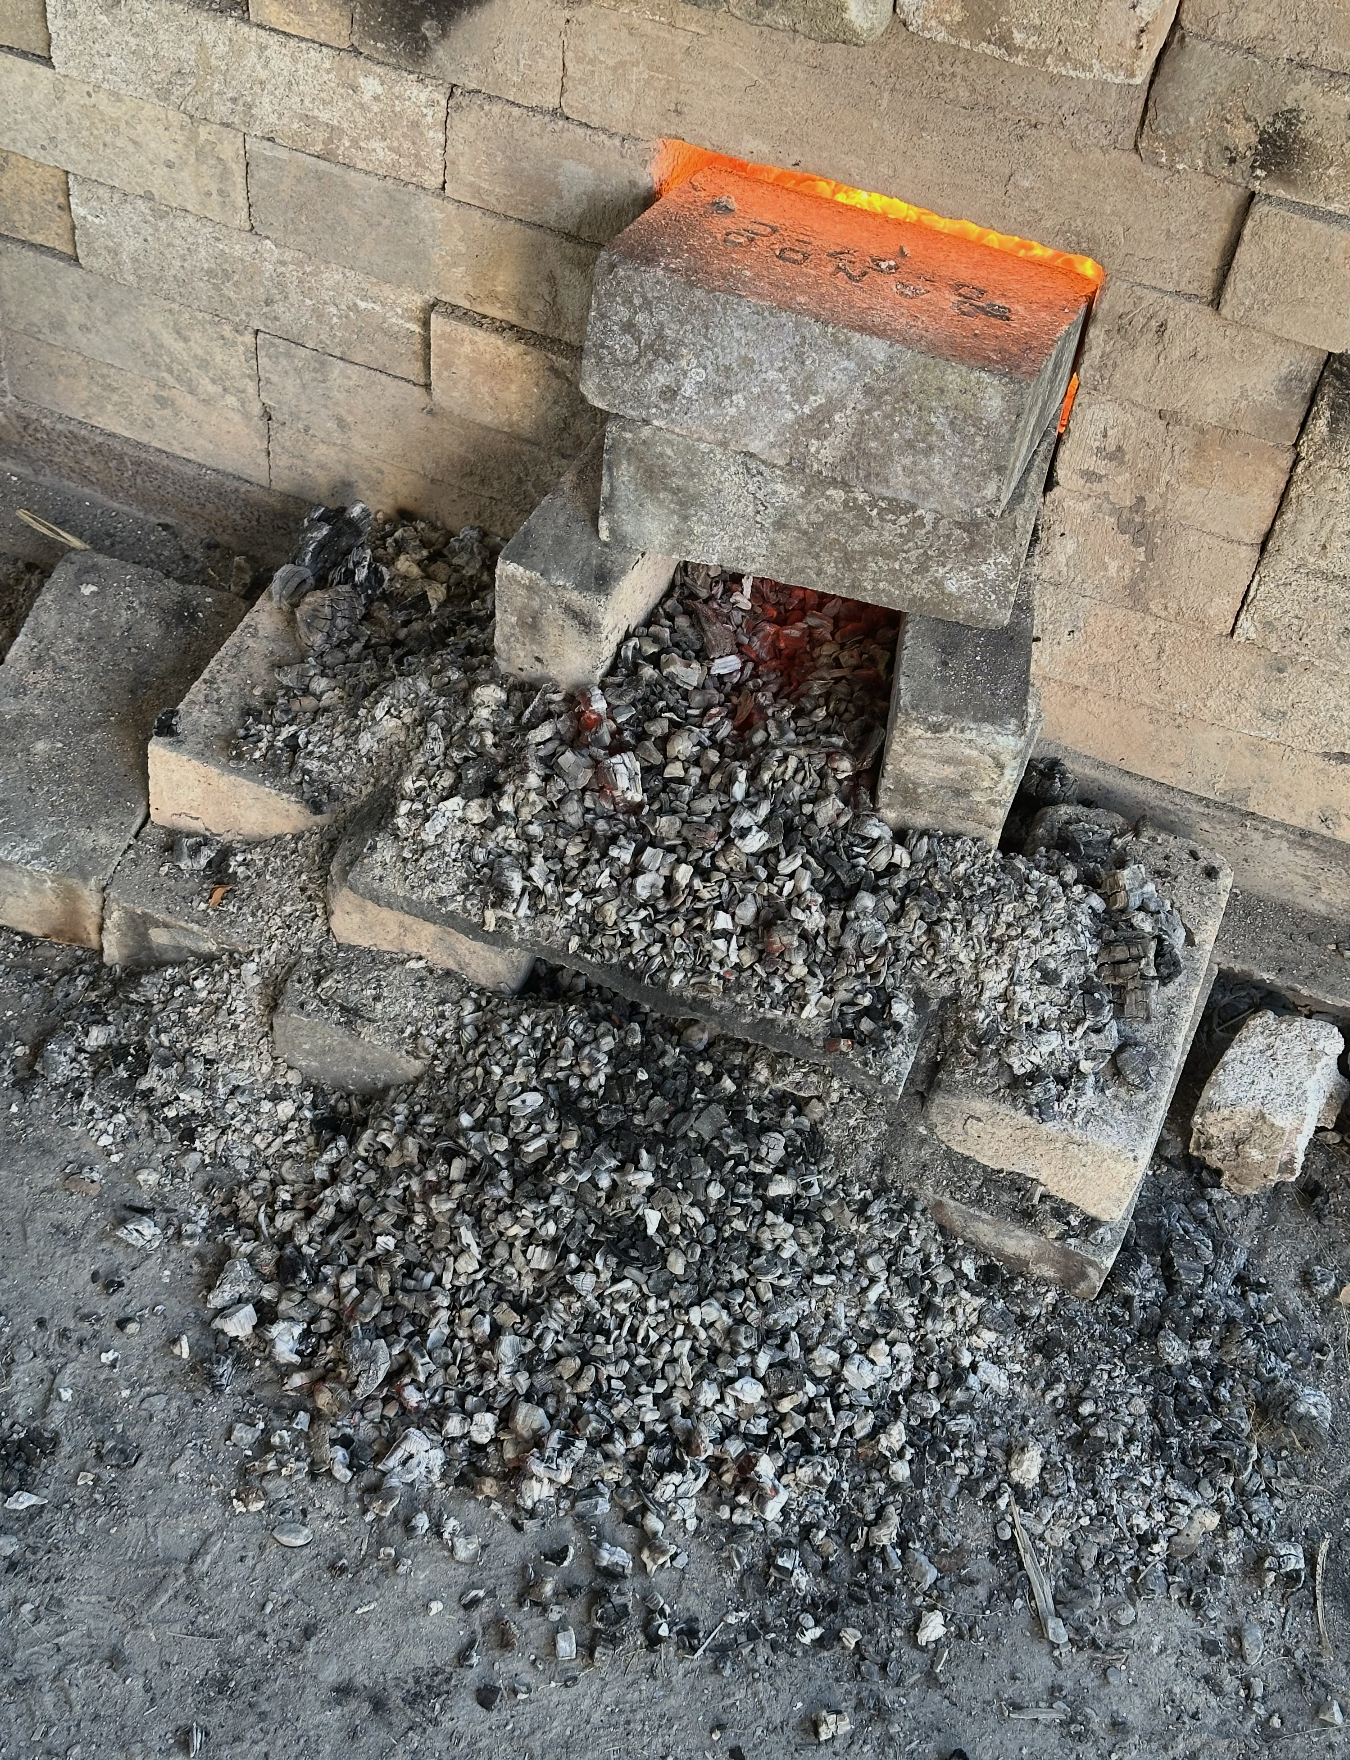
There was a moment where I was left totally alone with the kiln, just listening to it crackle. I watched the thermometer with intensity, not wanting anything bad to happen while alone. Sophie came back relief but I was proud to say that we were on track. My goal was to keep the temperature stable between 2200-2500 degrees, and our hope was to drop the back cone packs and hold at temp for a few hours. I cannot stress enough that this was an entirely manual process, with Sophie guiding the phases of the firing. Her experience and expertise carried the group through, and 34 hours later, the kiln was done. It was around 4 pm, and I couldn’t believe how quickly 8 hours flew by with the kiln on my shift that day.
By then the rest of the group had gathered. We sealed up the openings to the kiln, including the door, the side viewing windows, and the area where embers were falling out onto the dirt. With the fire out, the only thing to do now was to wait days for the kiln to cool so we could gather again and unload.
Five days later, we returned.
Workshop Day 4: Unloading Day


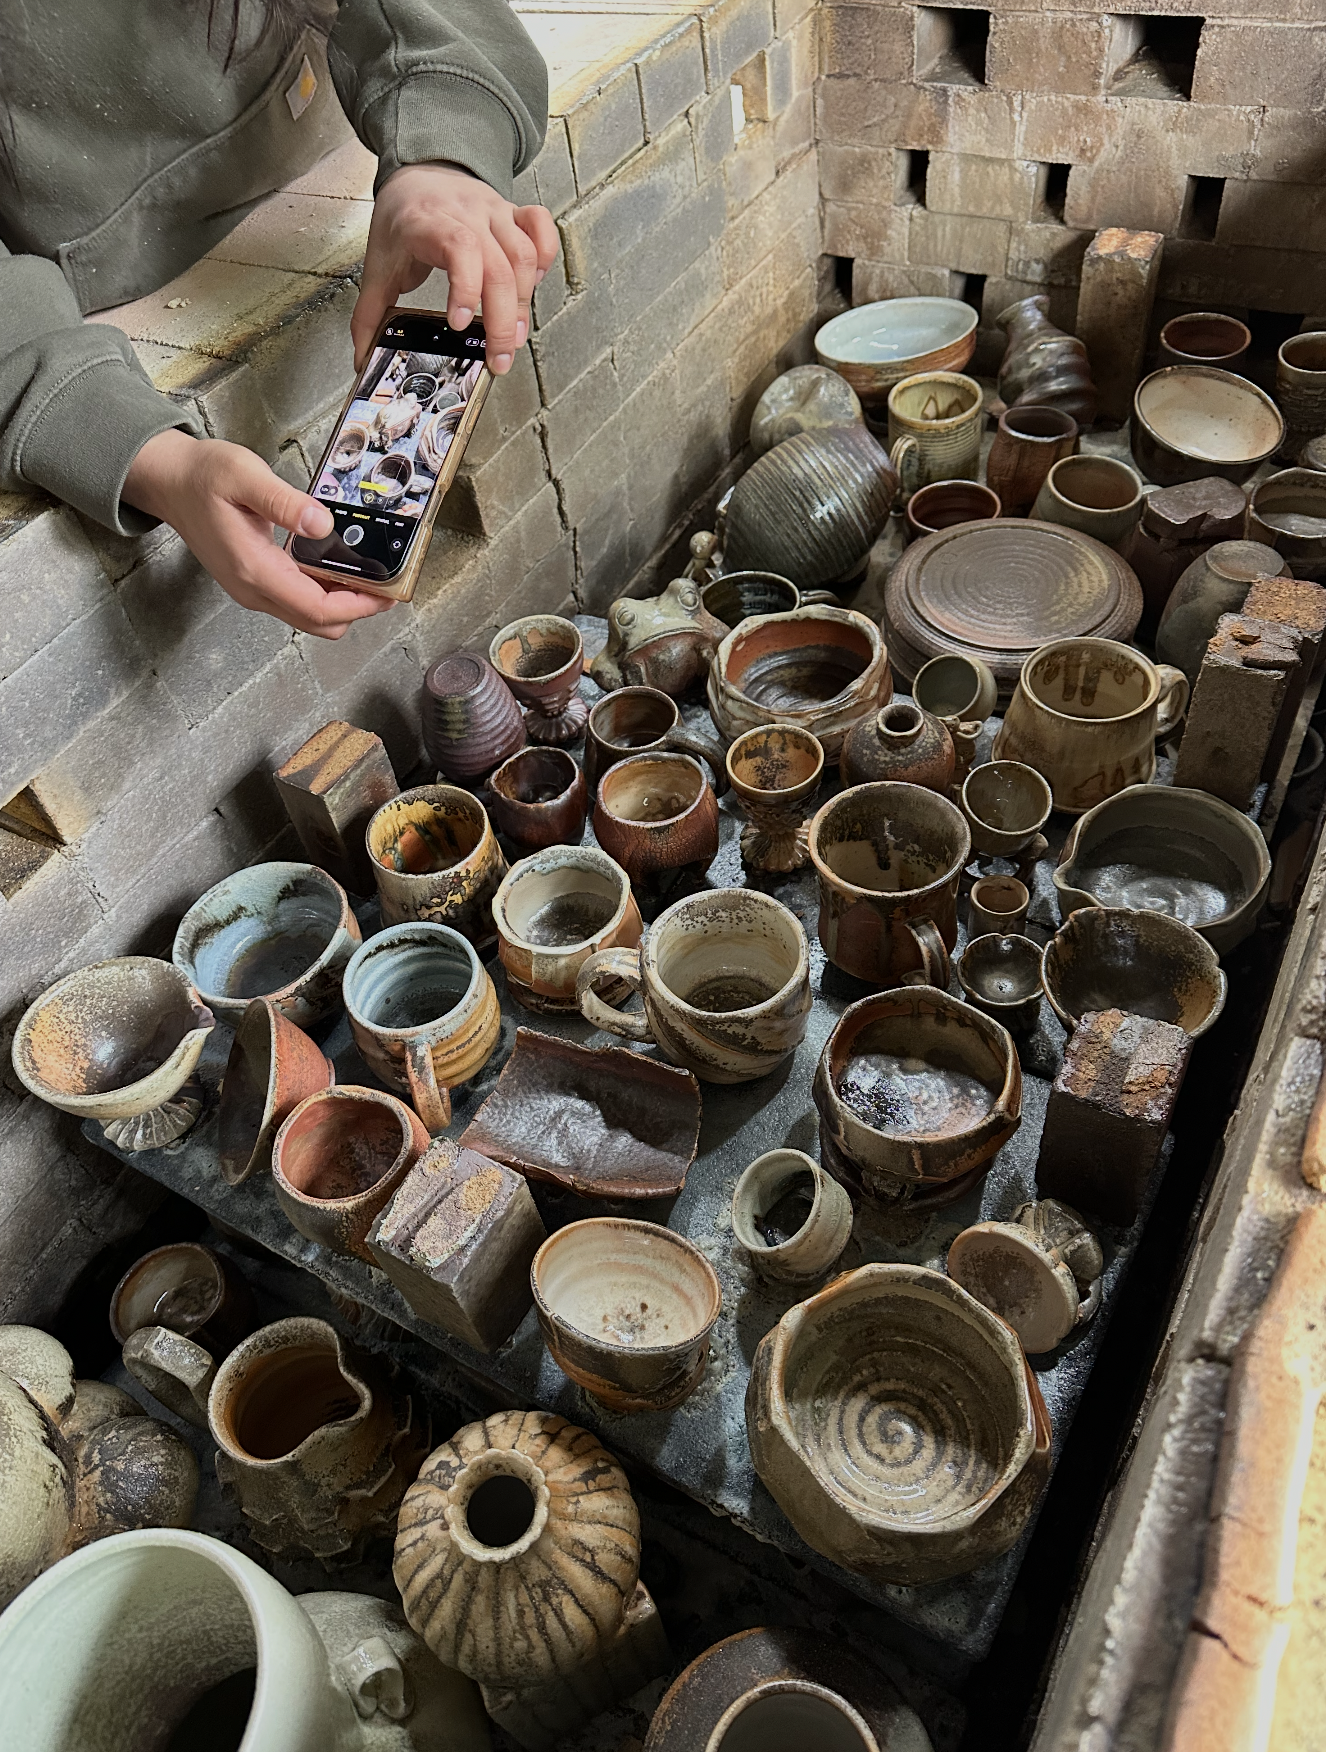
The anticipation was huge on unloading day. We gathered back at the Oki Doki Studio and watched as Sophie, Andrew, and the studio assistants removed the cover of the kiln.
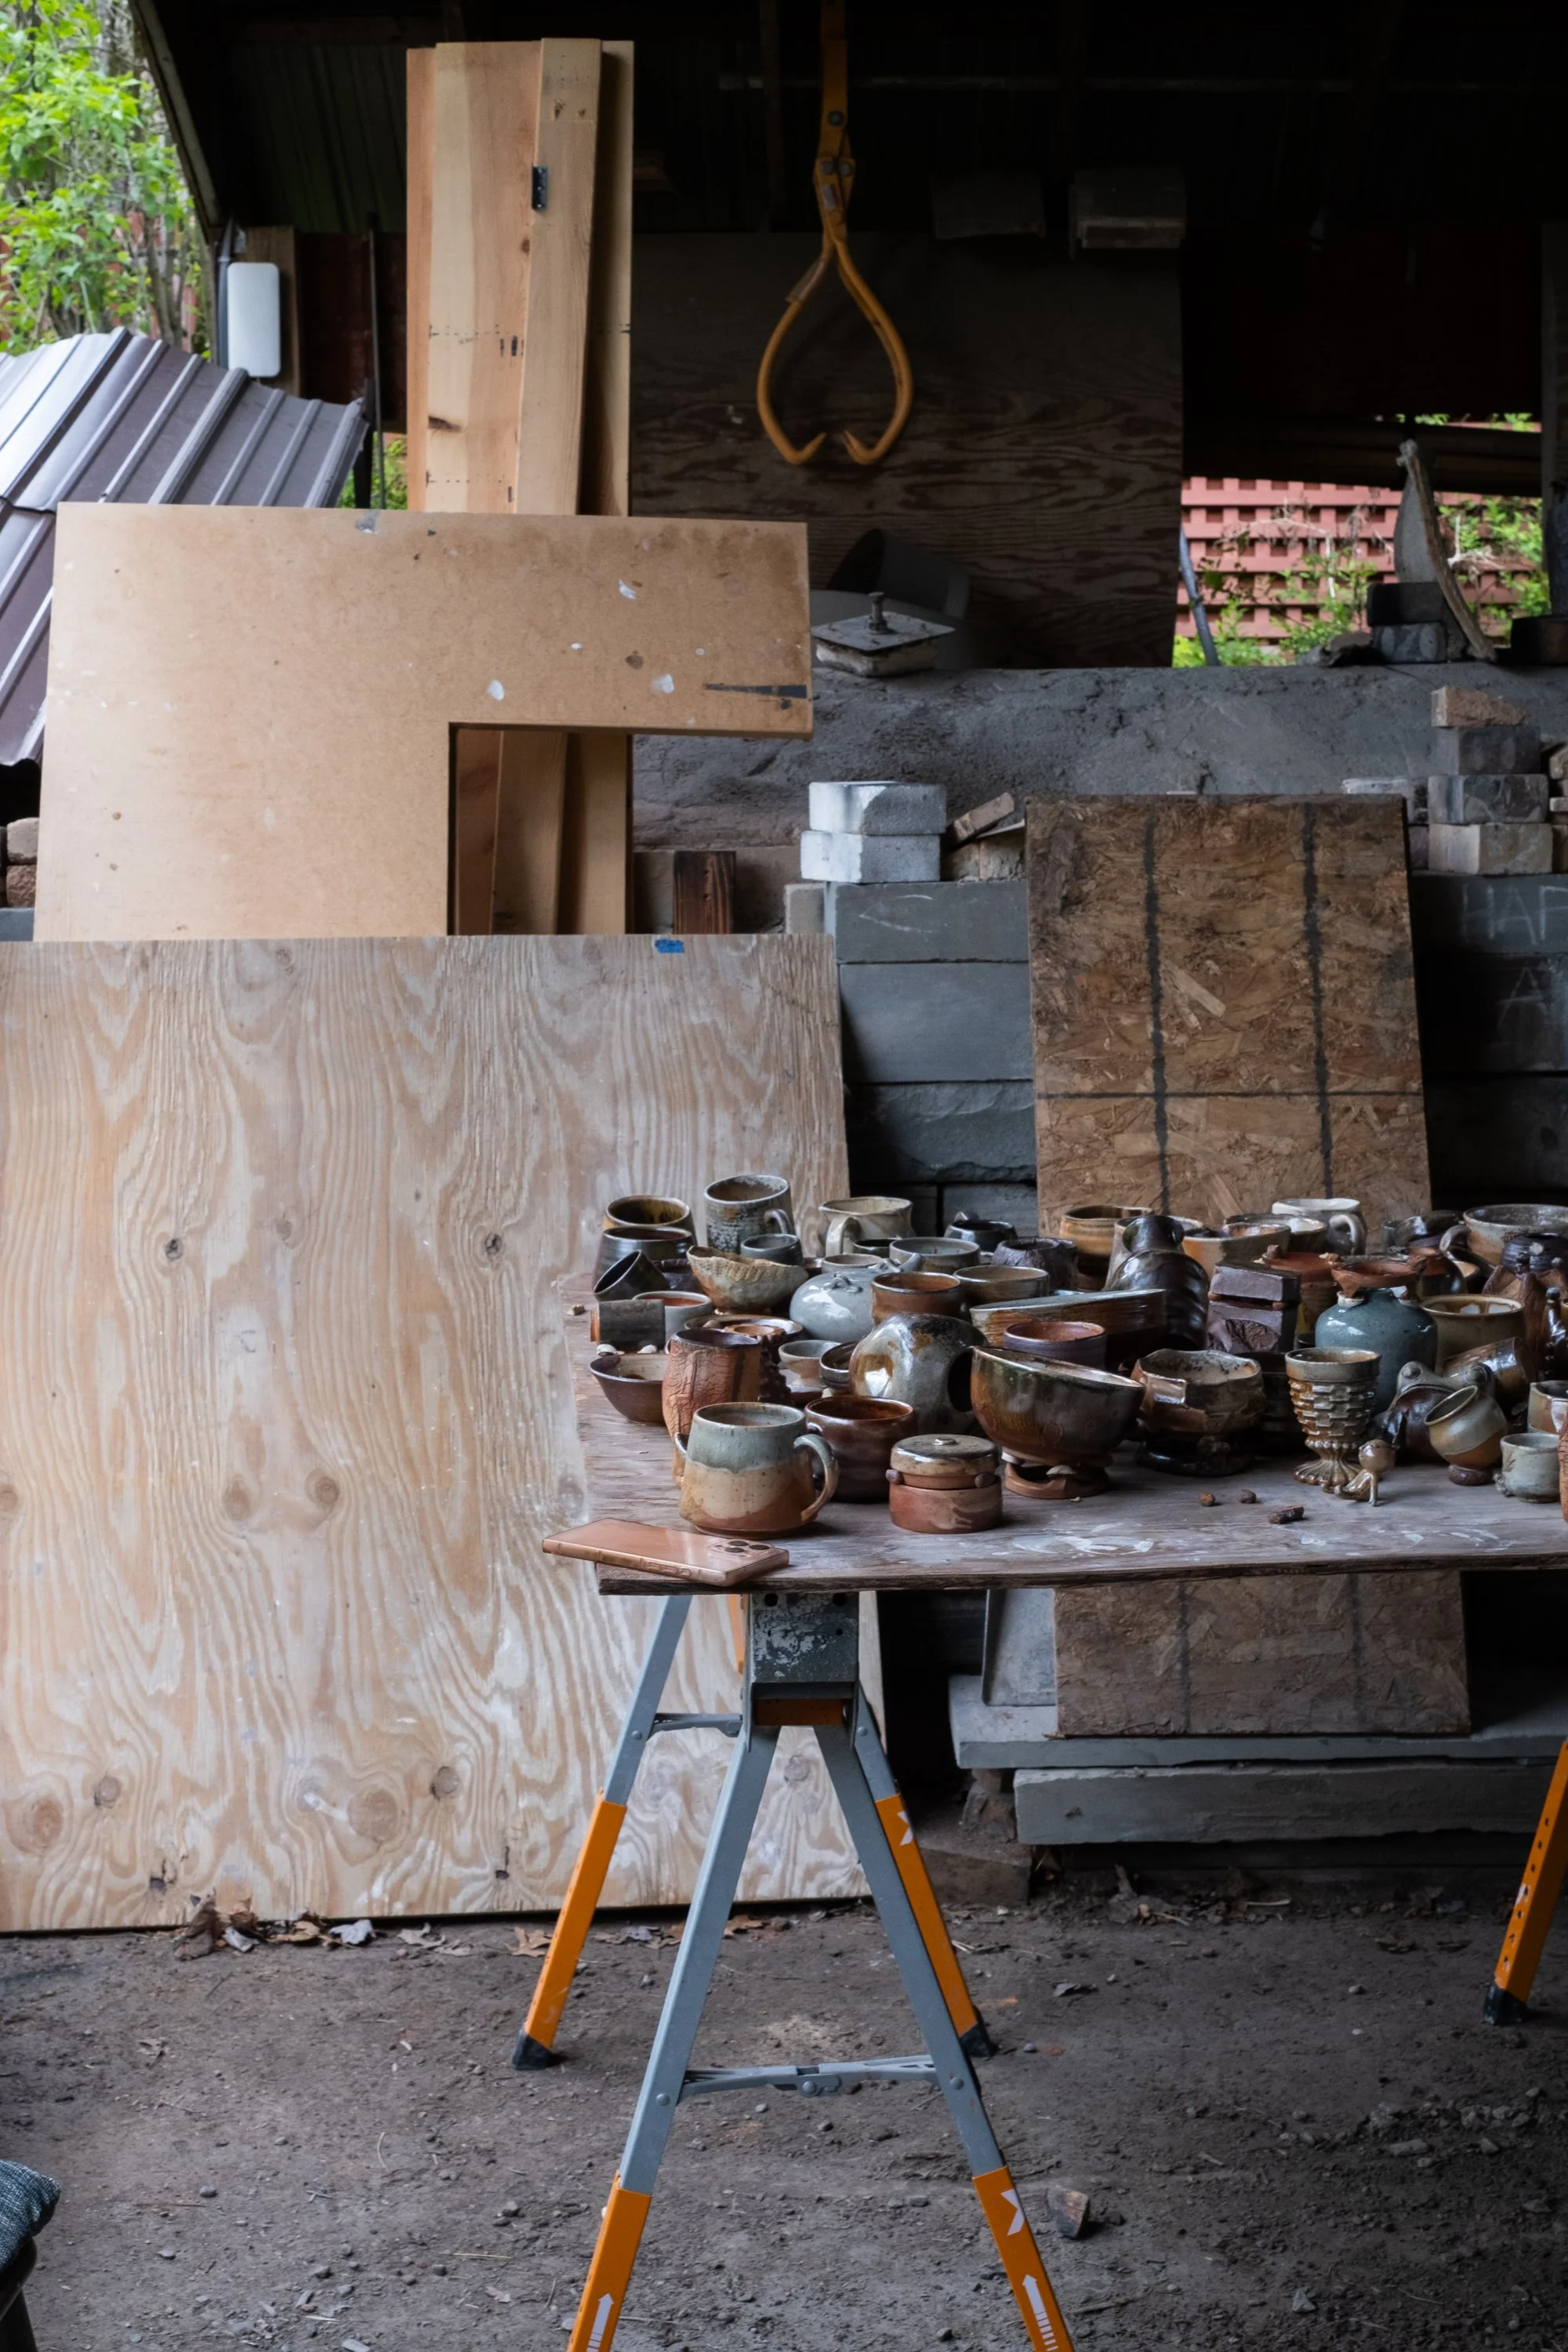
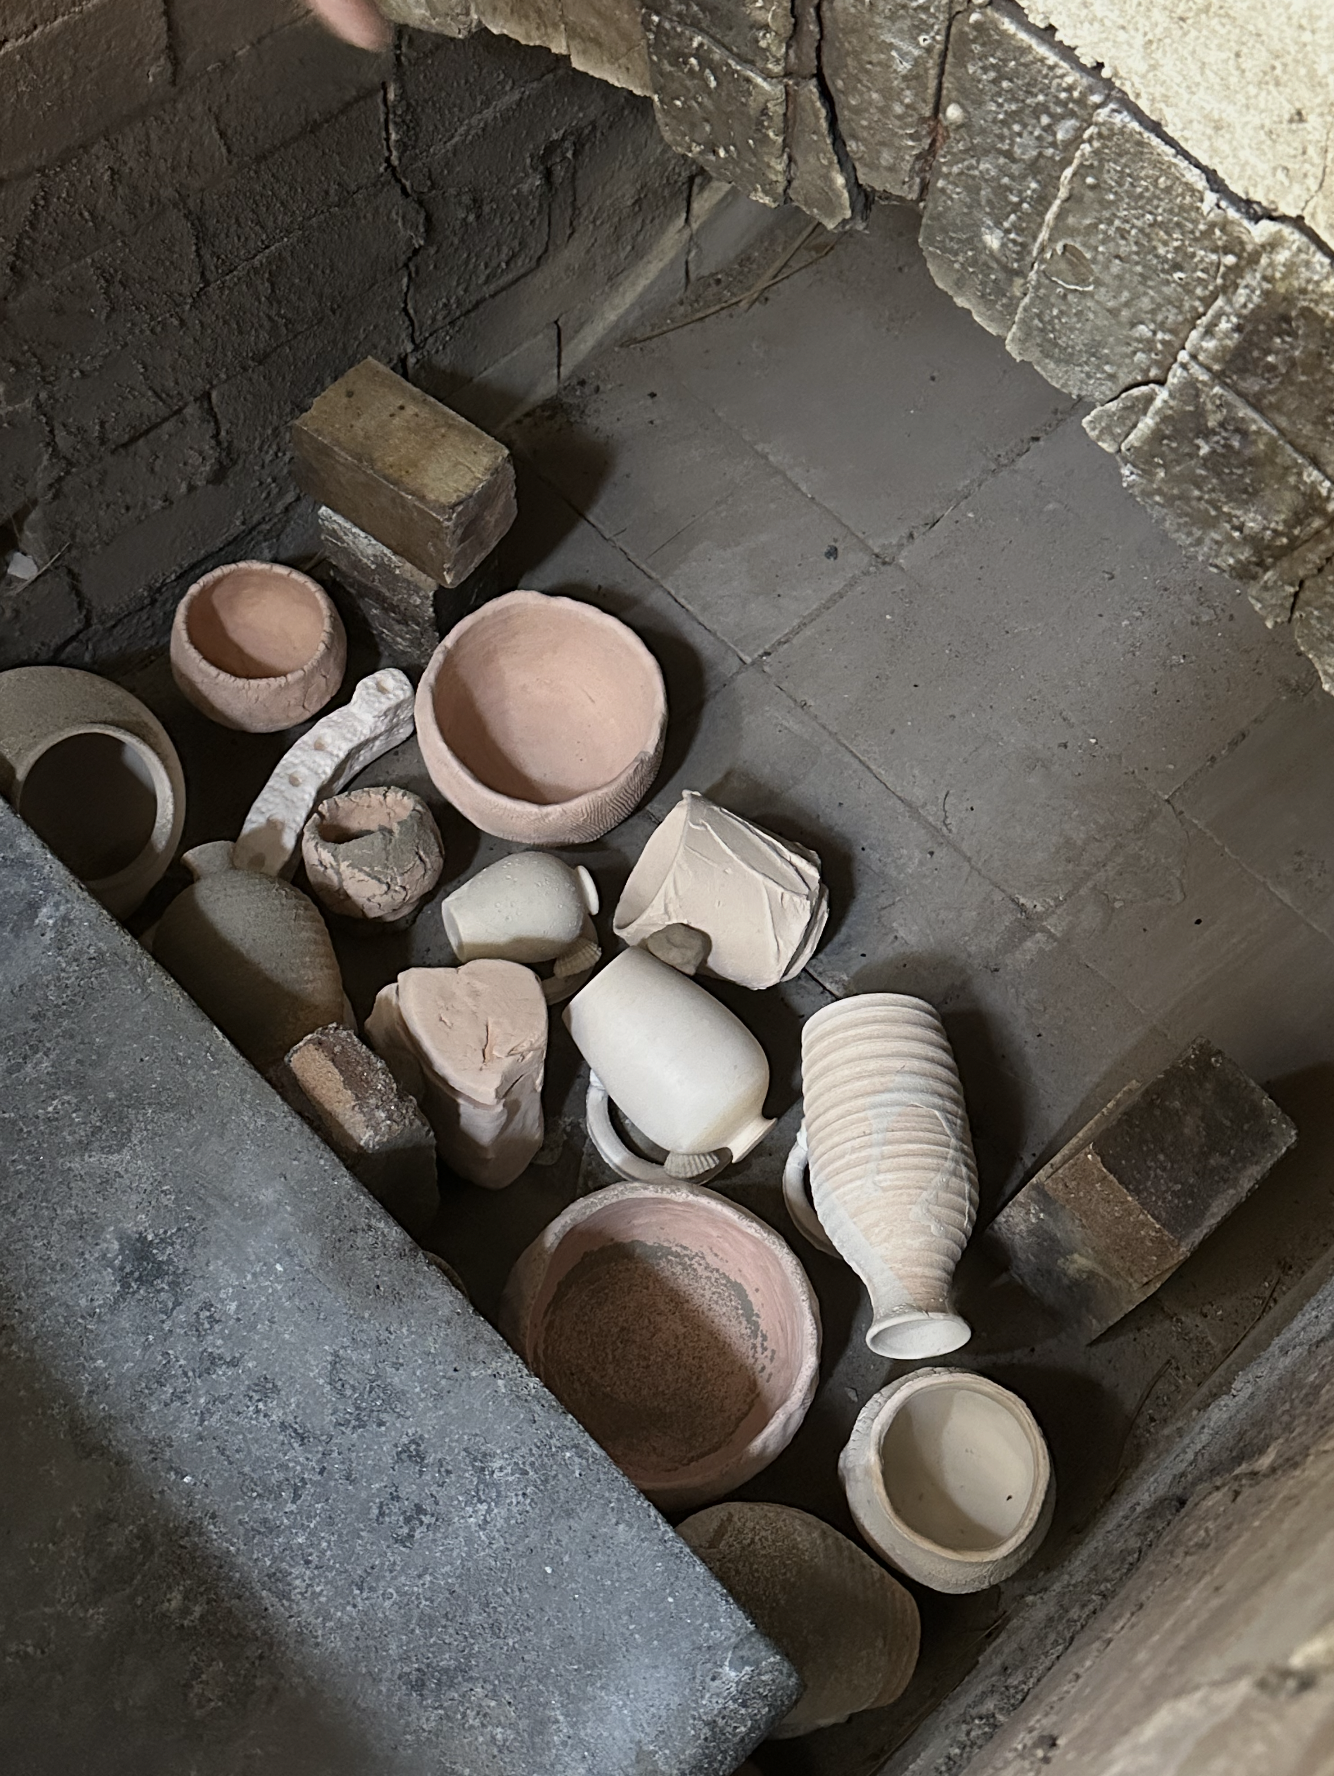
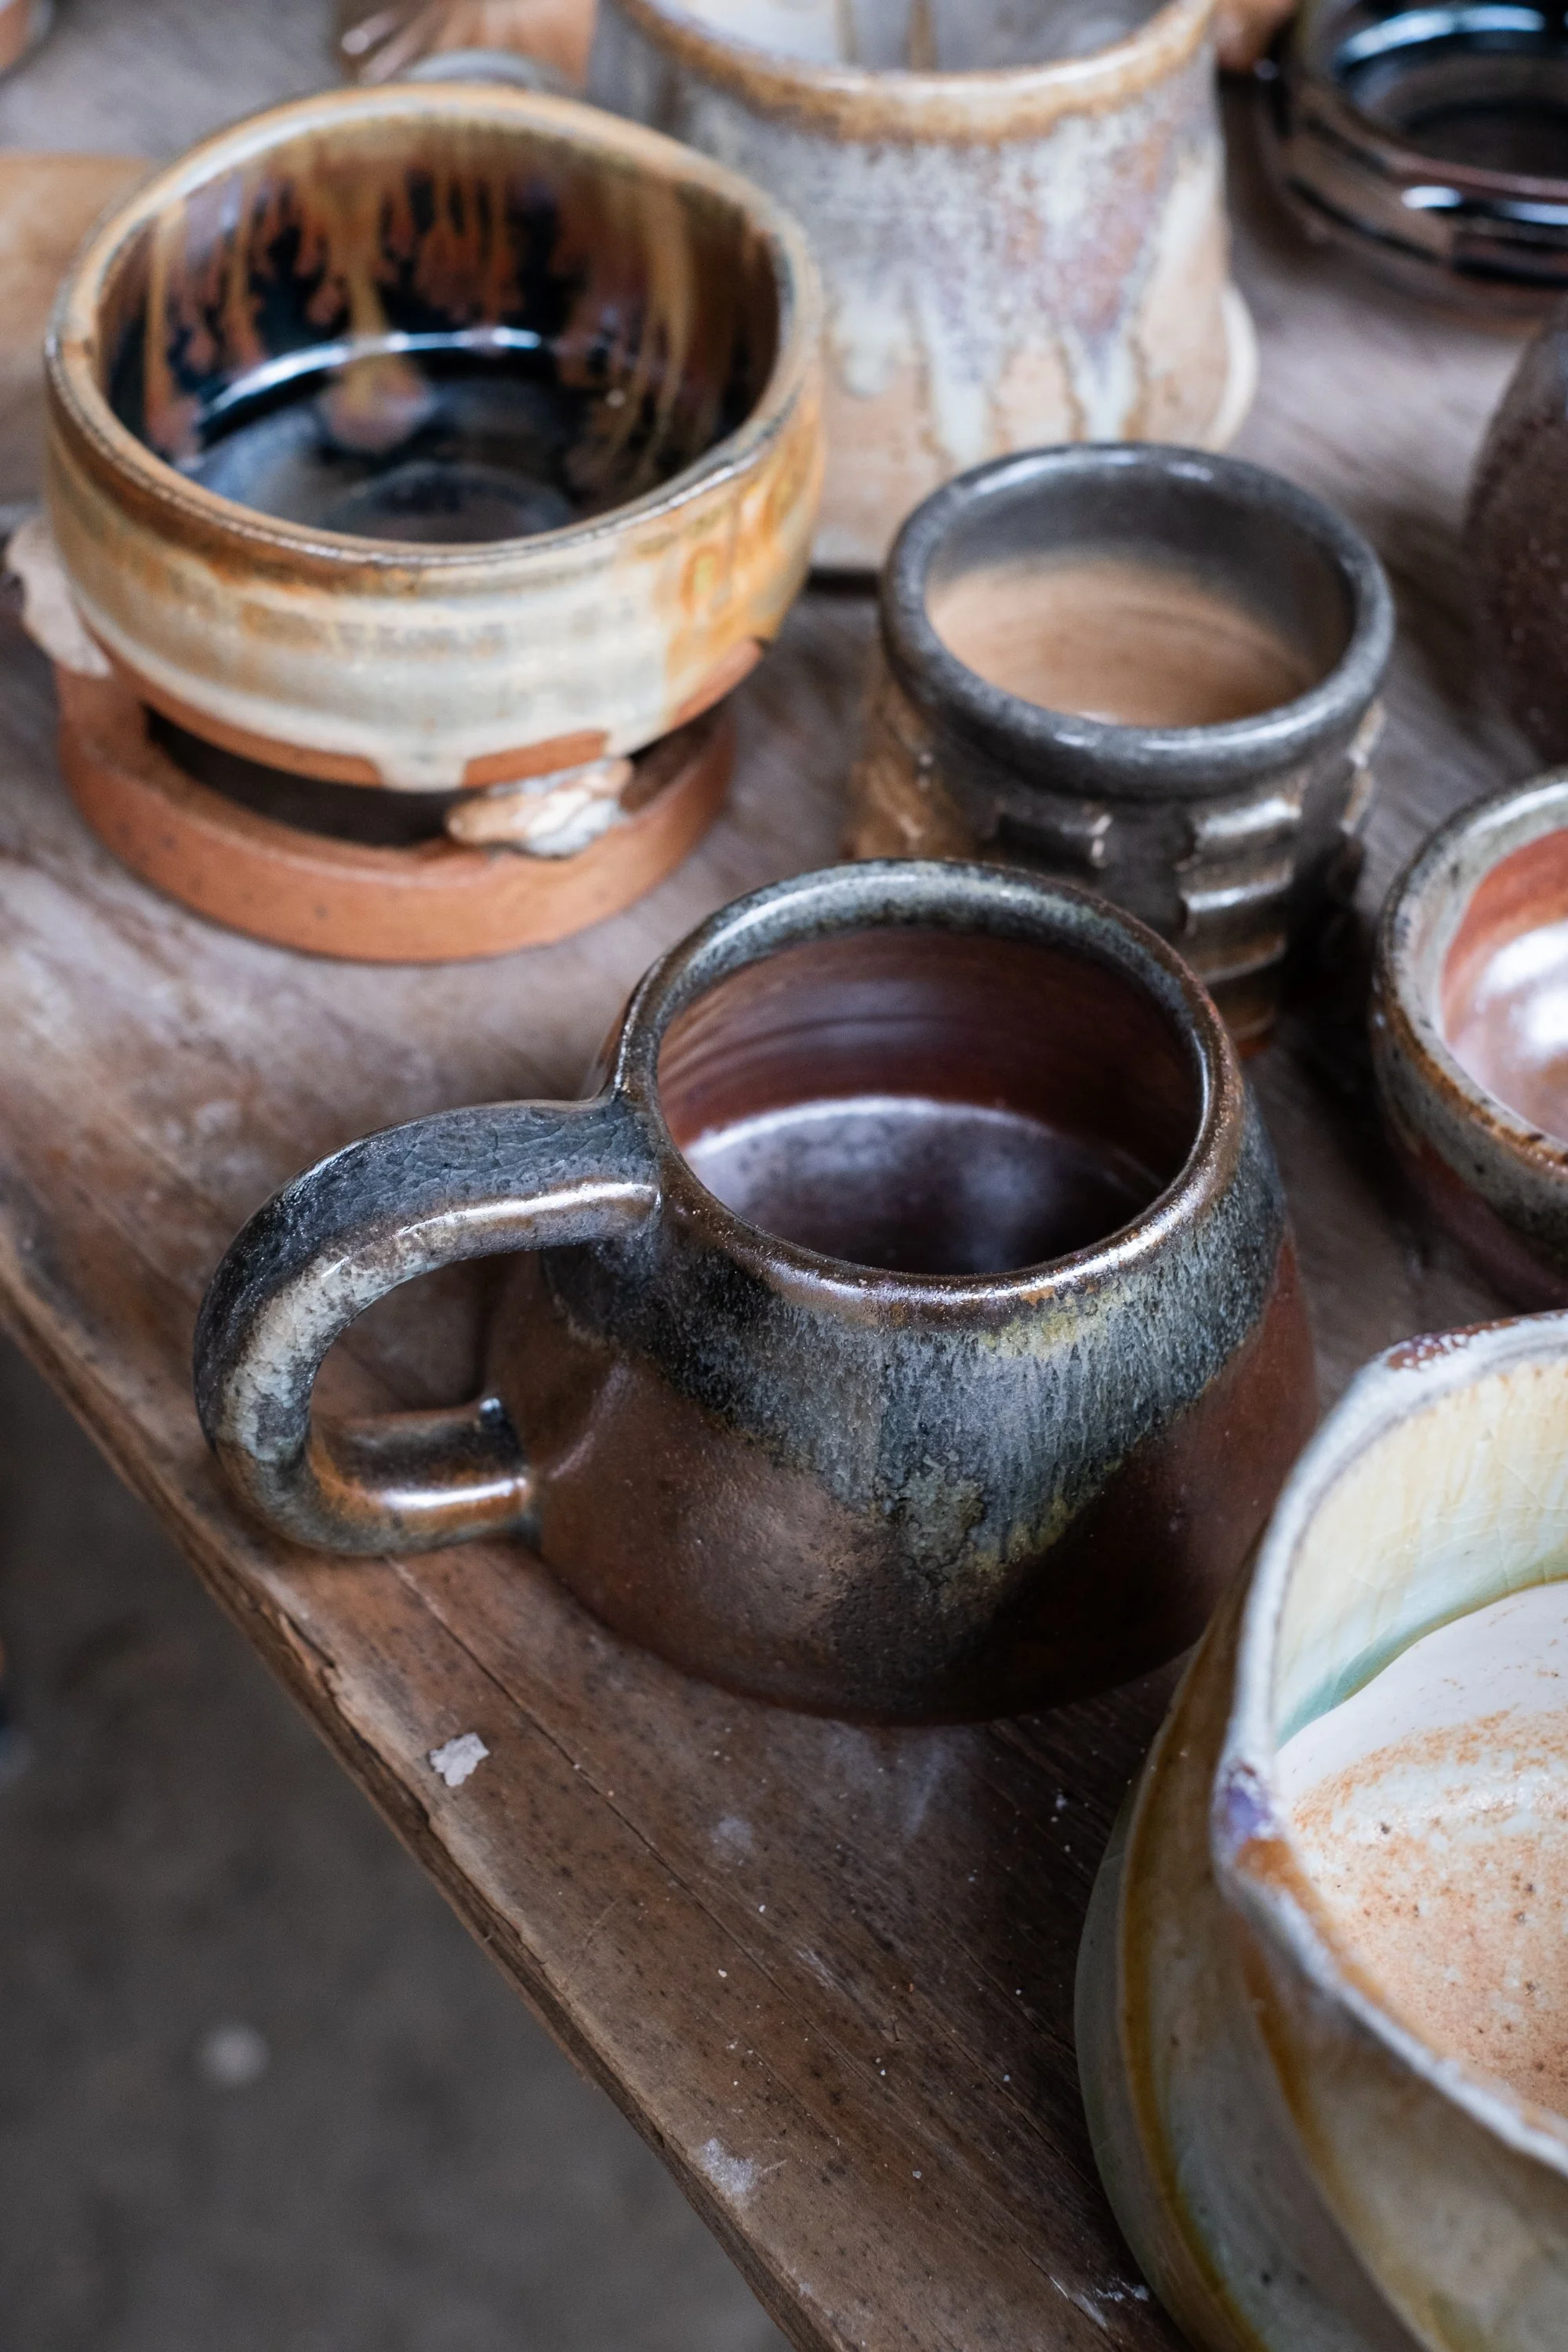
Fired pieces wait nearby after being unloaded
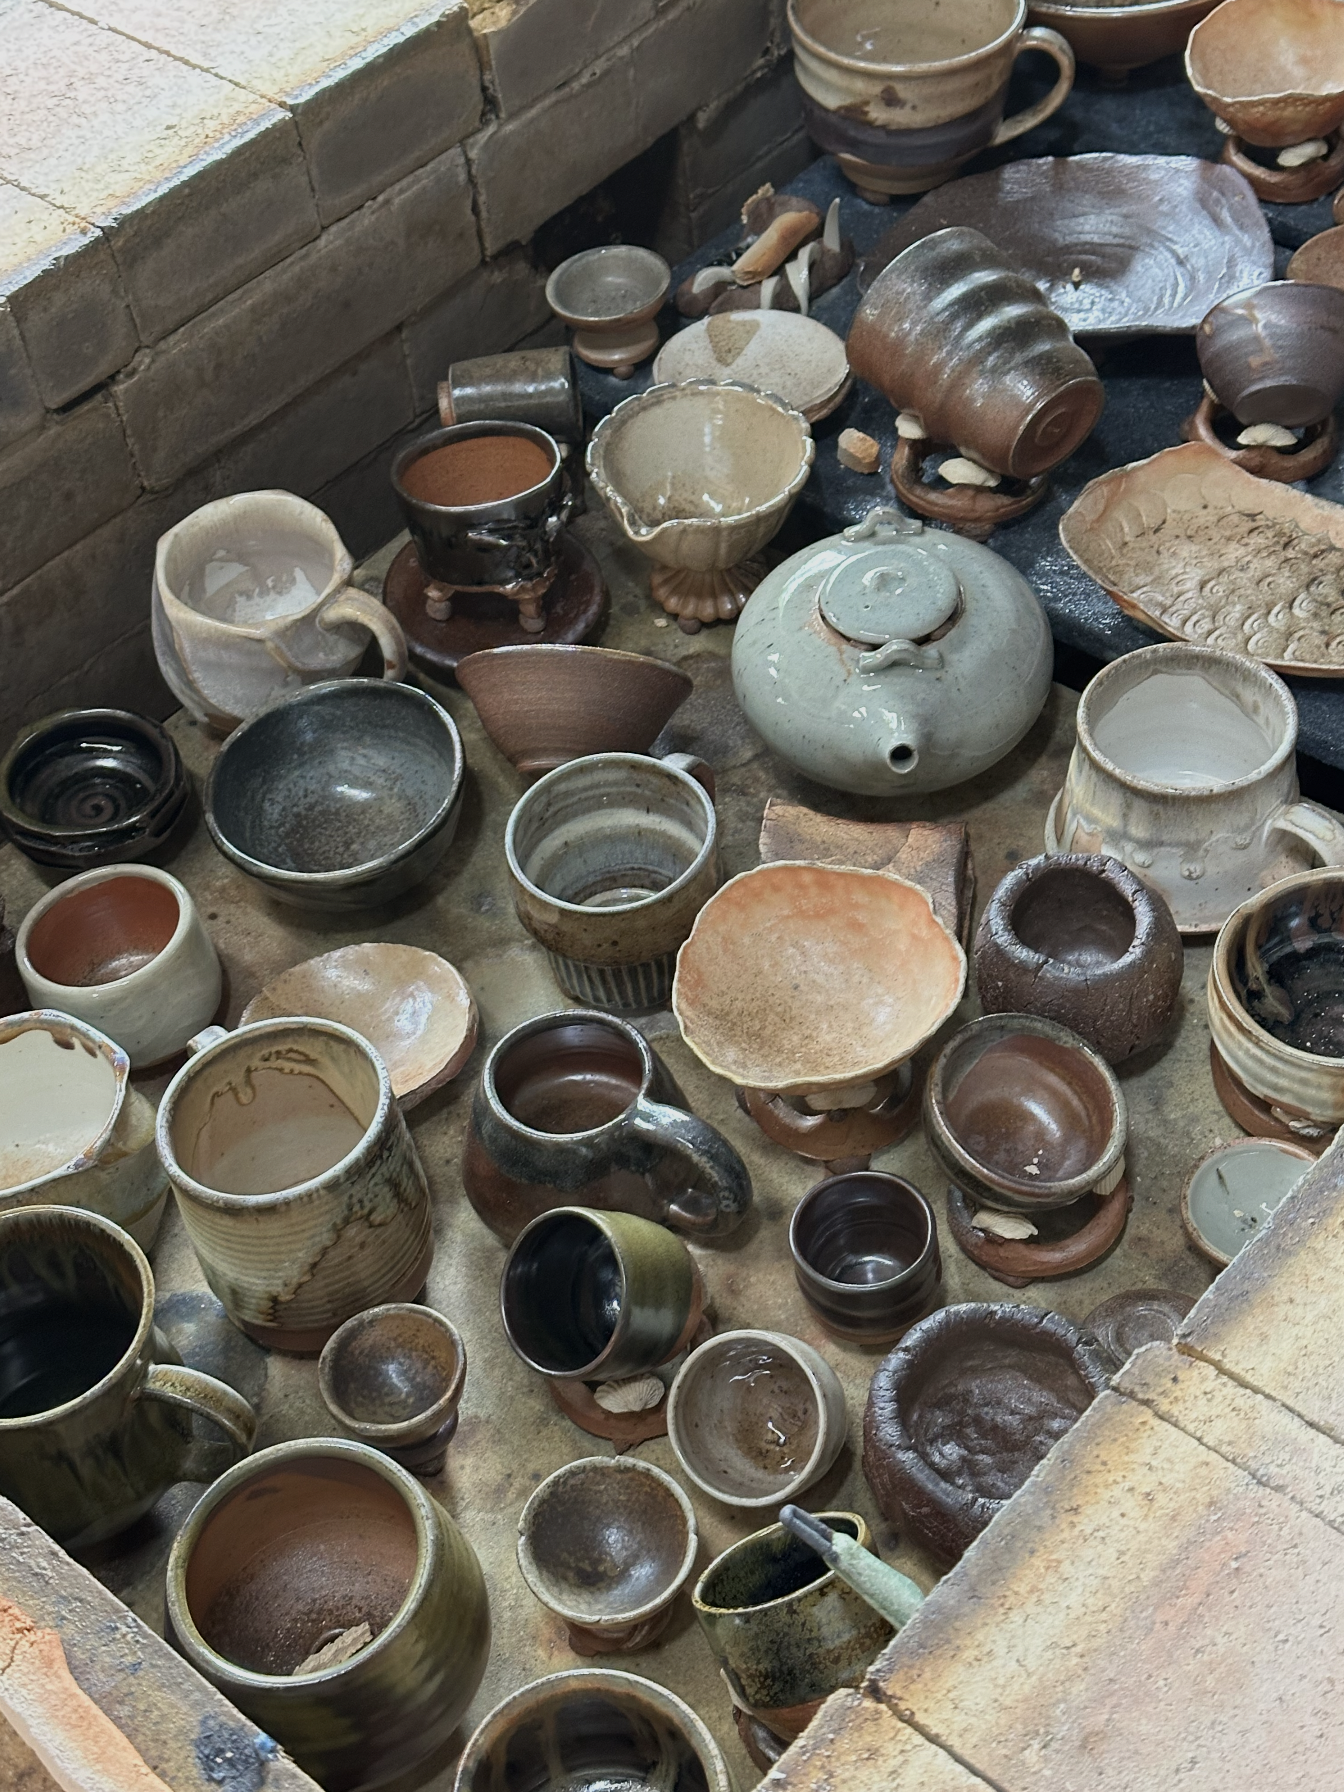
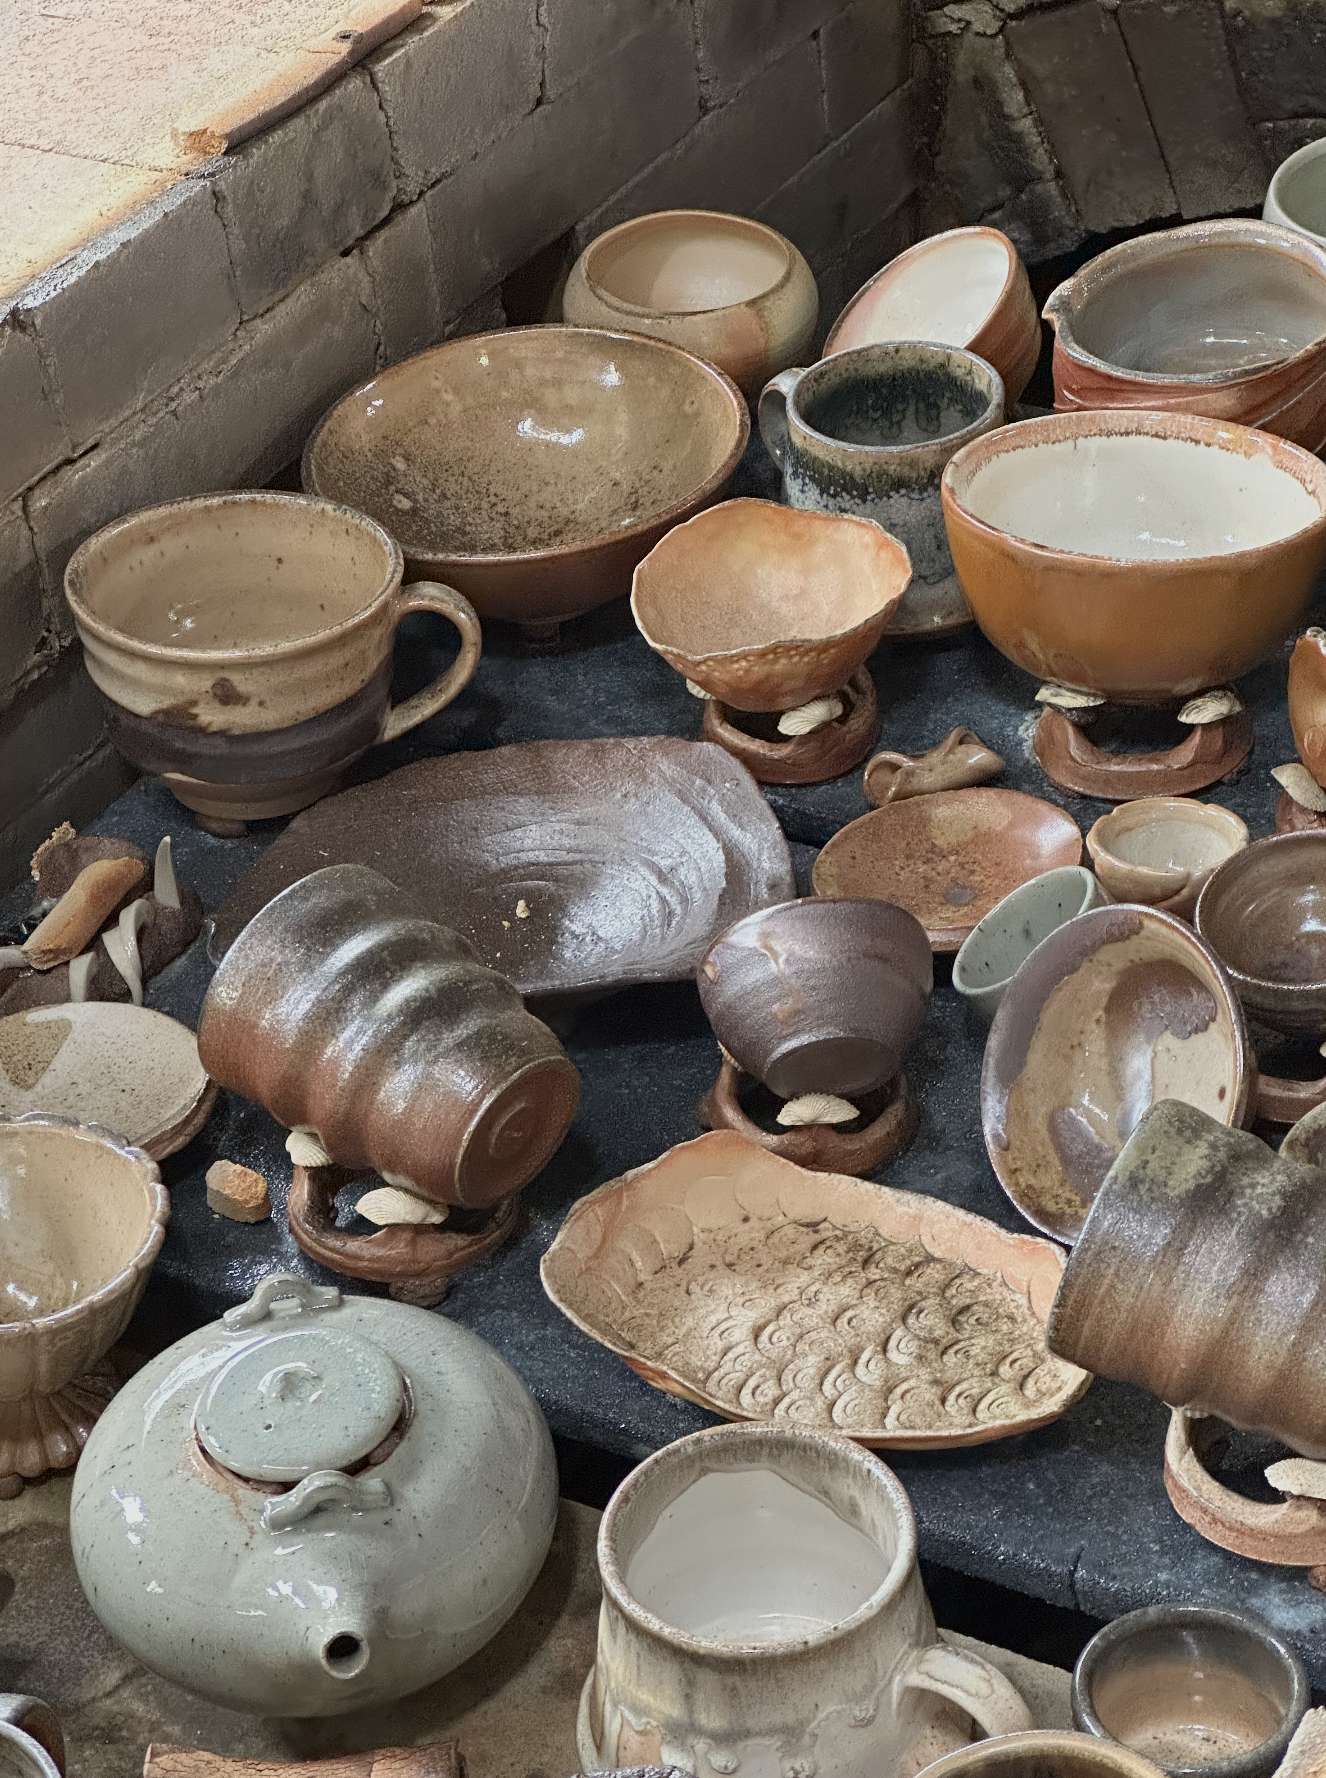
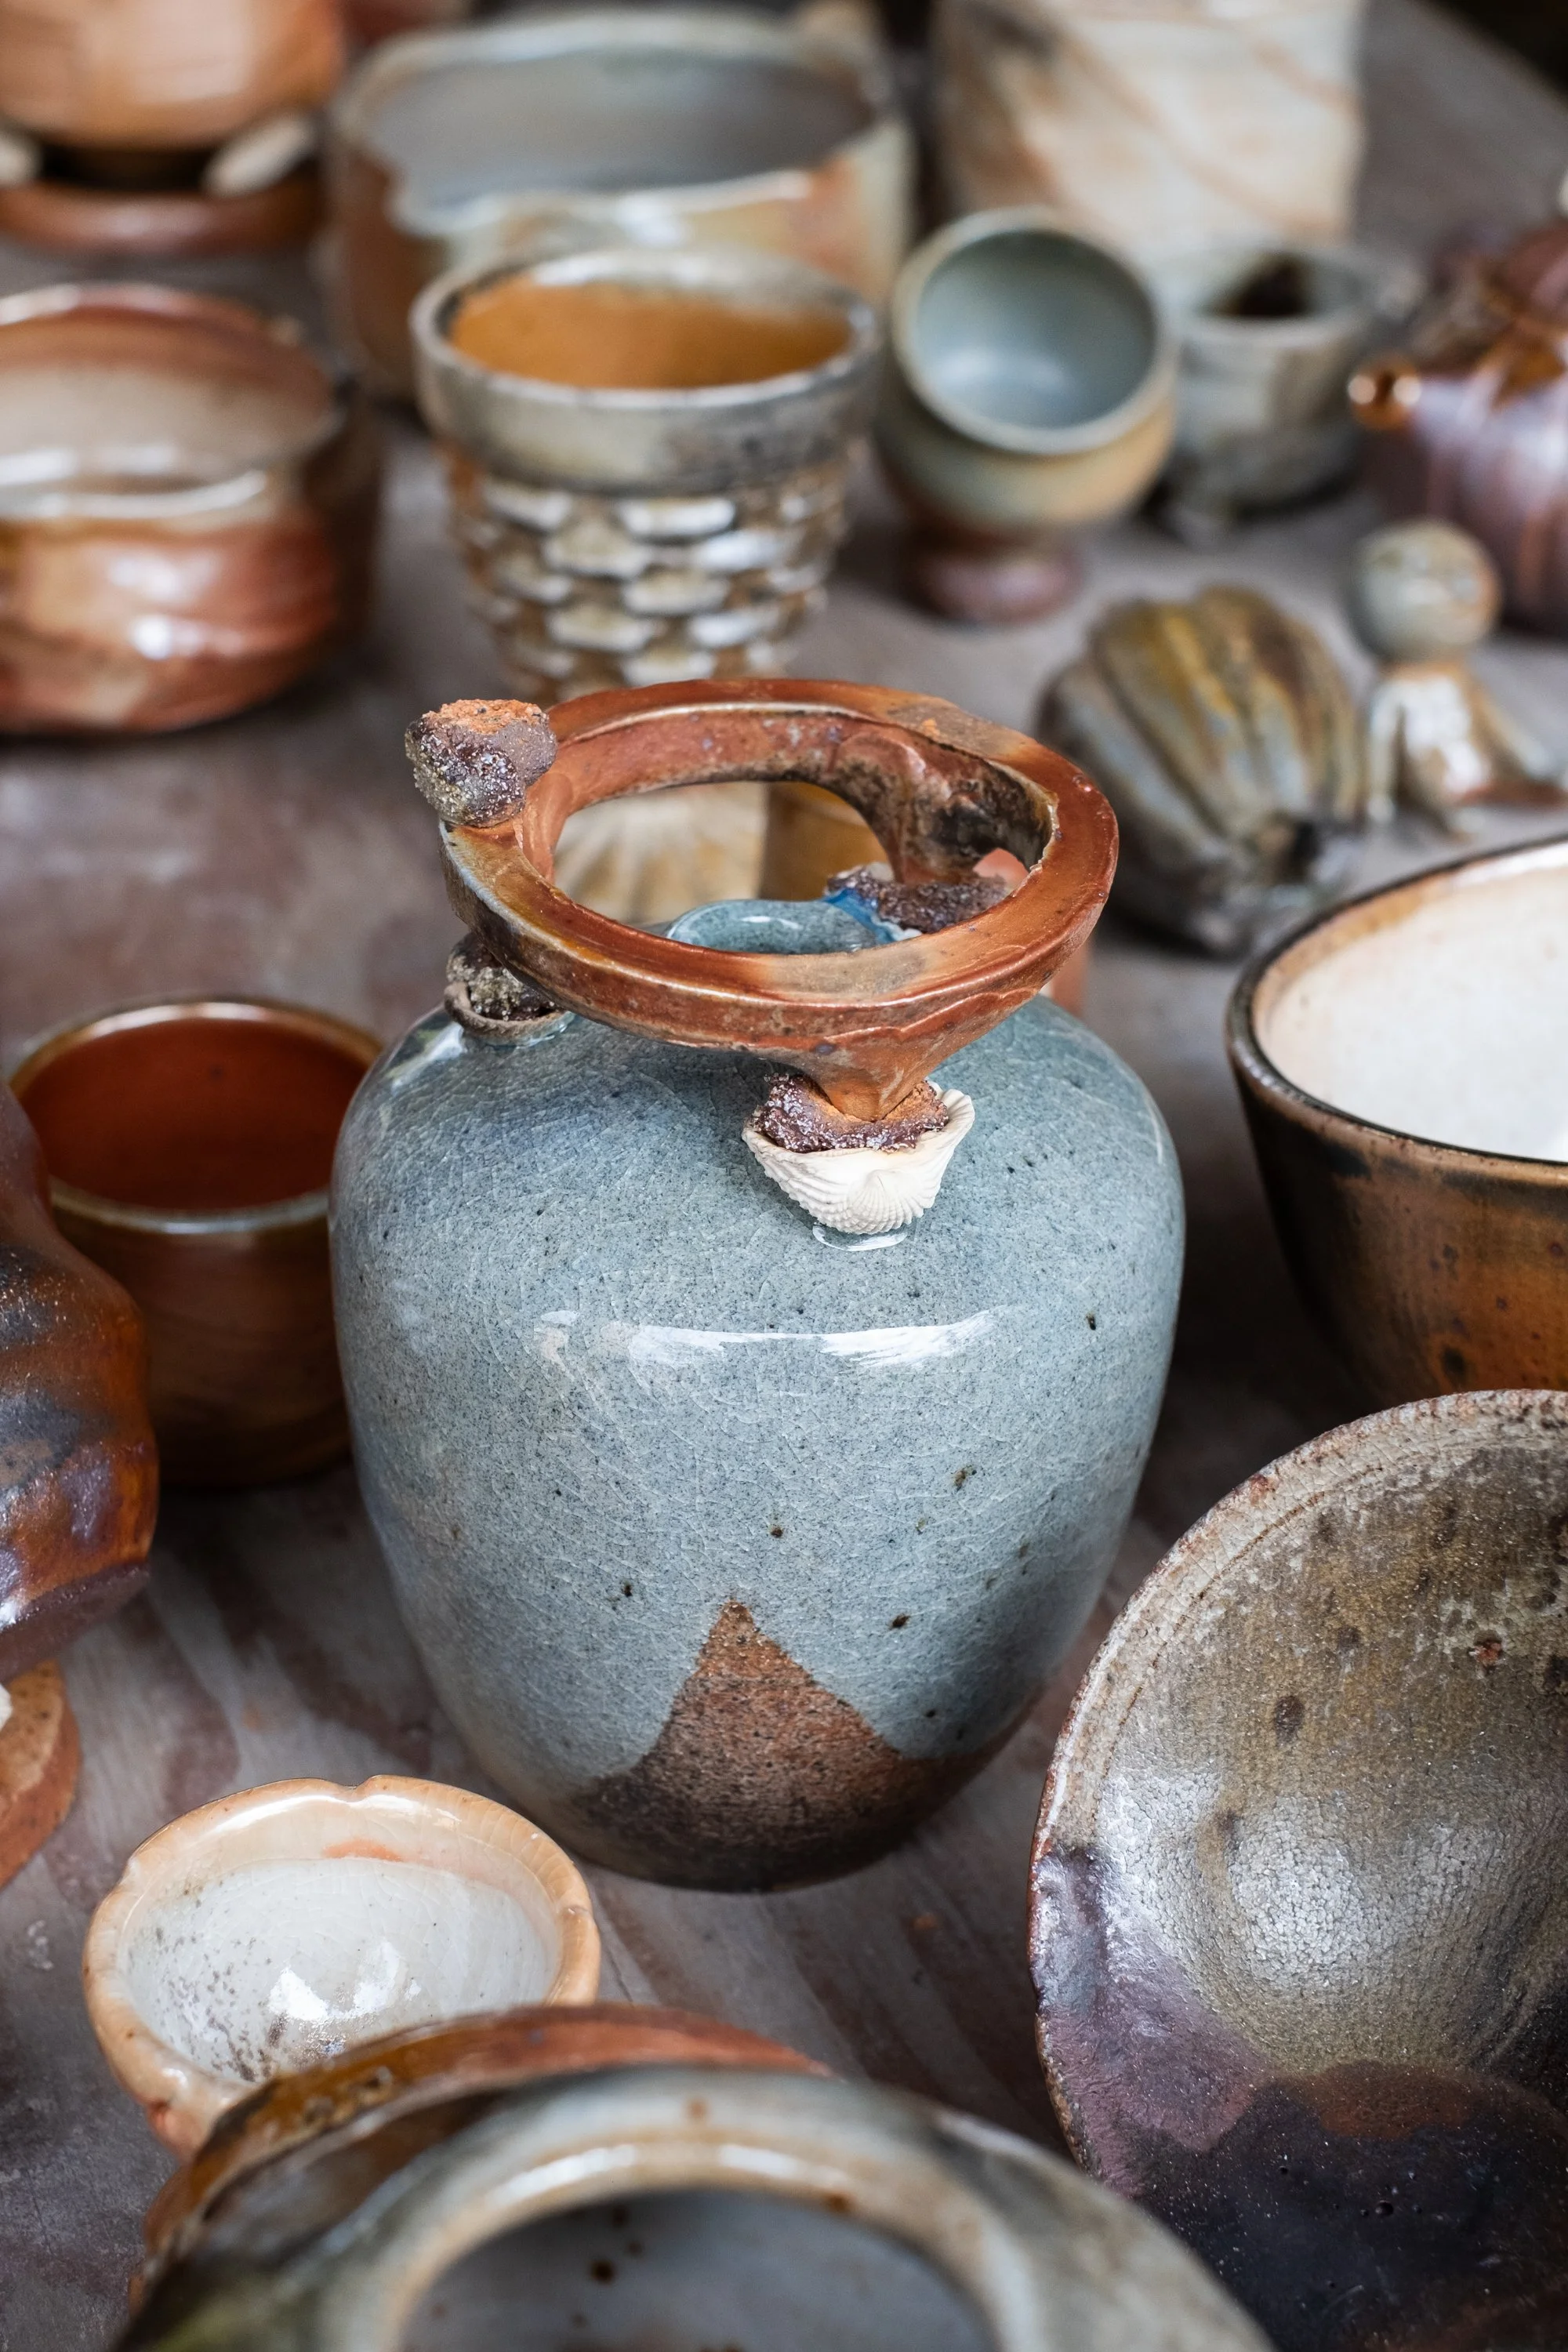
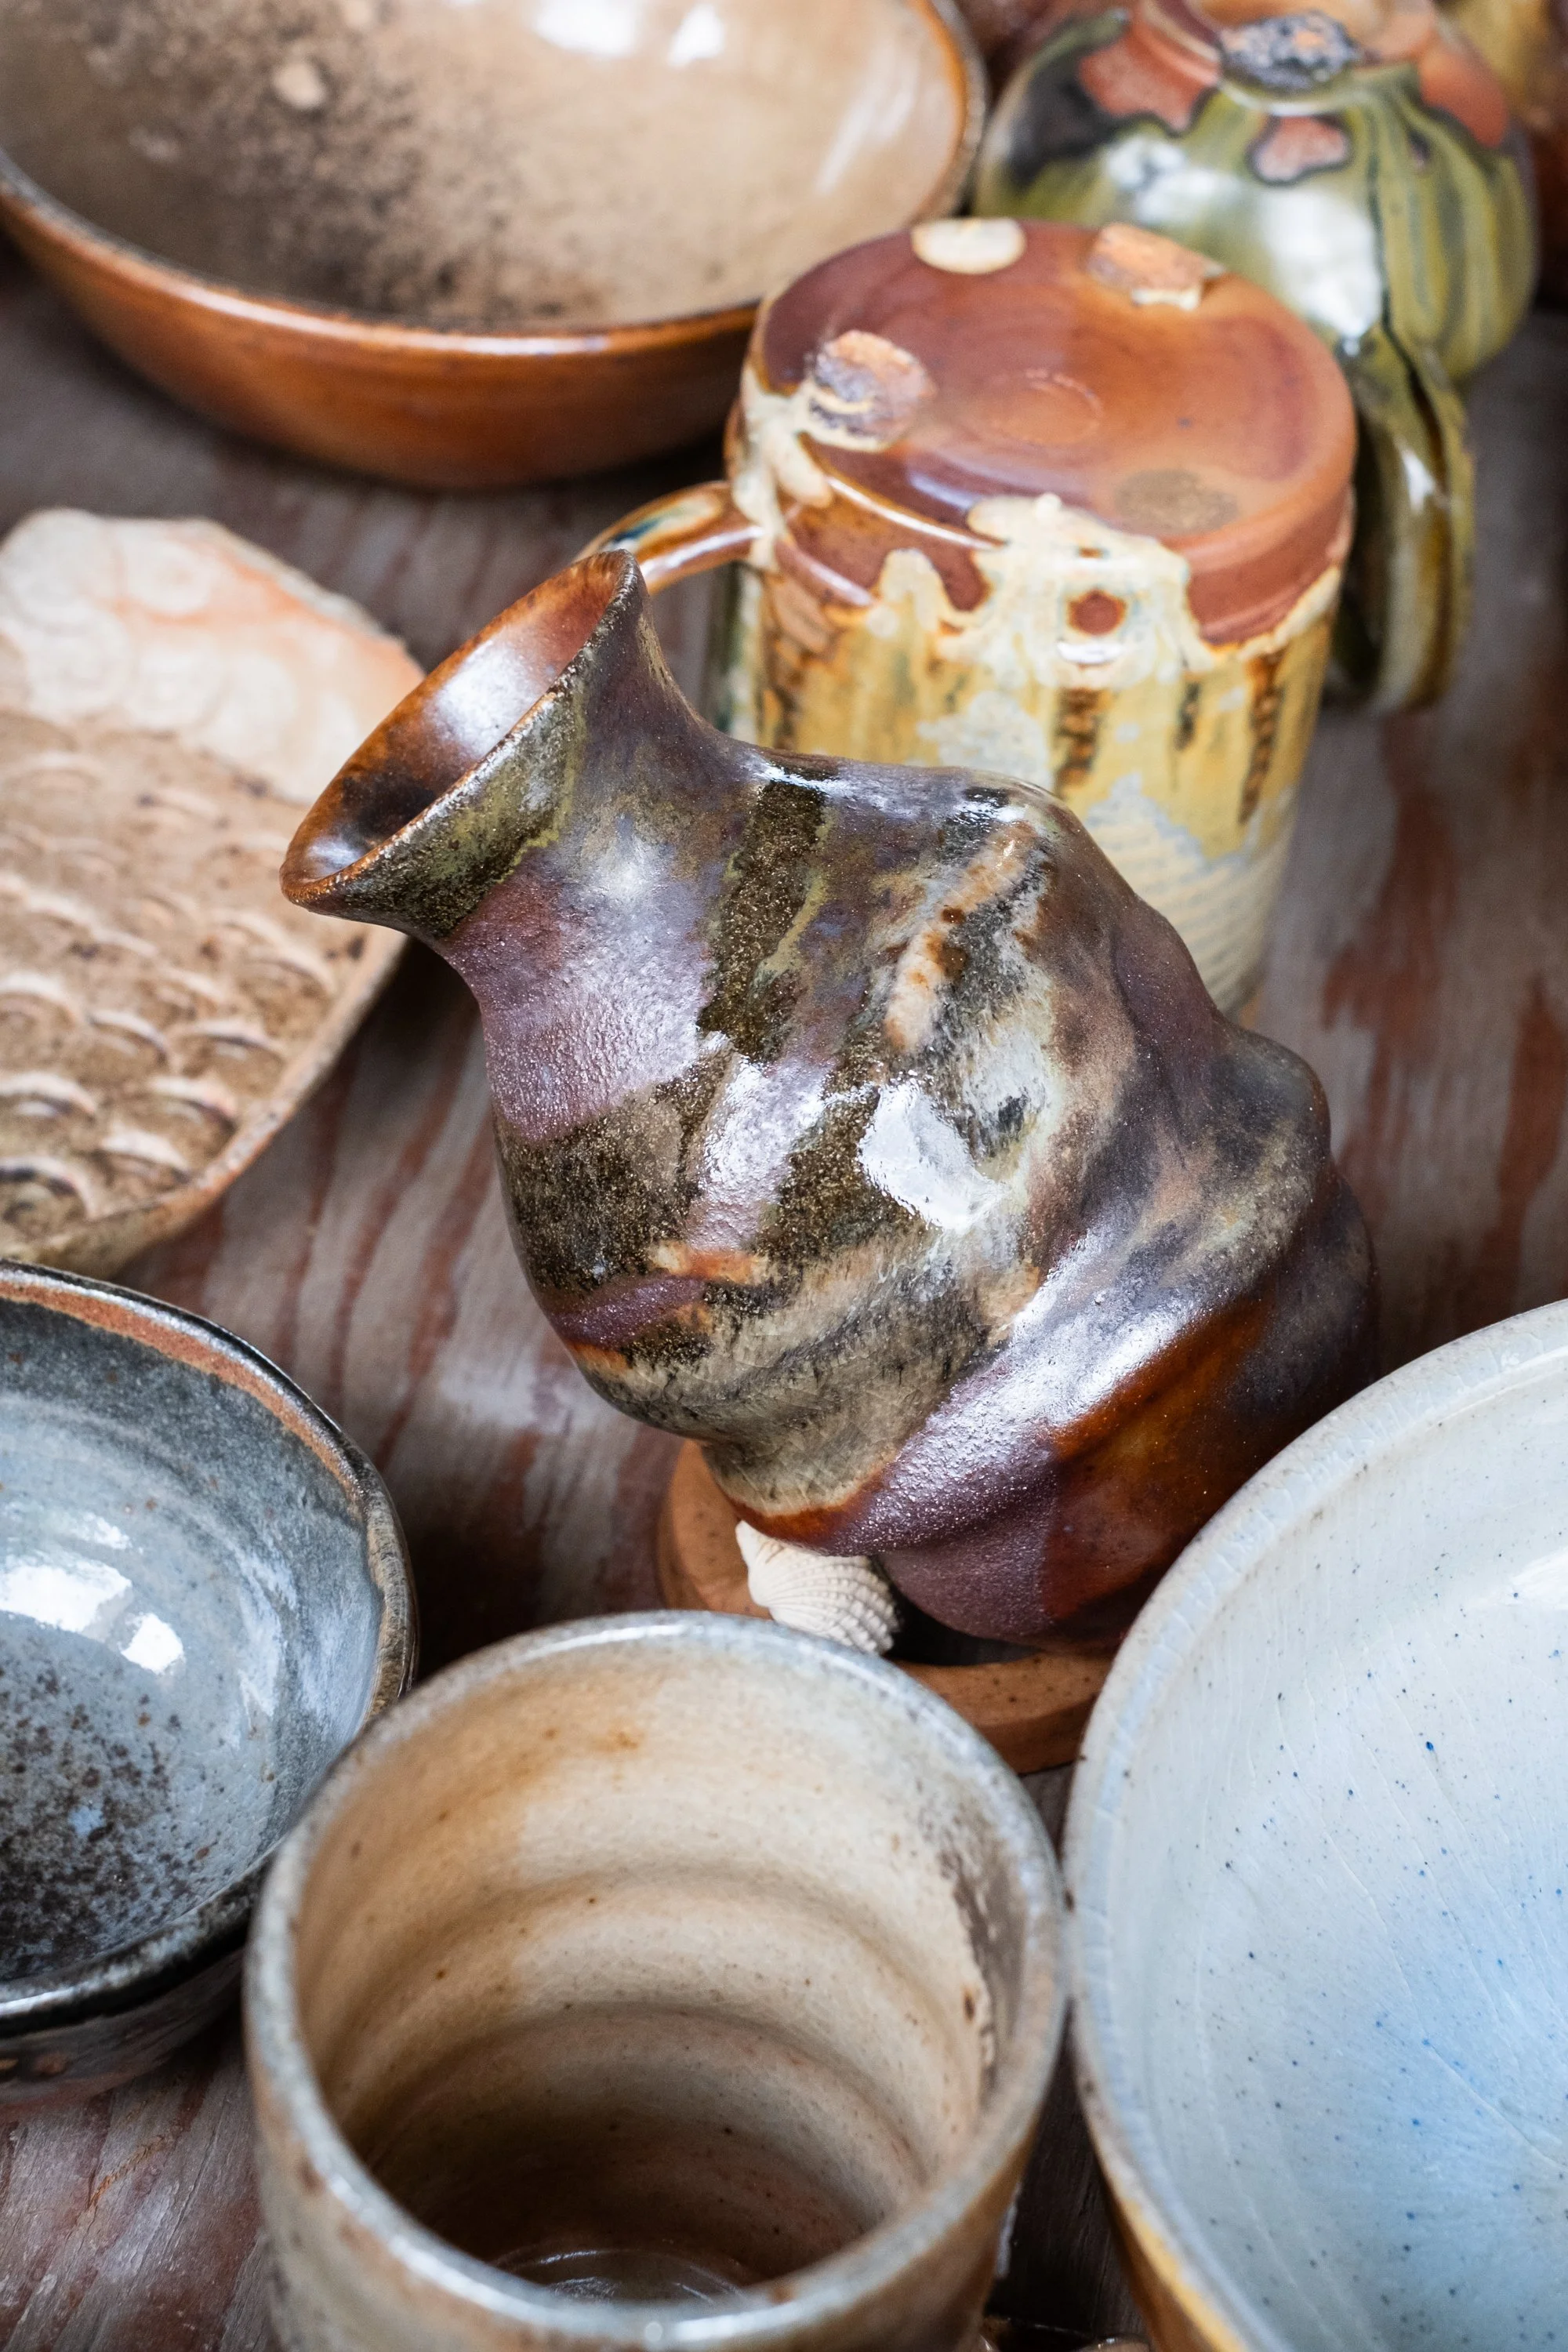
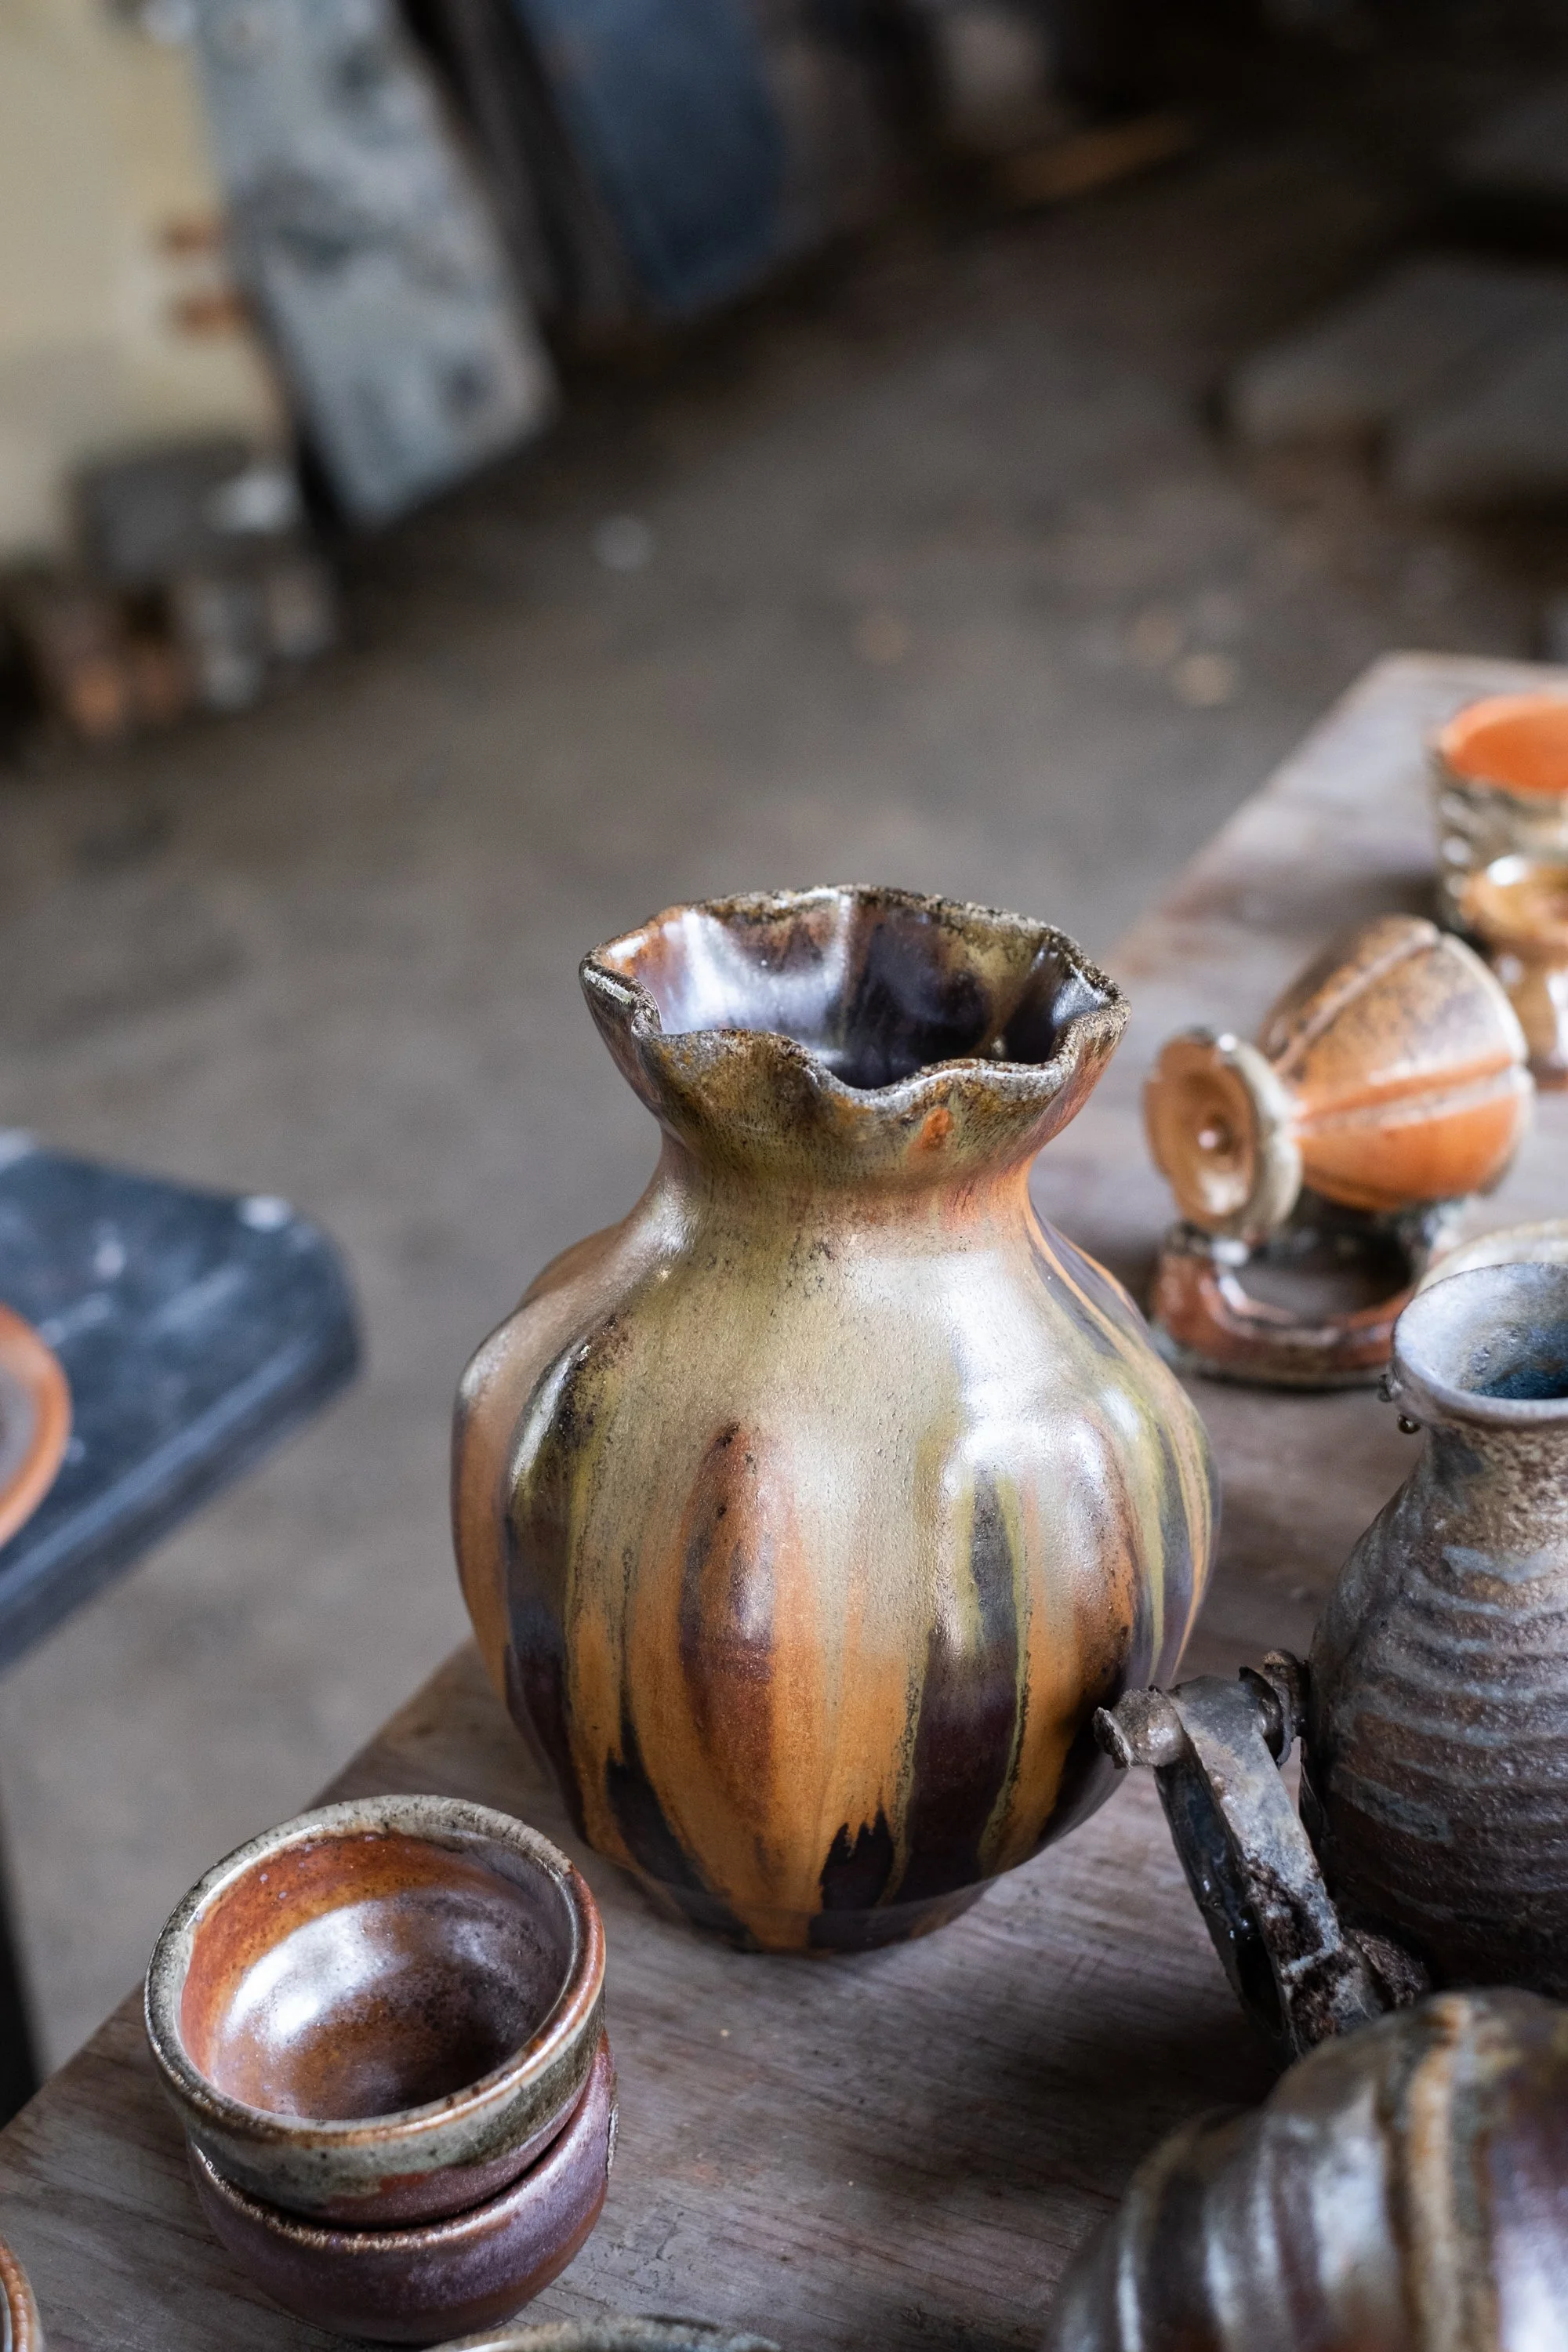
The top layer stood shining, each piece completely transformed since we had last seen them. New colors, surprising shine, melty ash, and bright glazes—everything looked so exciting.
We got to work with gloves, carefully unloading each piece and handing them down a line to a nearby table. Layer by layer, more treasures revealed themselves.
Not unexpectedly, a few pieces had some issues sticking to the kiln shelves or floor. A known risk when working with some of these ultra-runny glazes and adding ash. The studio assistants and Sophie carefully chiseled each piece until everything was set free.
After everything was unloaded, we all wandered around examining all the results. A few of my pieces still had seashells with trivets attached. Sophie told us that everything should go into a bucket of warm water, and we could leave them there for a couple days to let the seashells naturally dissolve. Trivets might release themselves at that point, and I could start tidying up rough edges with a dremel after that.
I packed up all my items back into my two carry-on bags and said thank you and goodbye. Before I knew it, I was flying back to Los Angeles and unpacking everything back at home.

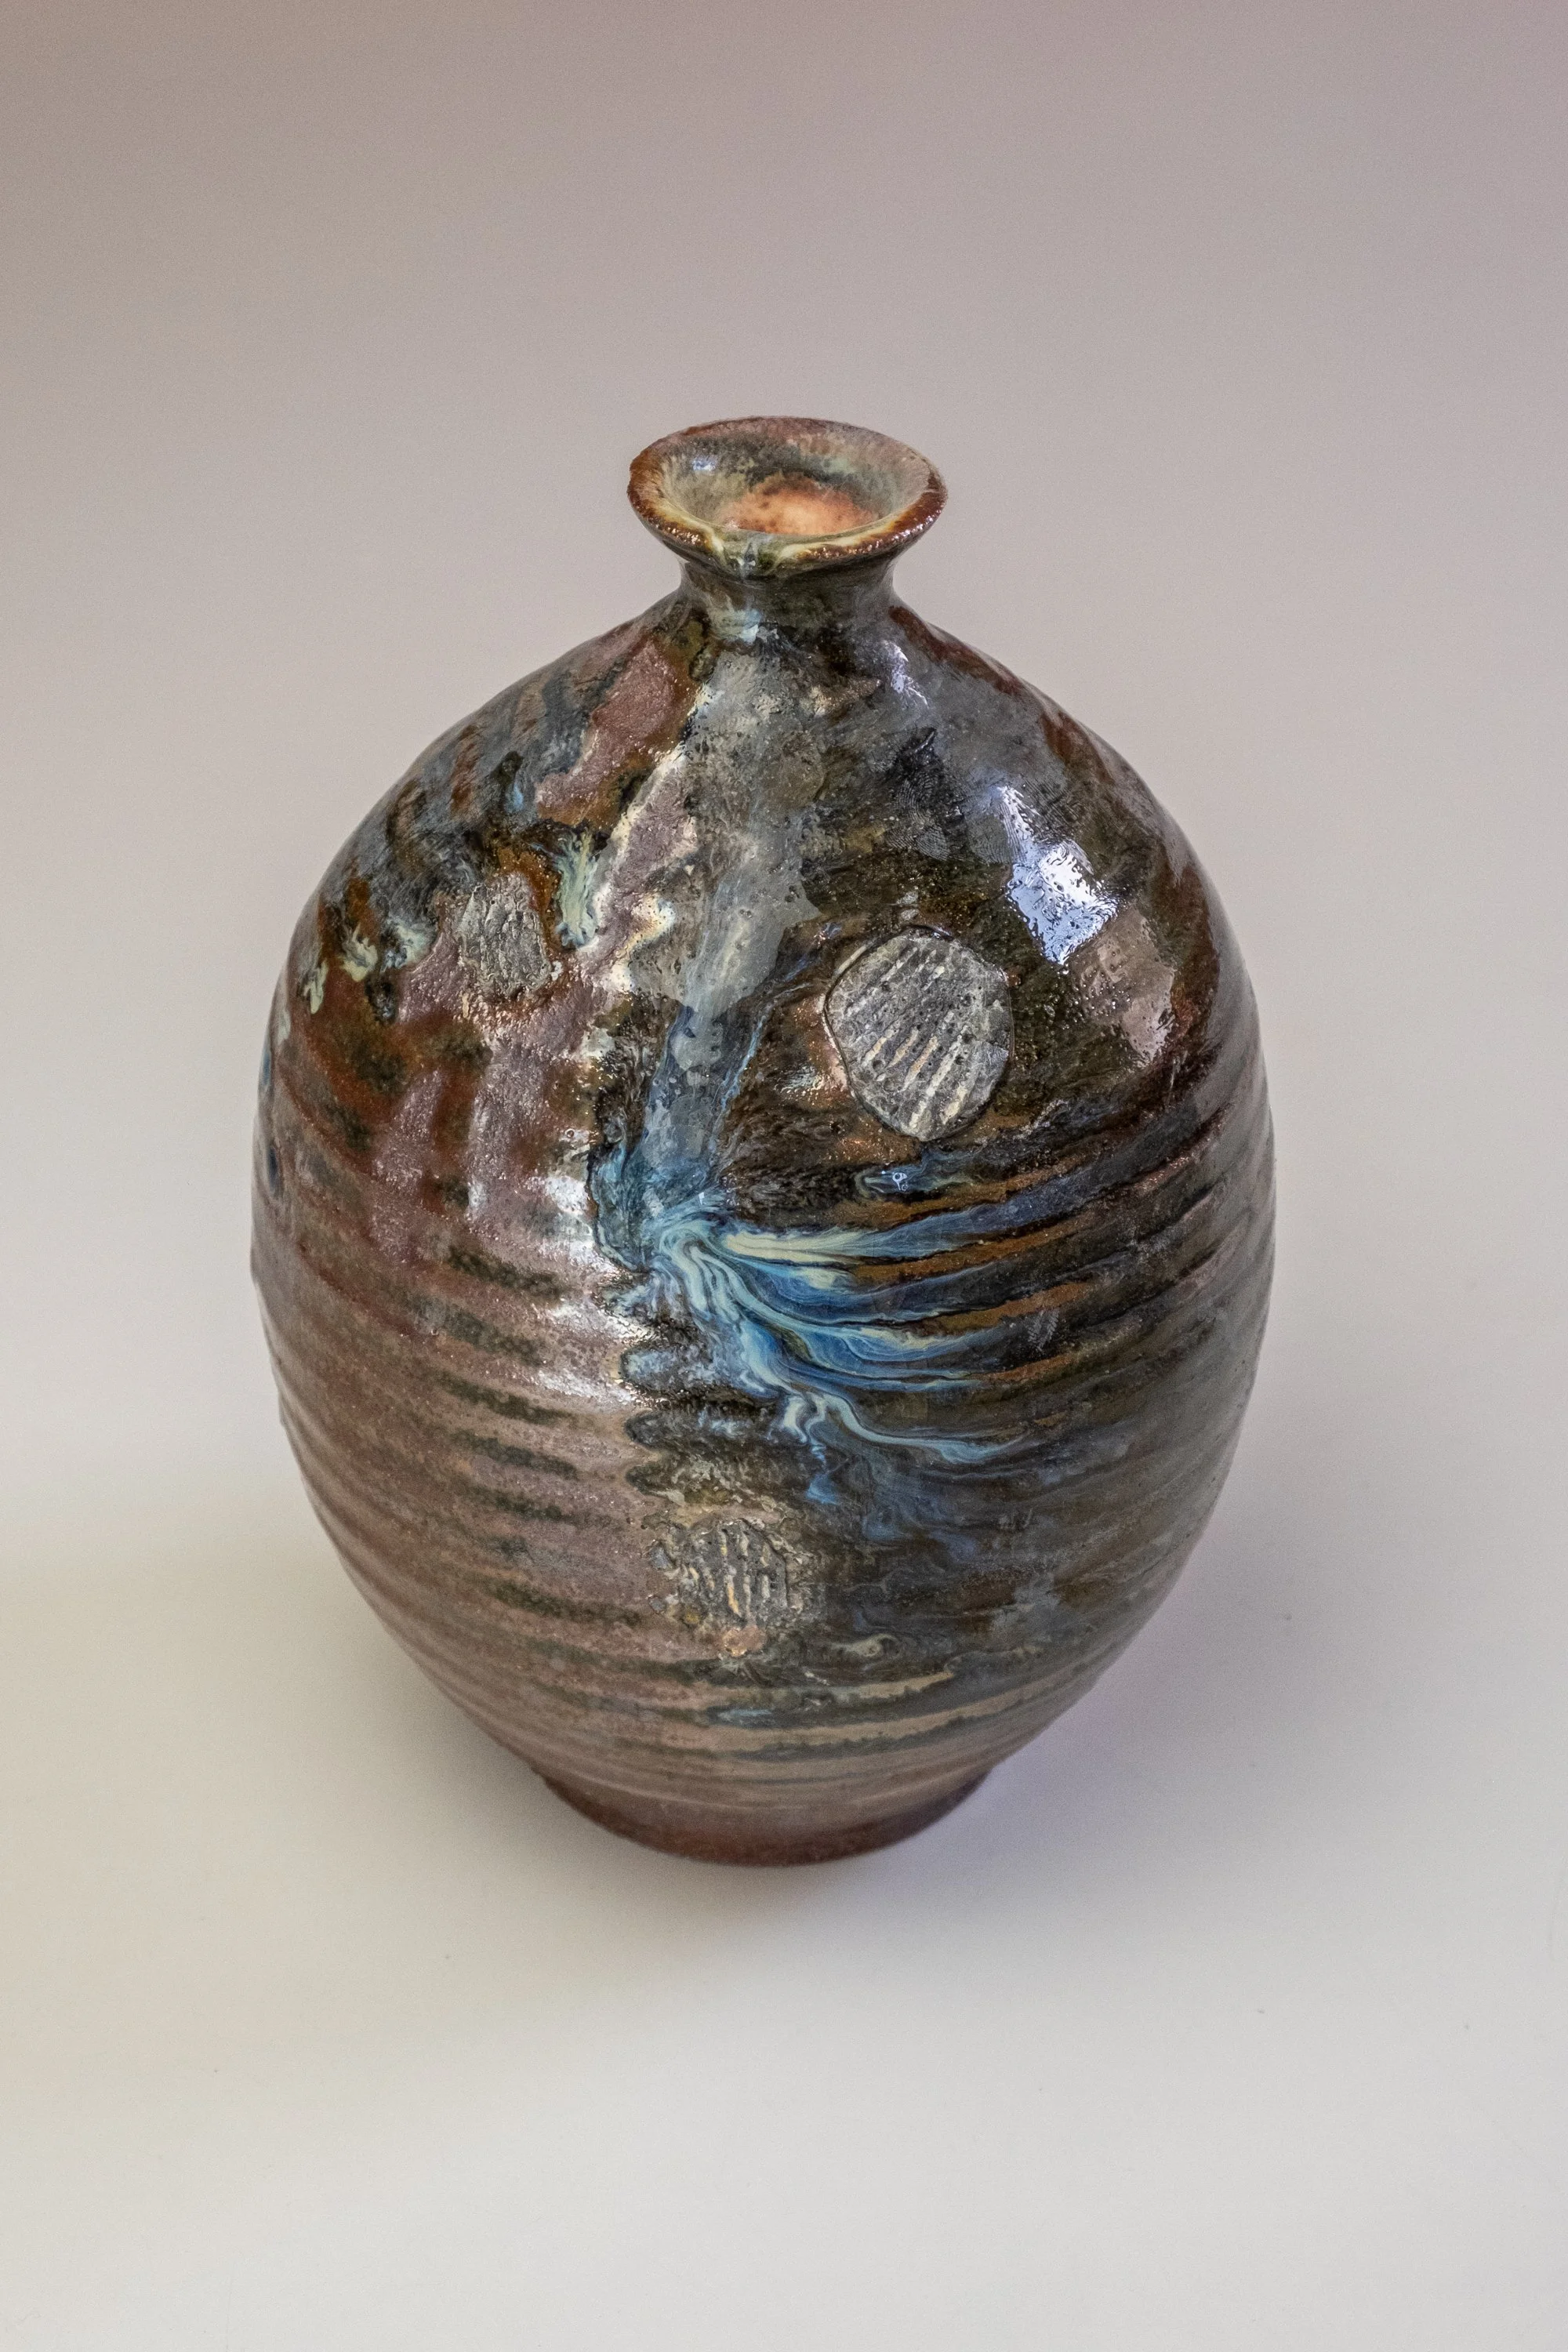
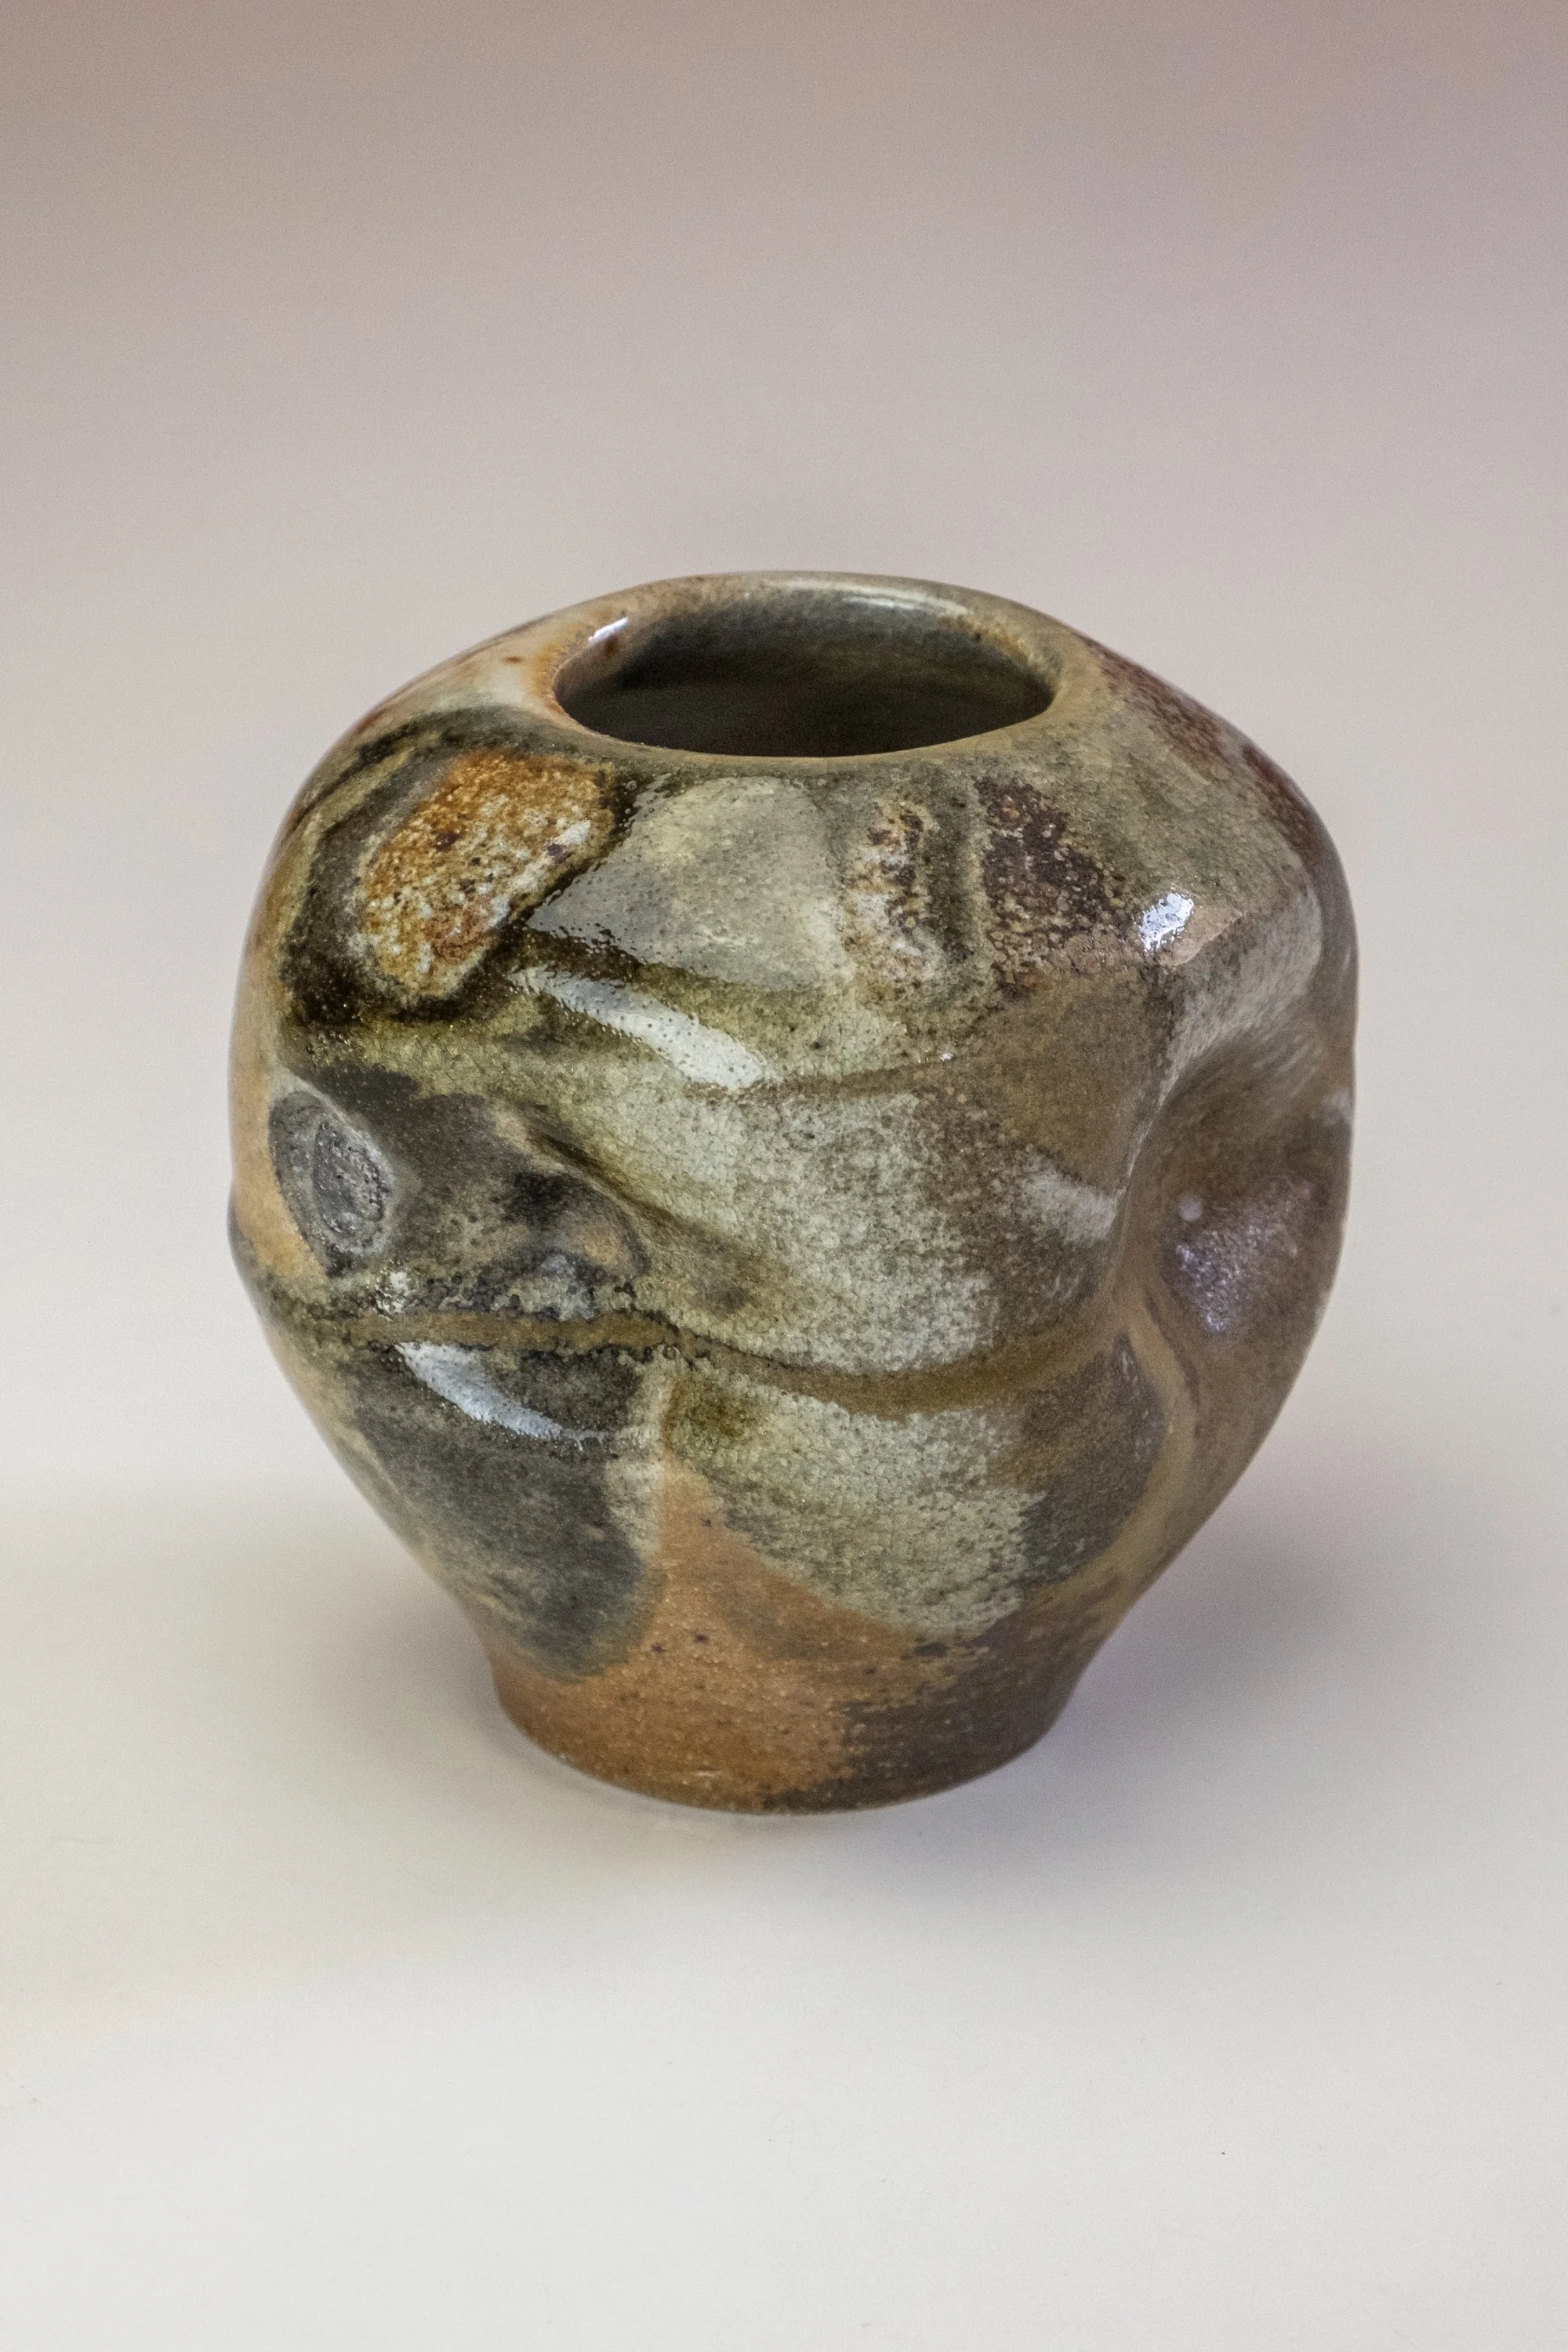
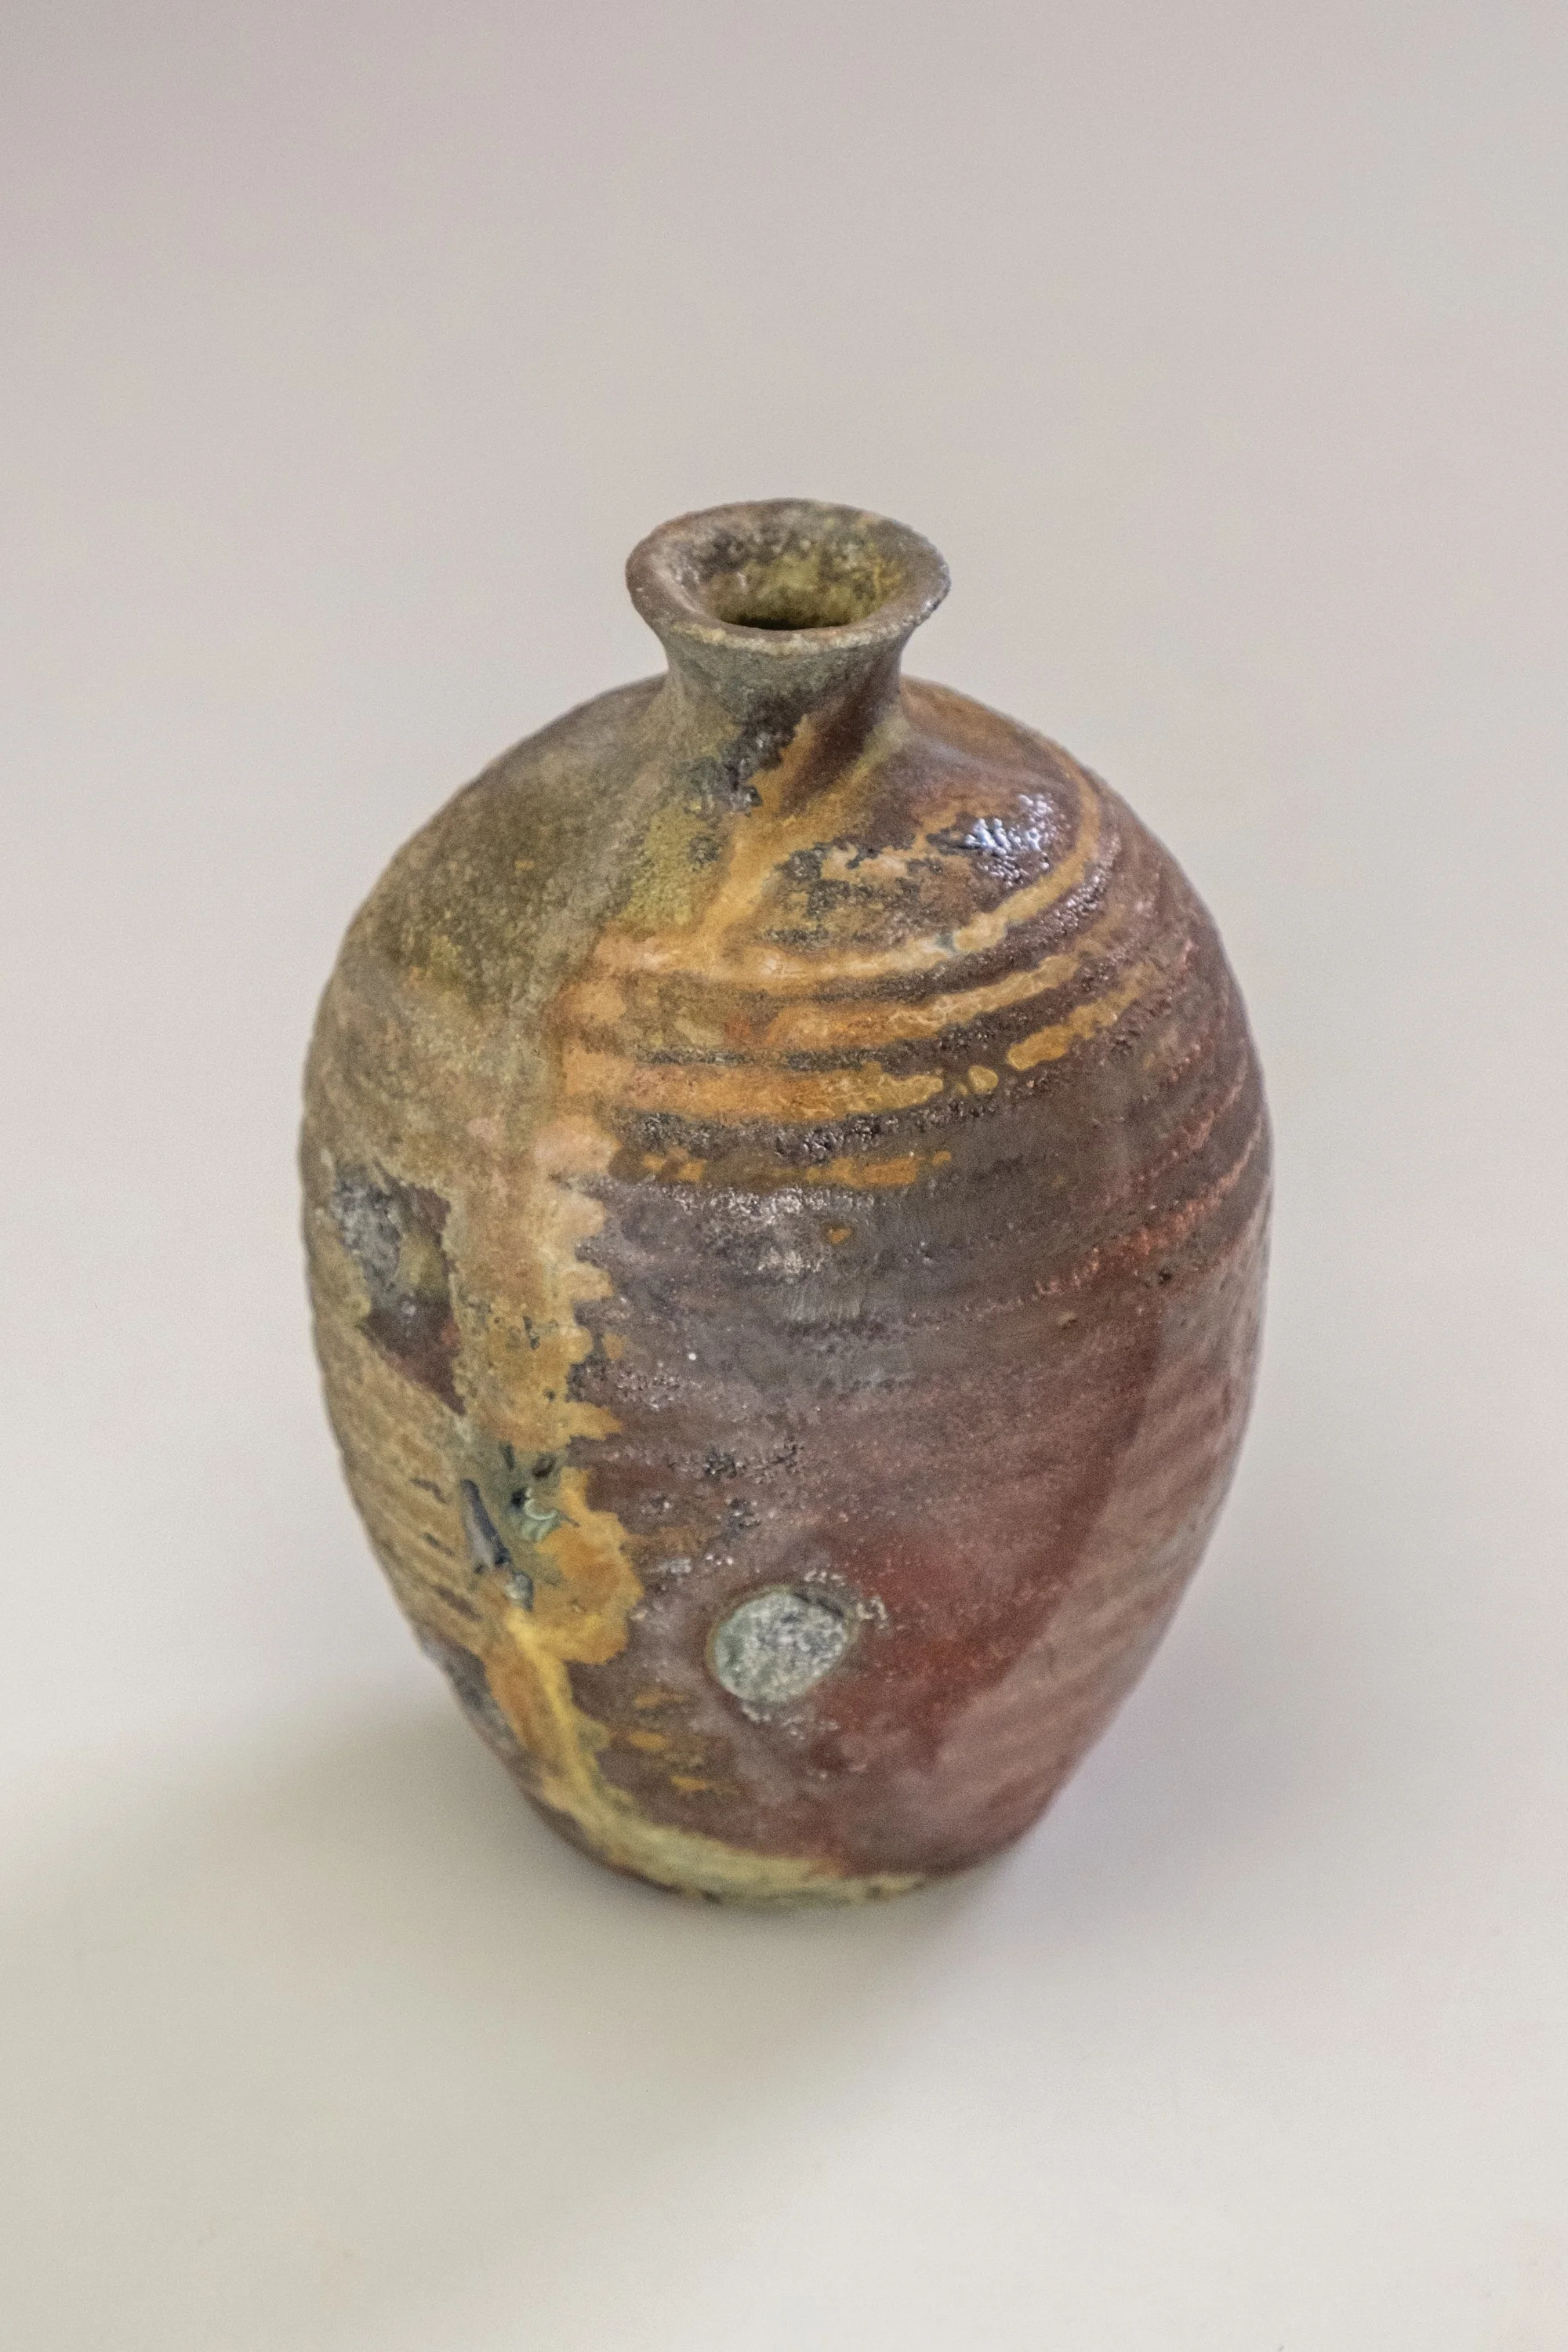
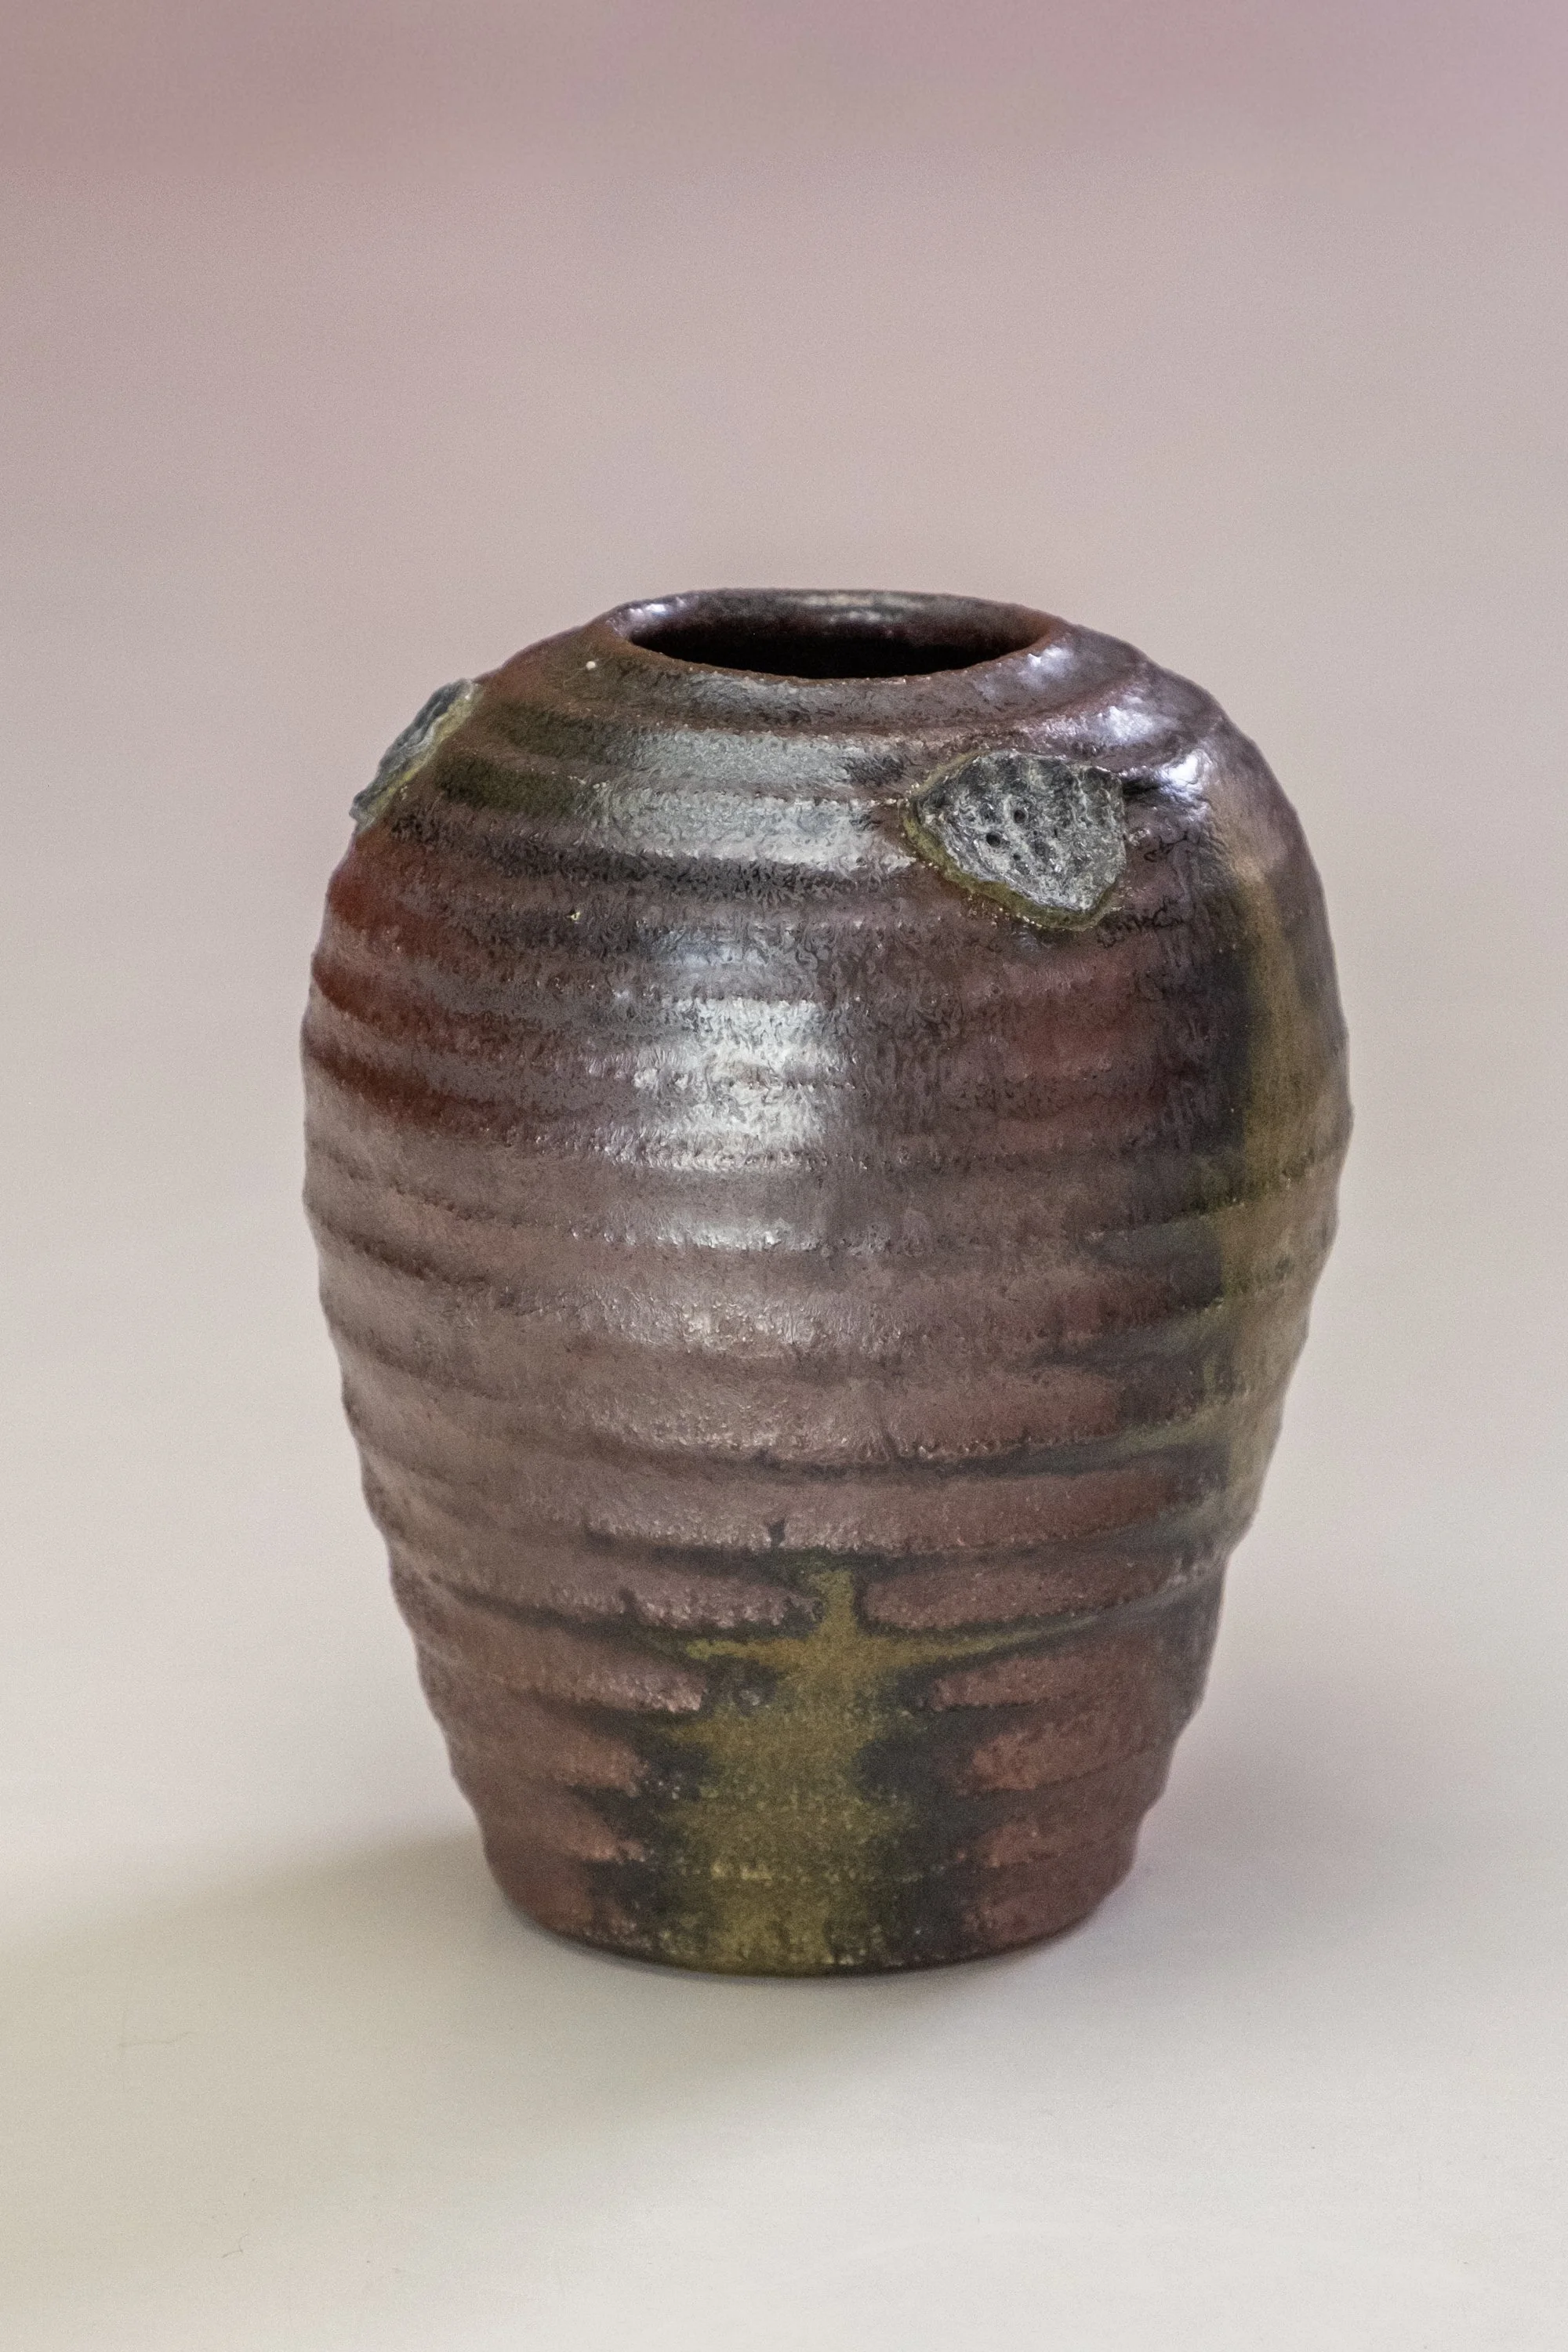
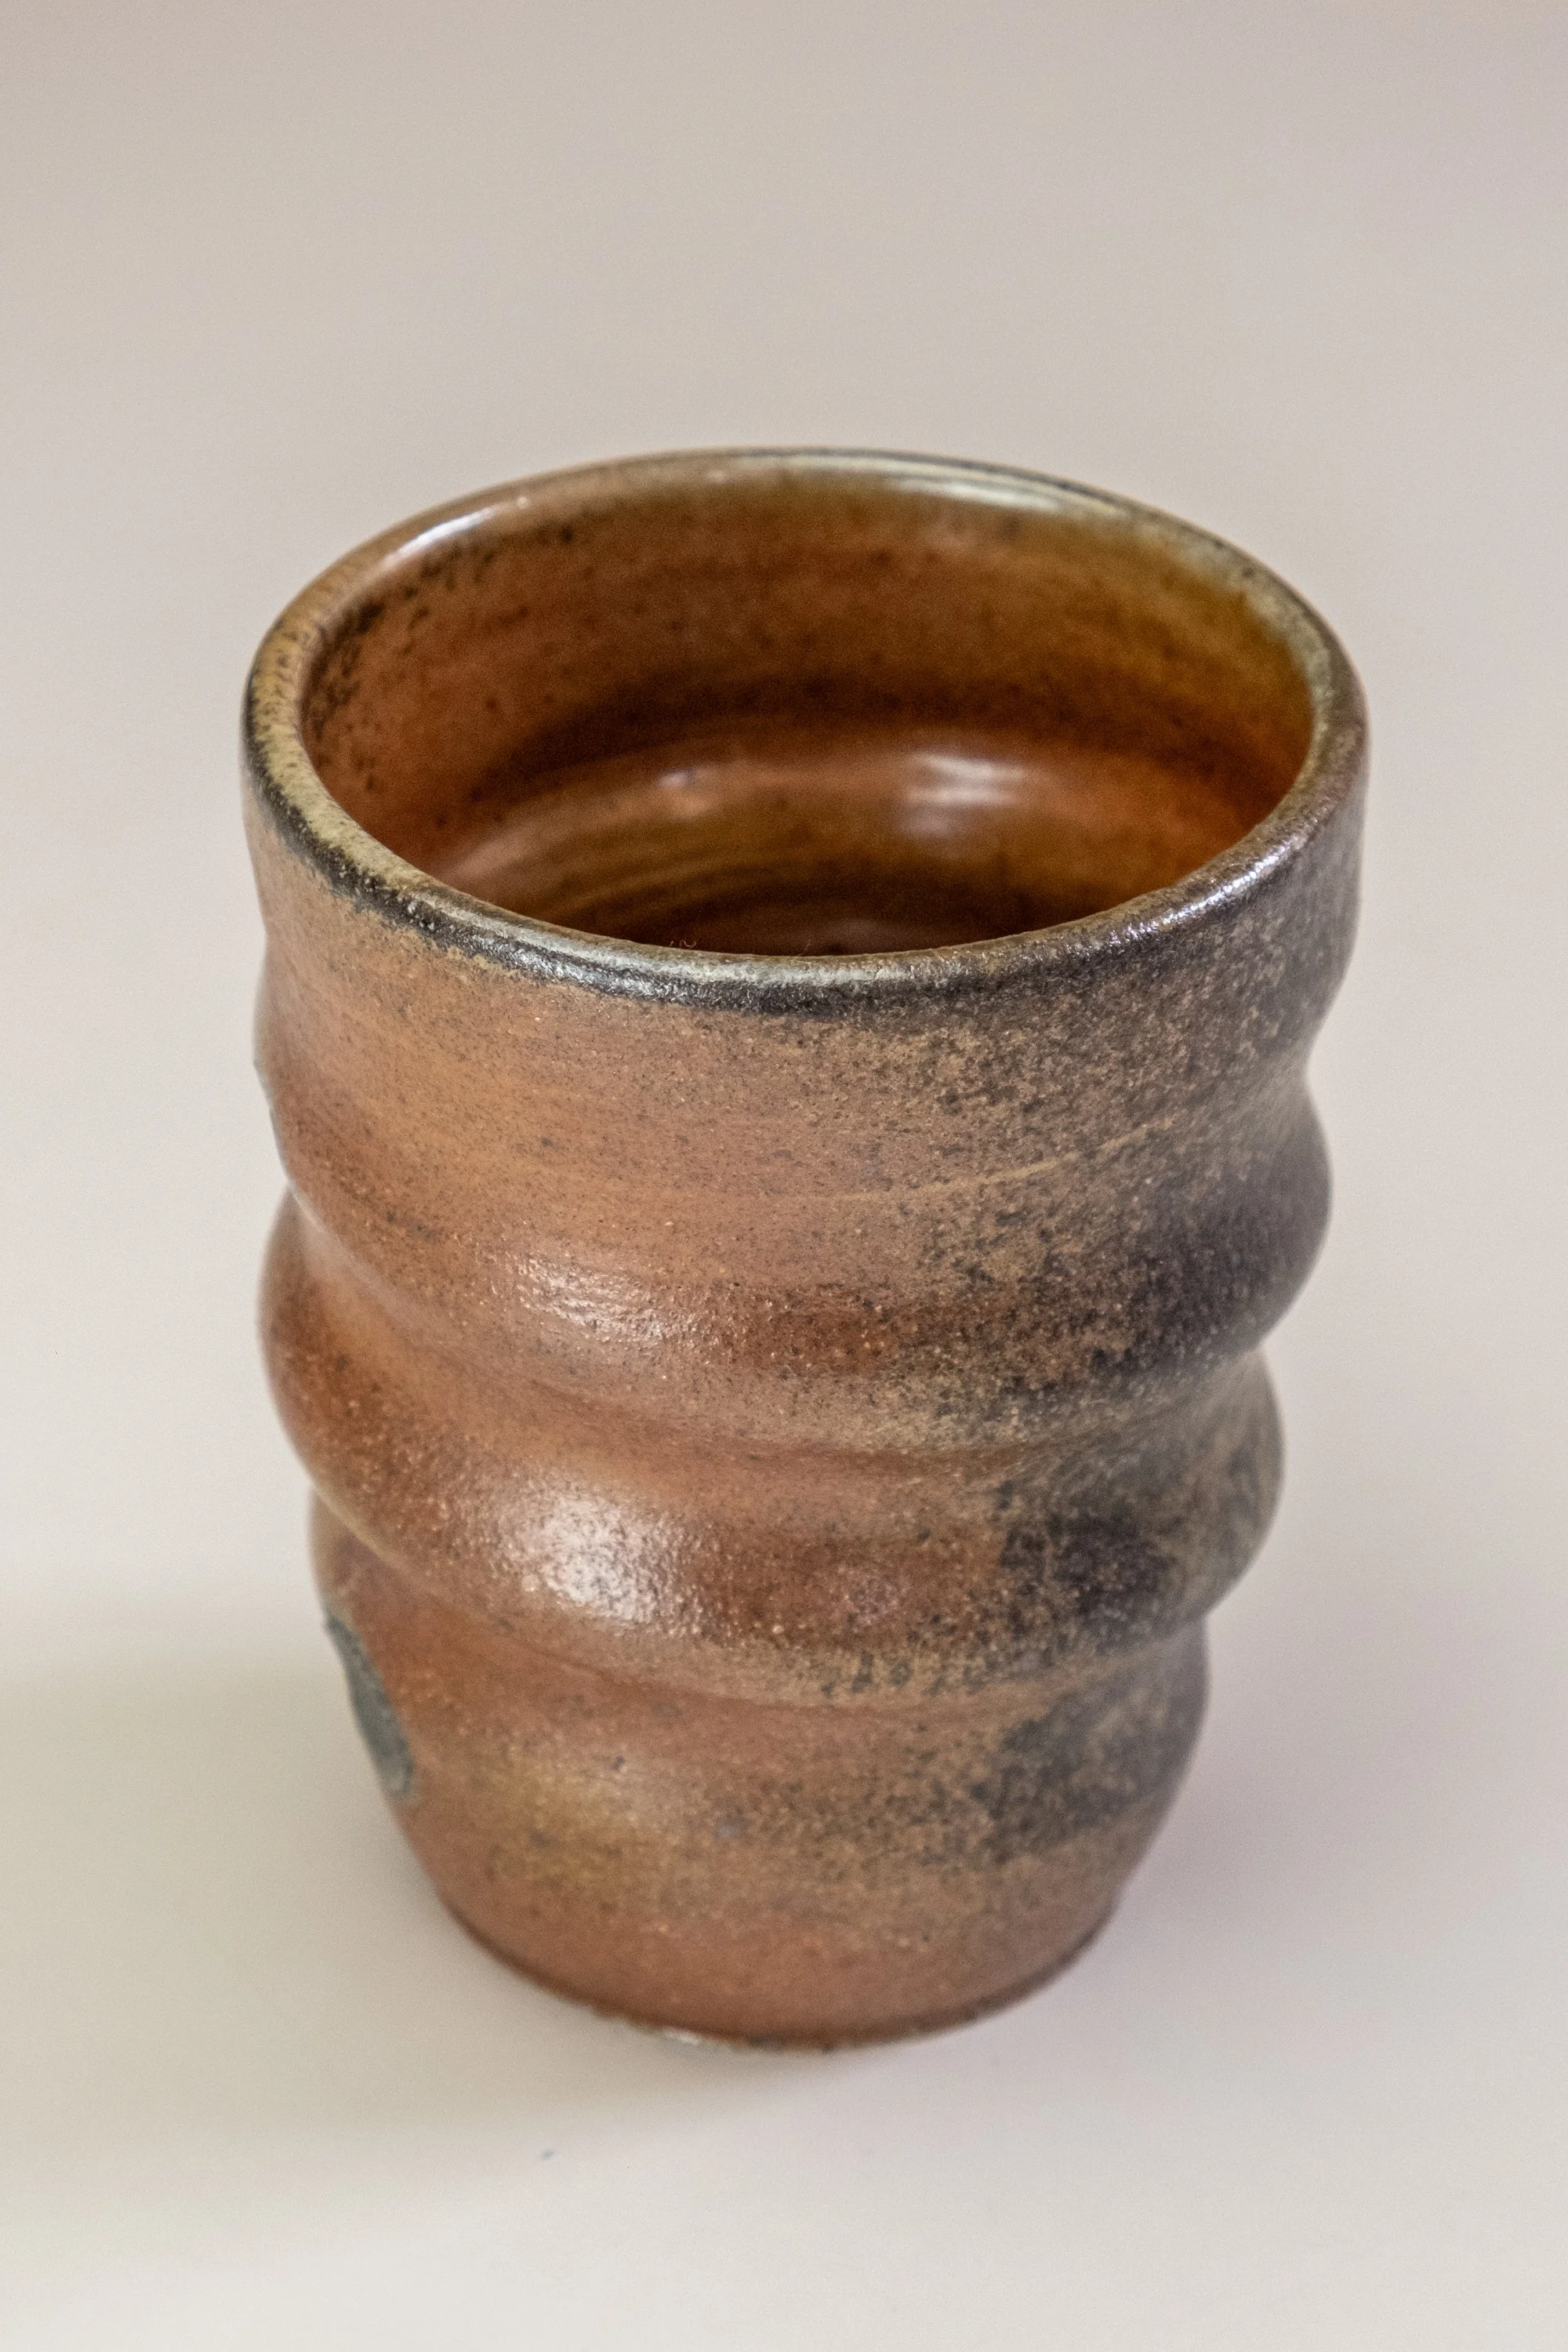
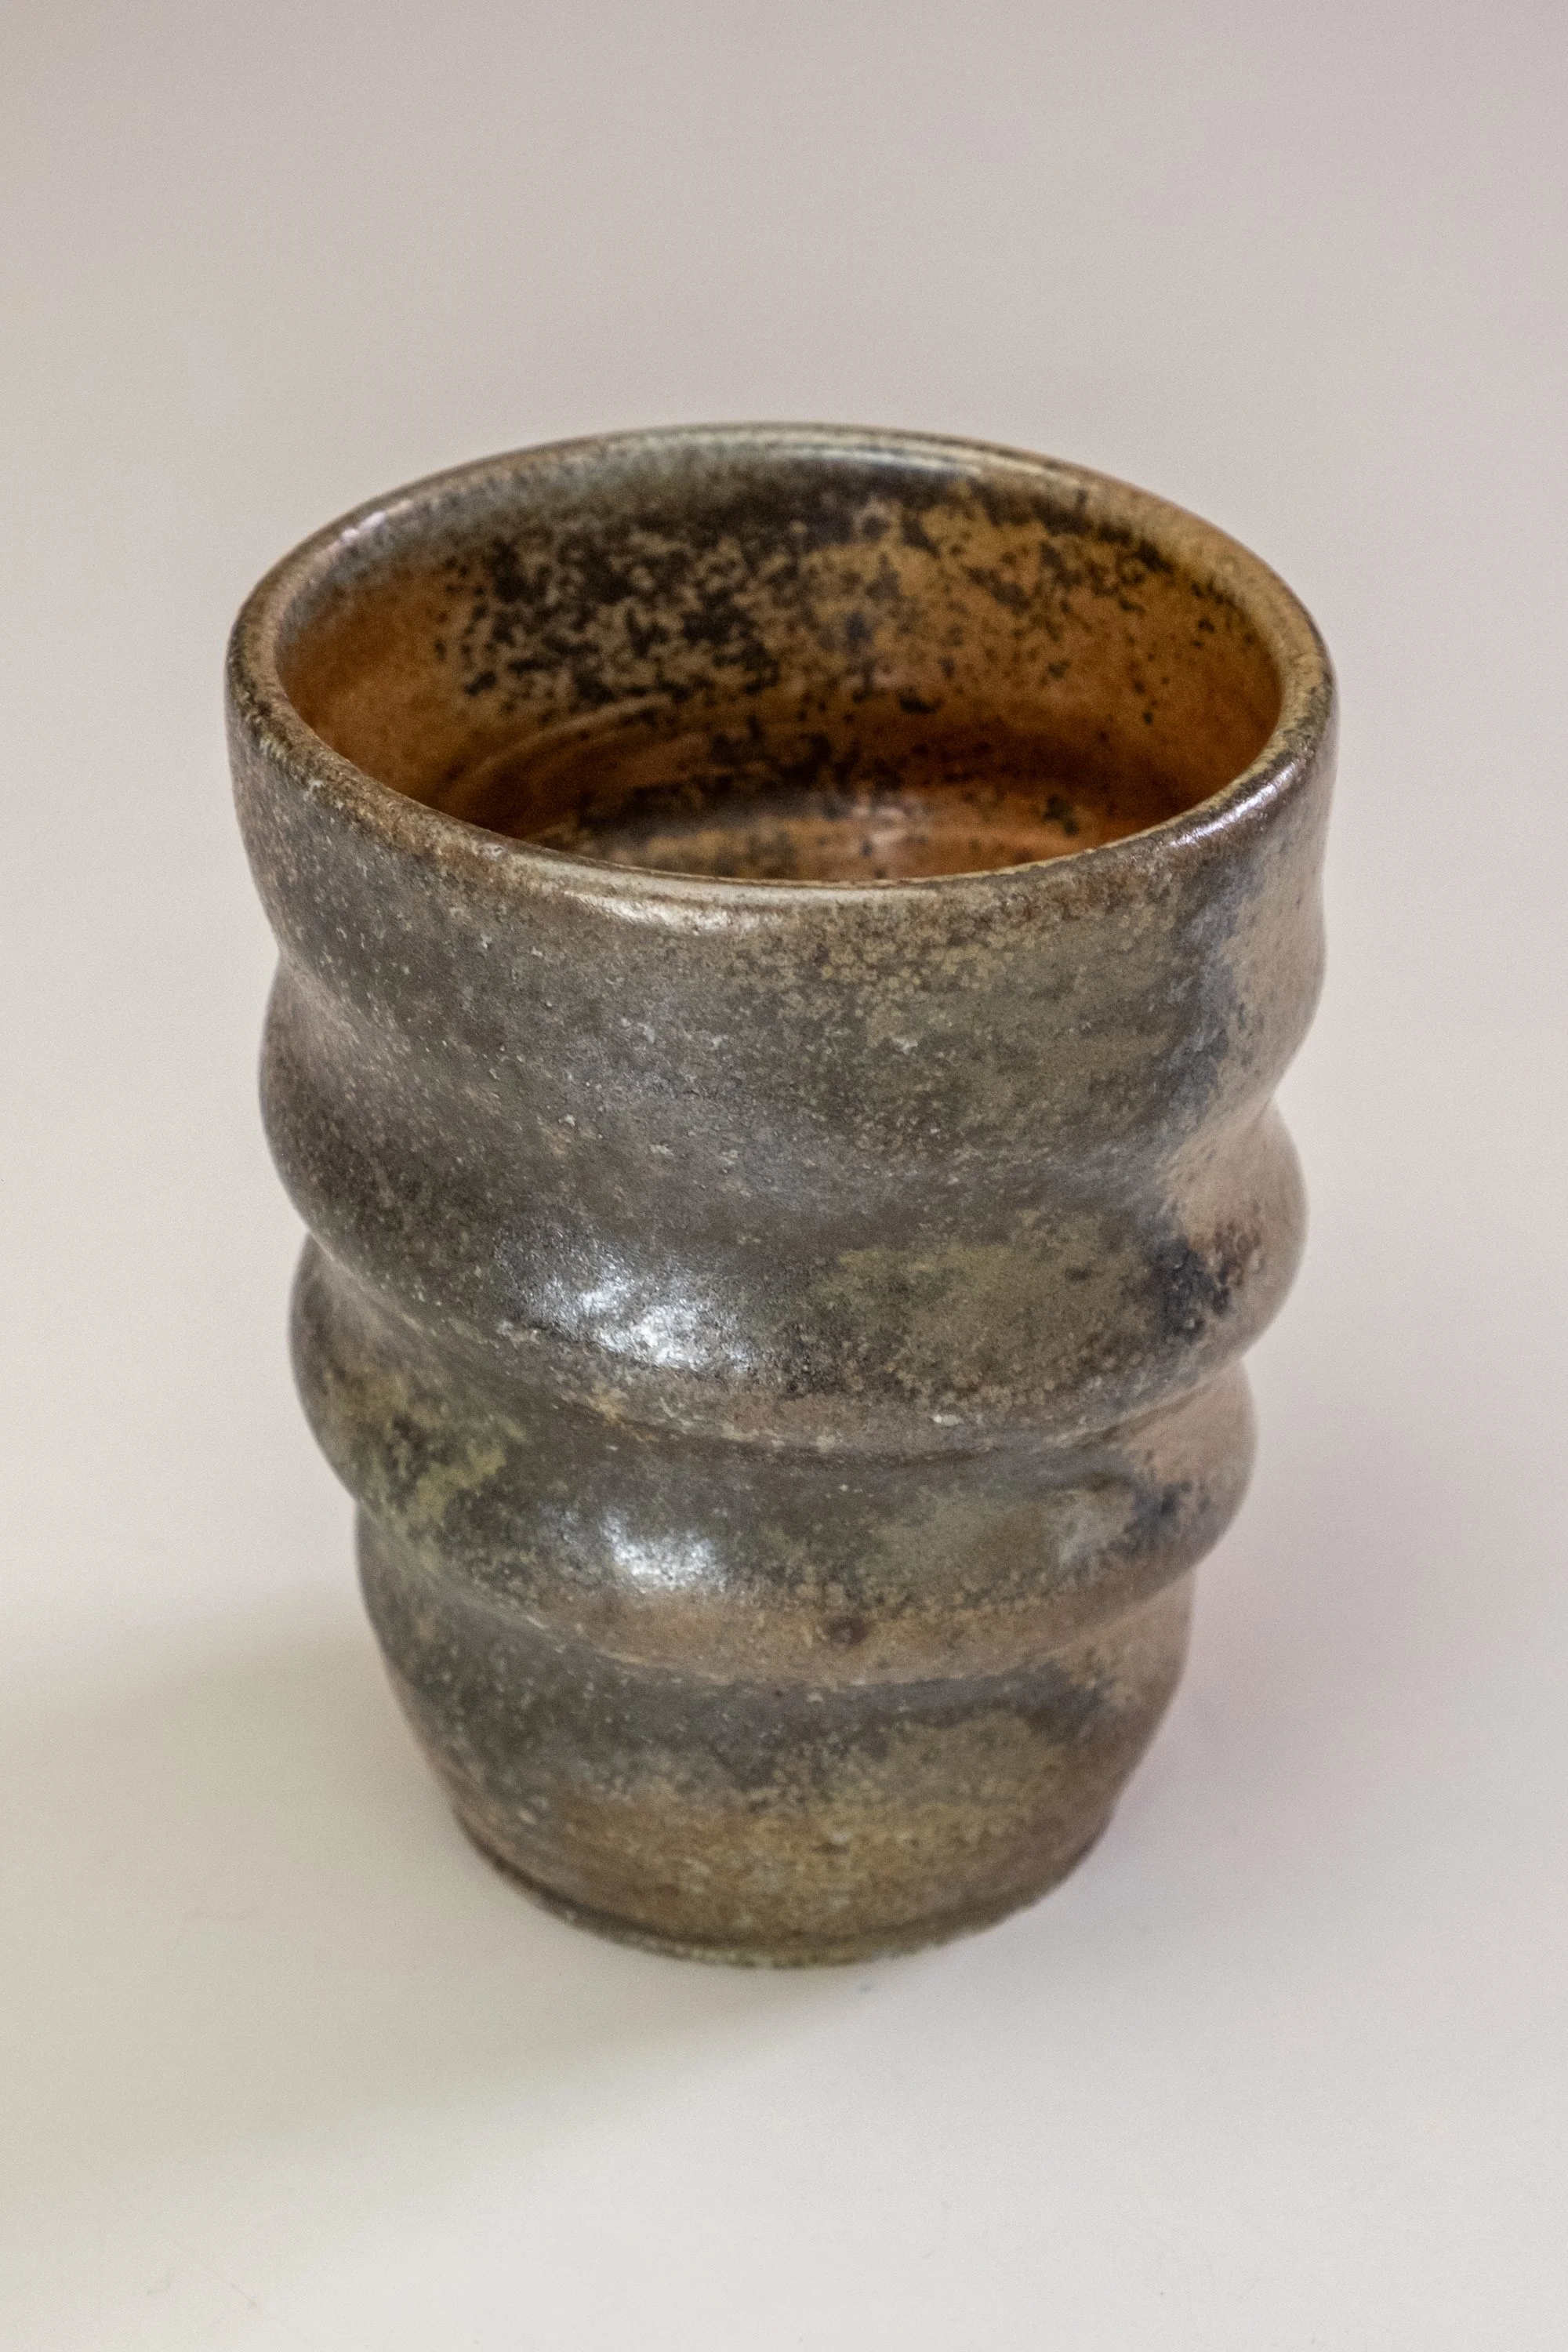
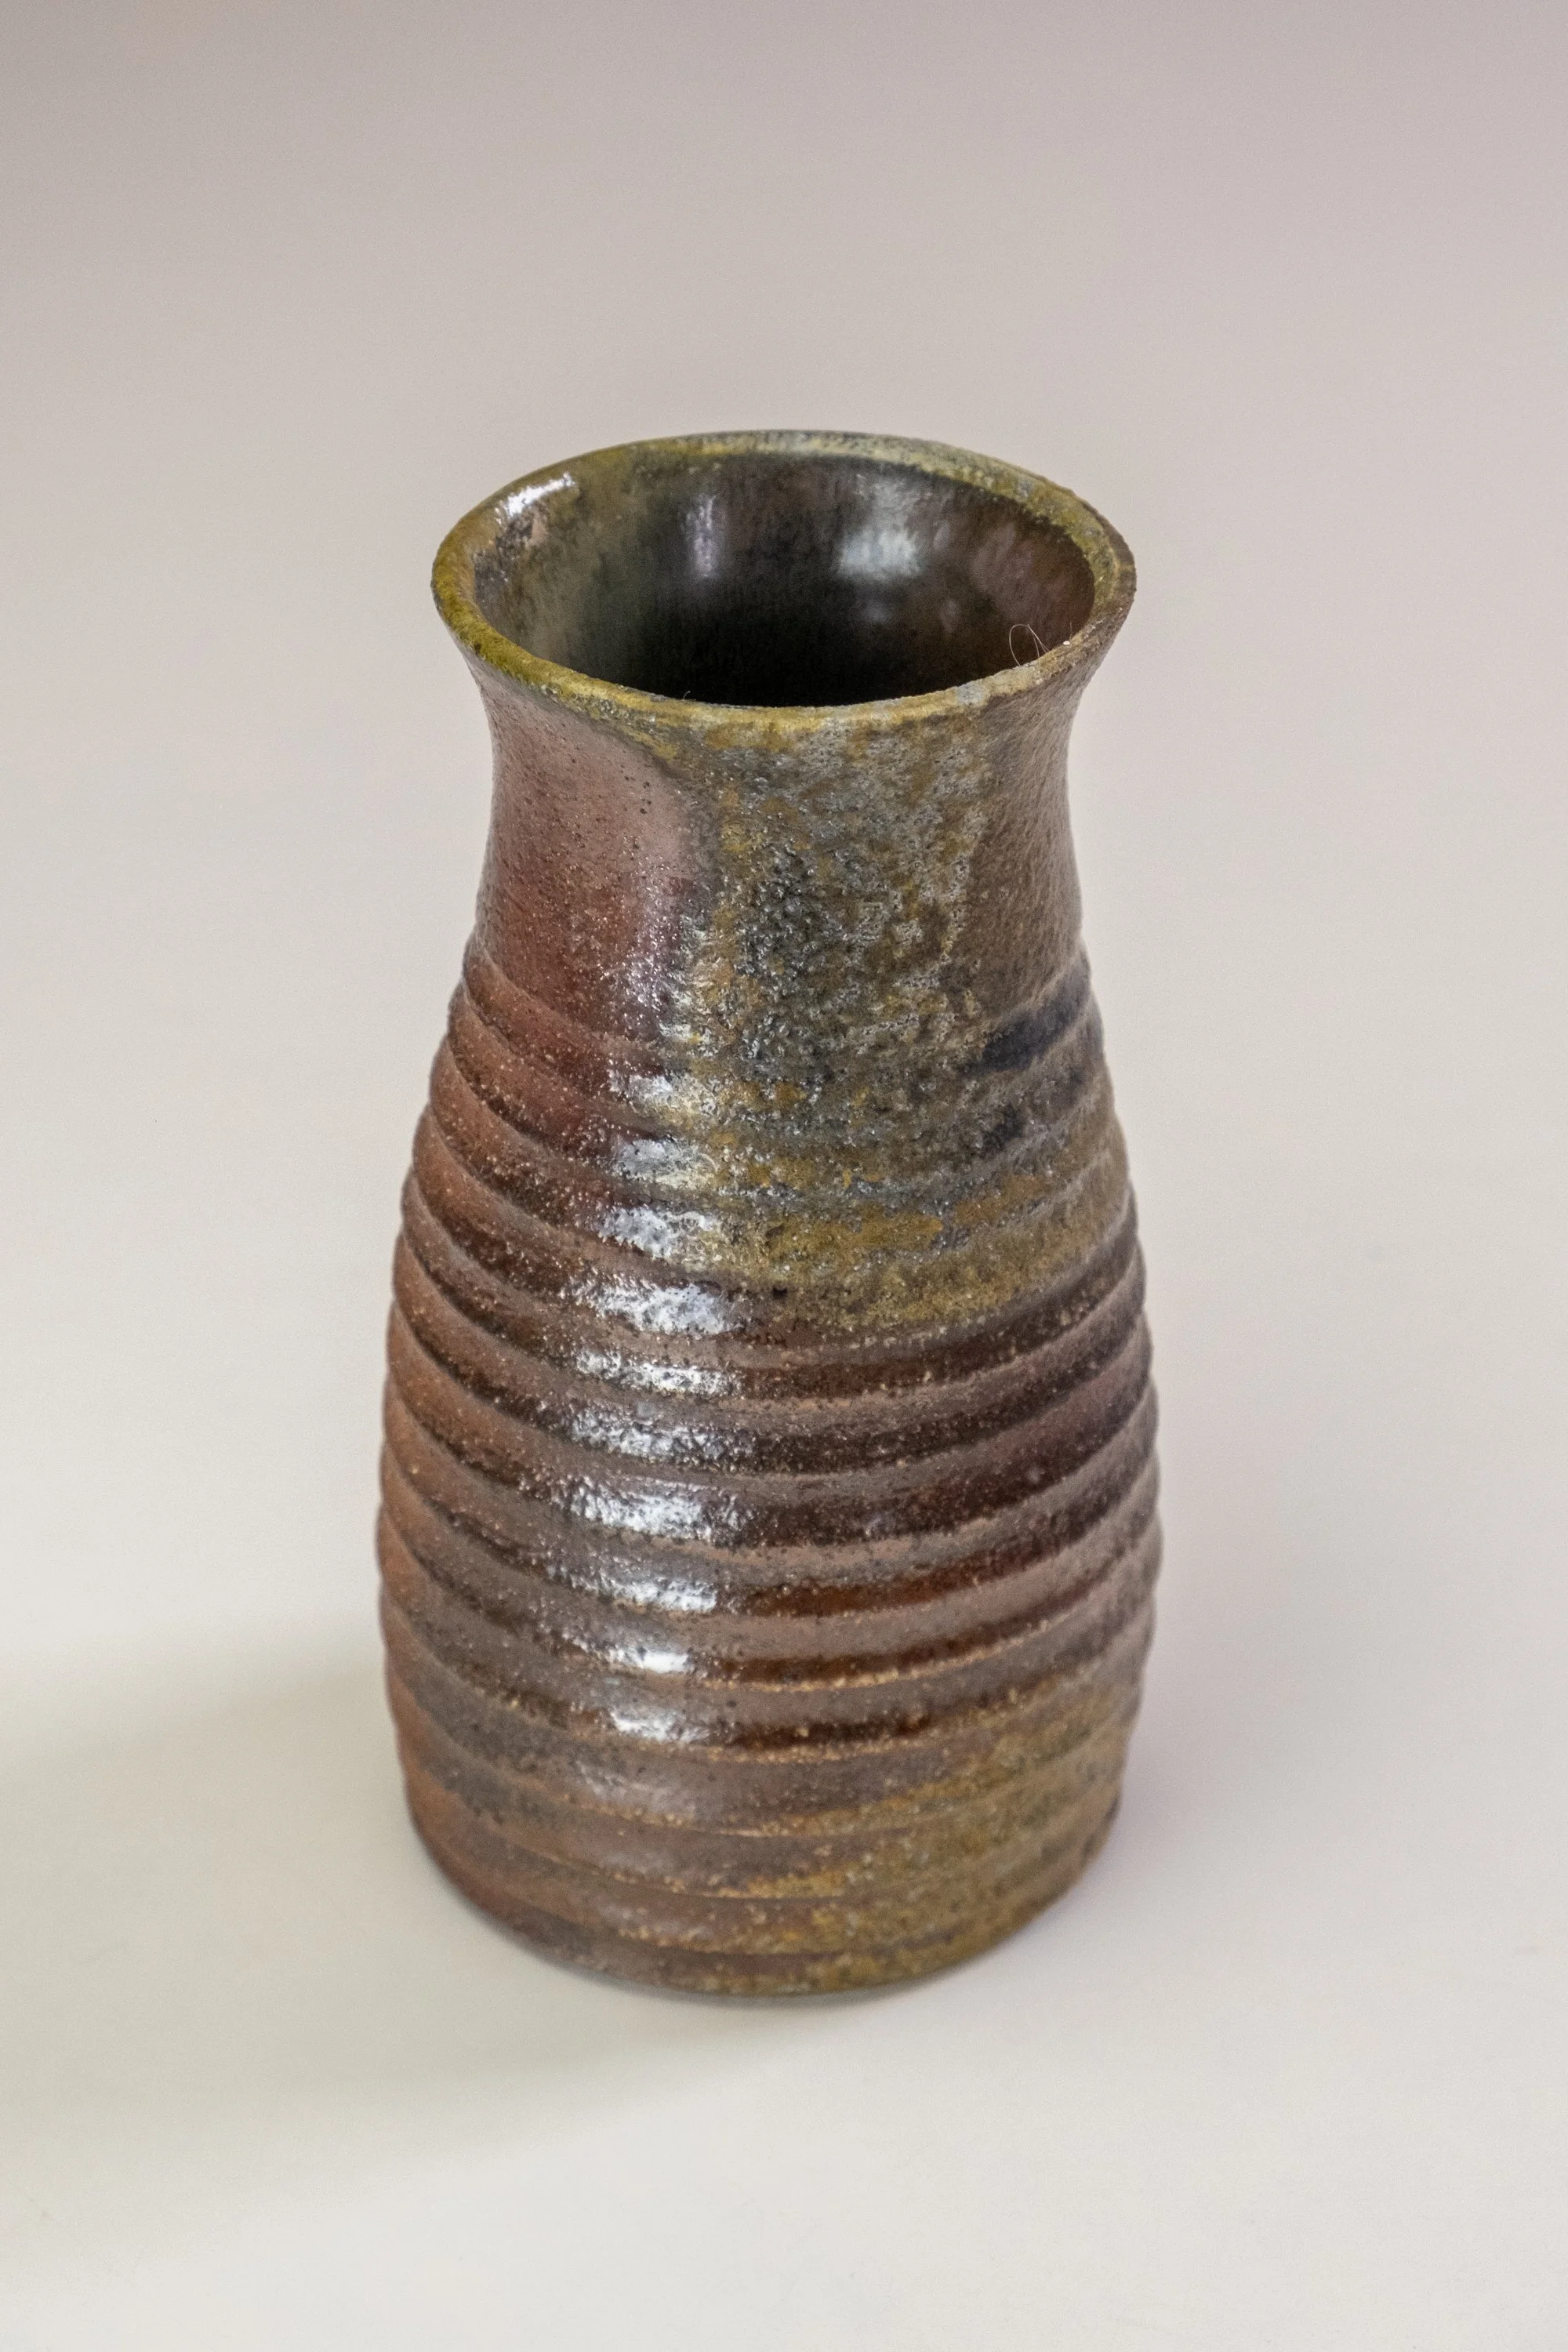
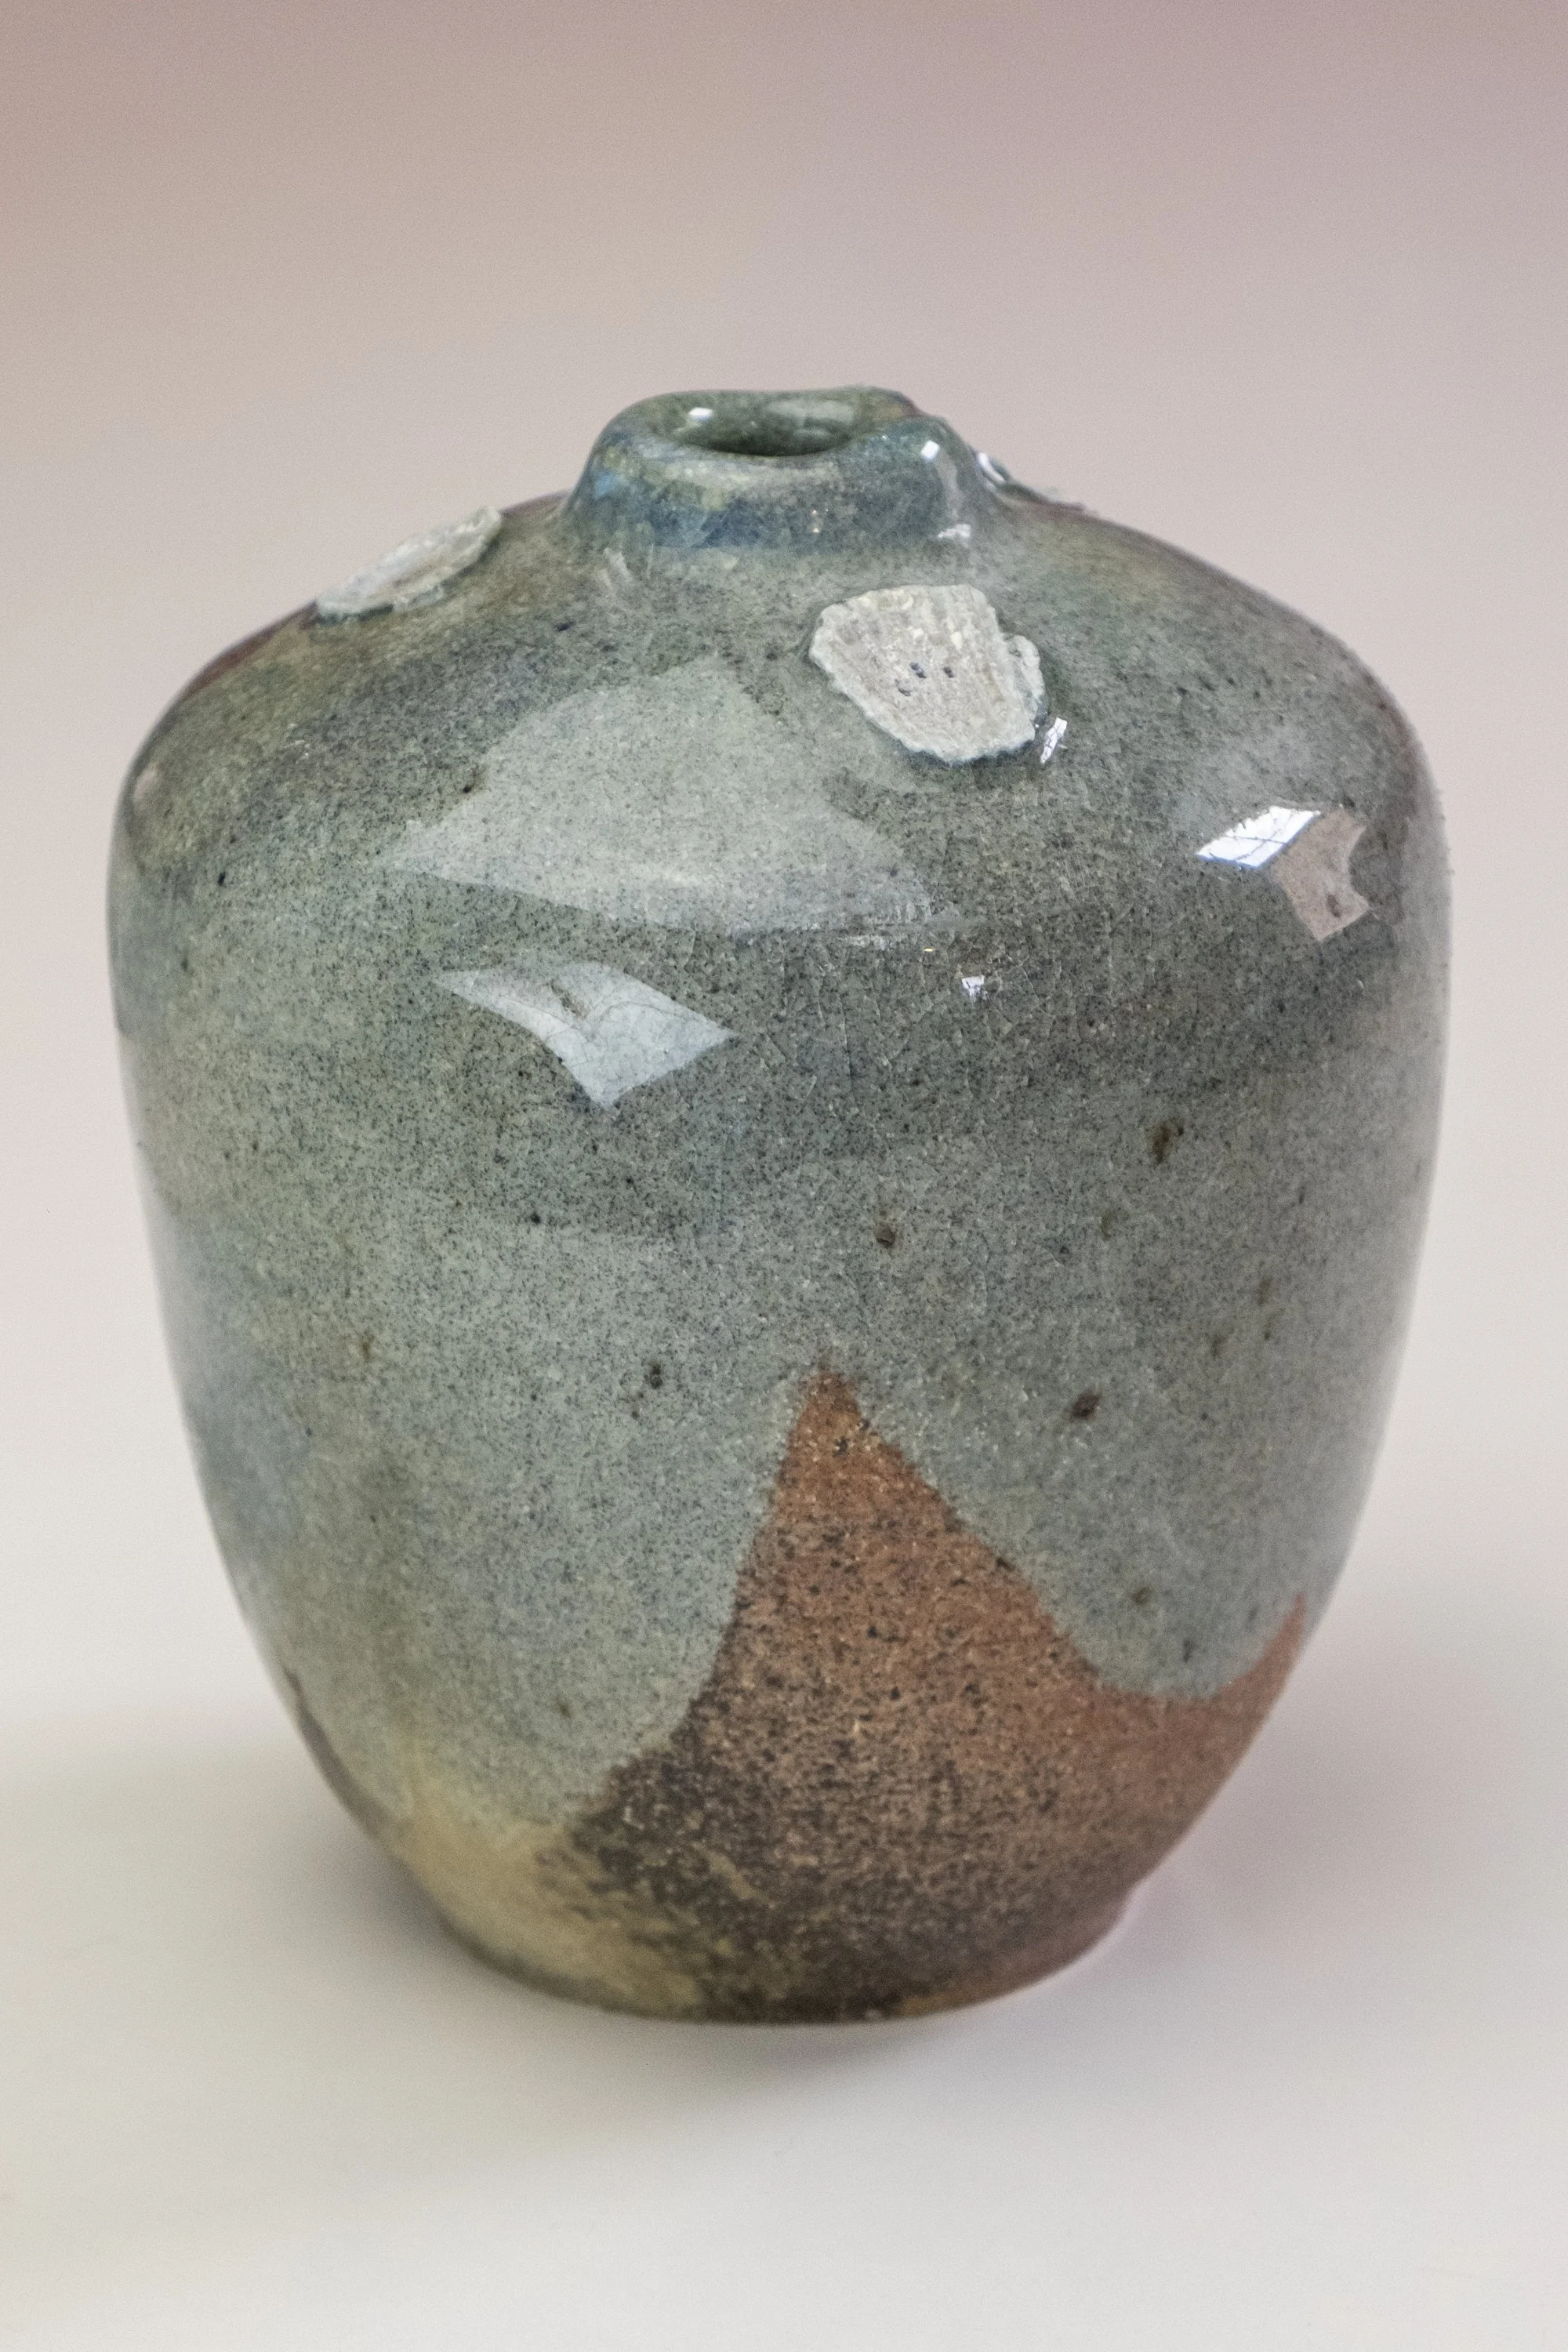
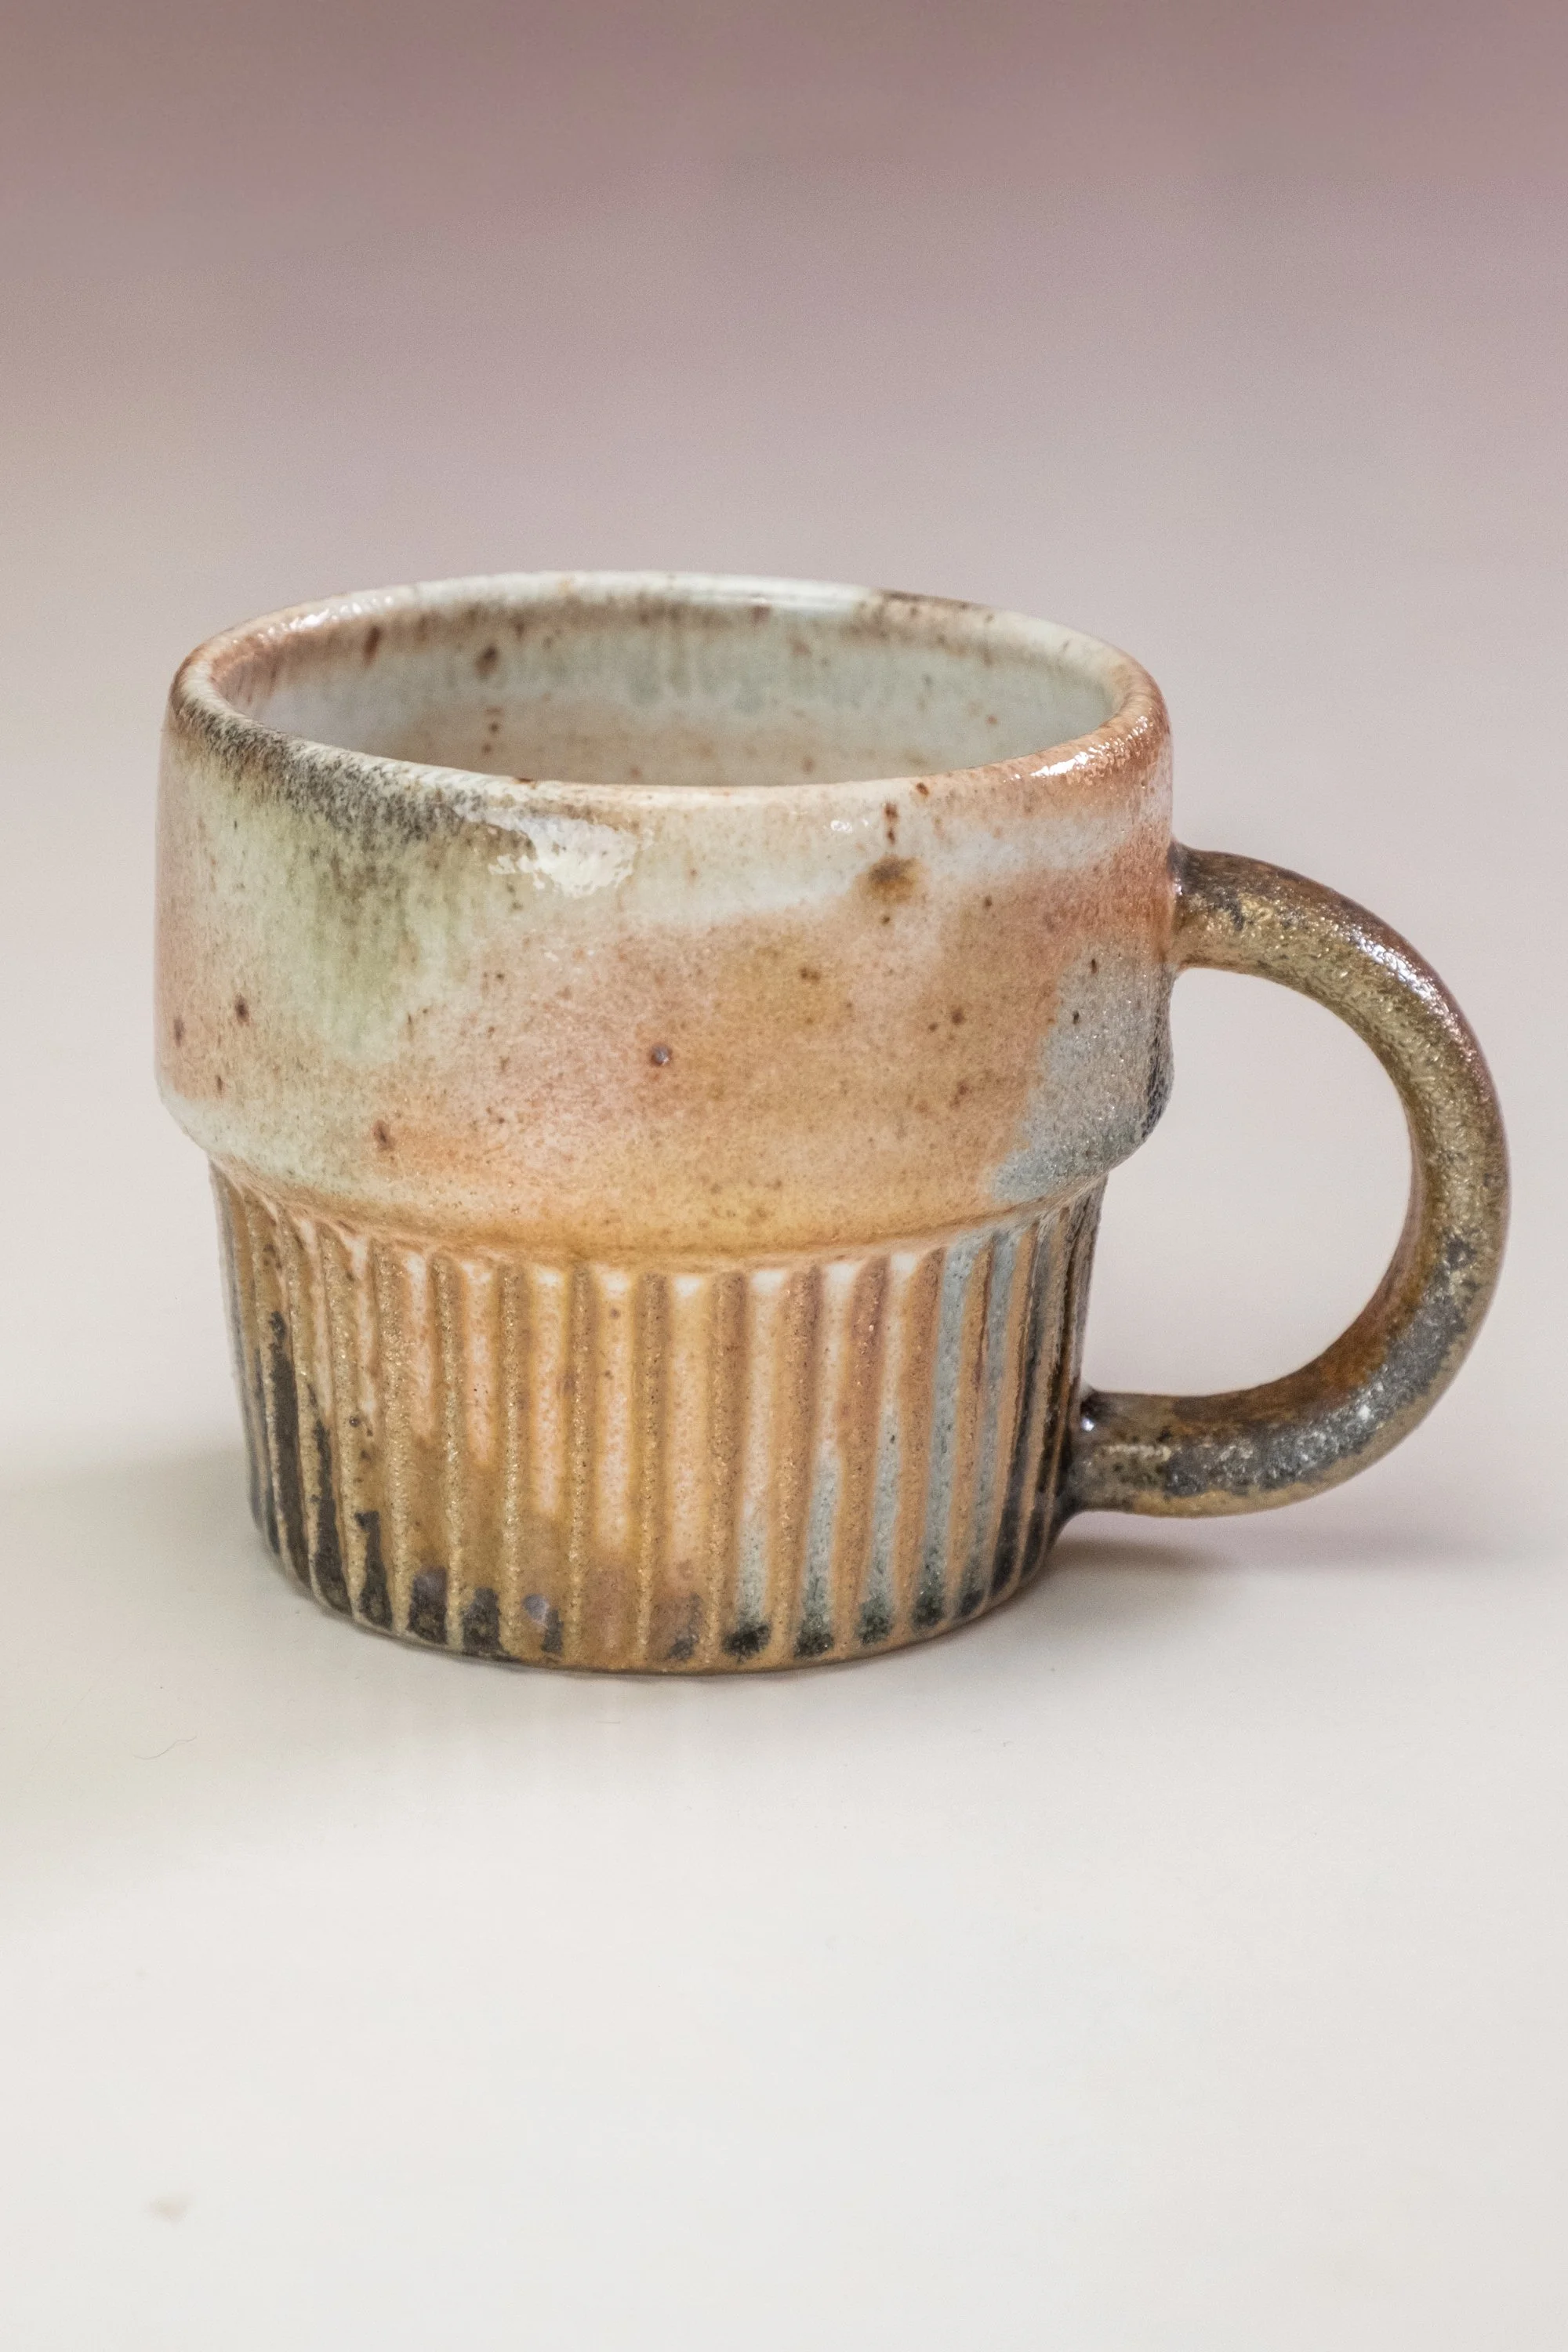
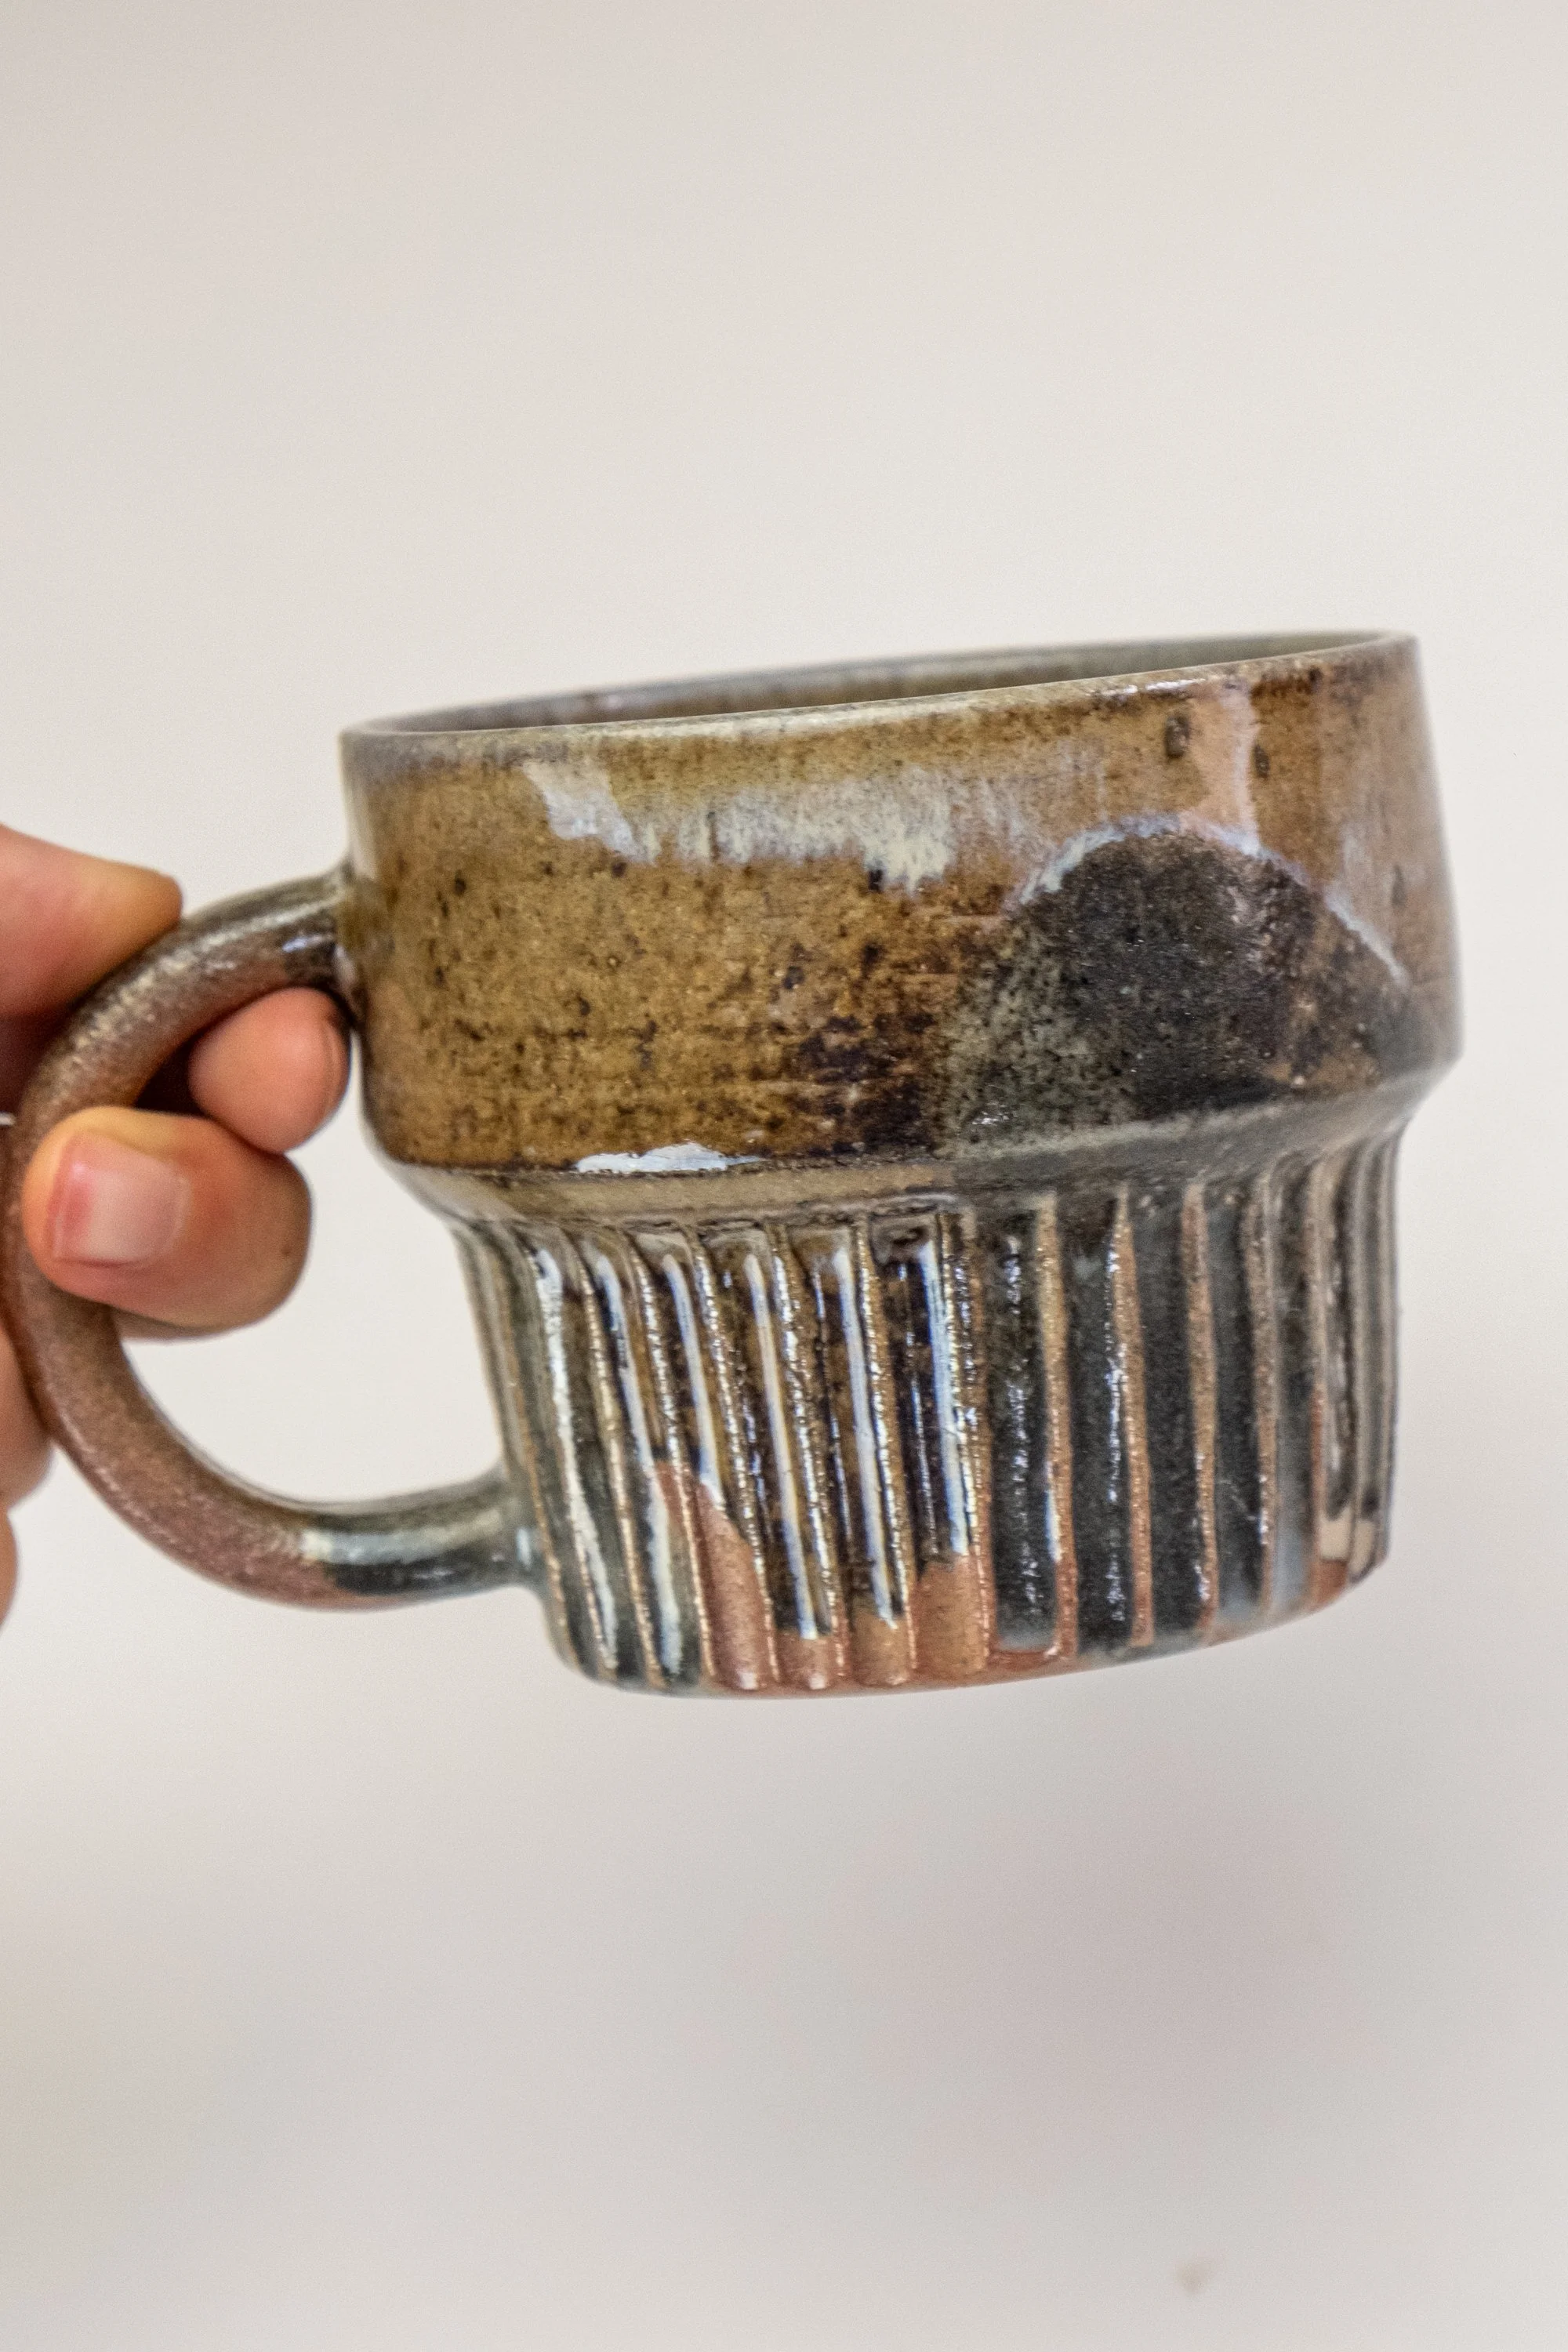
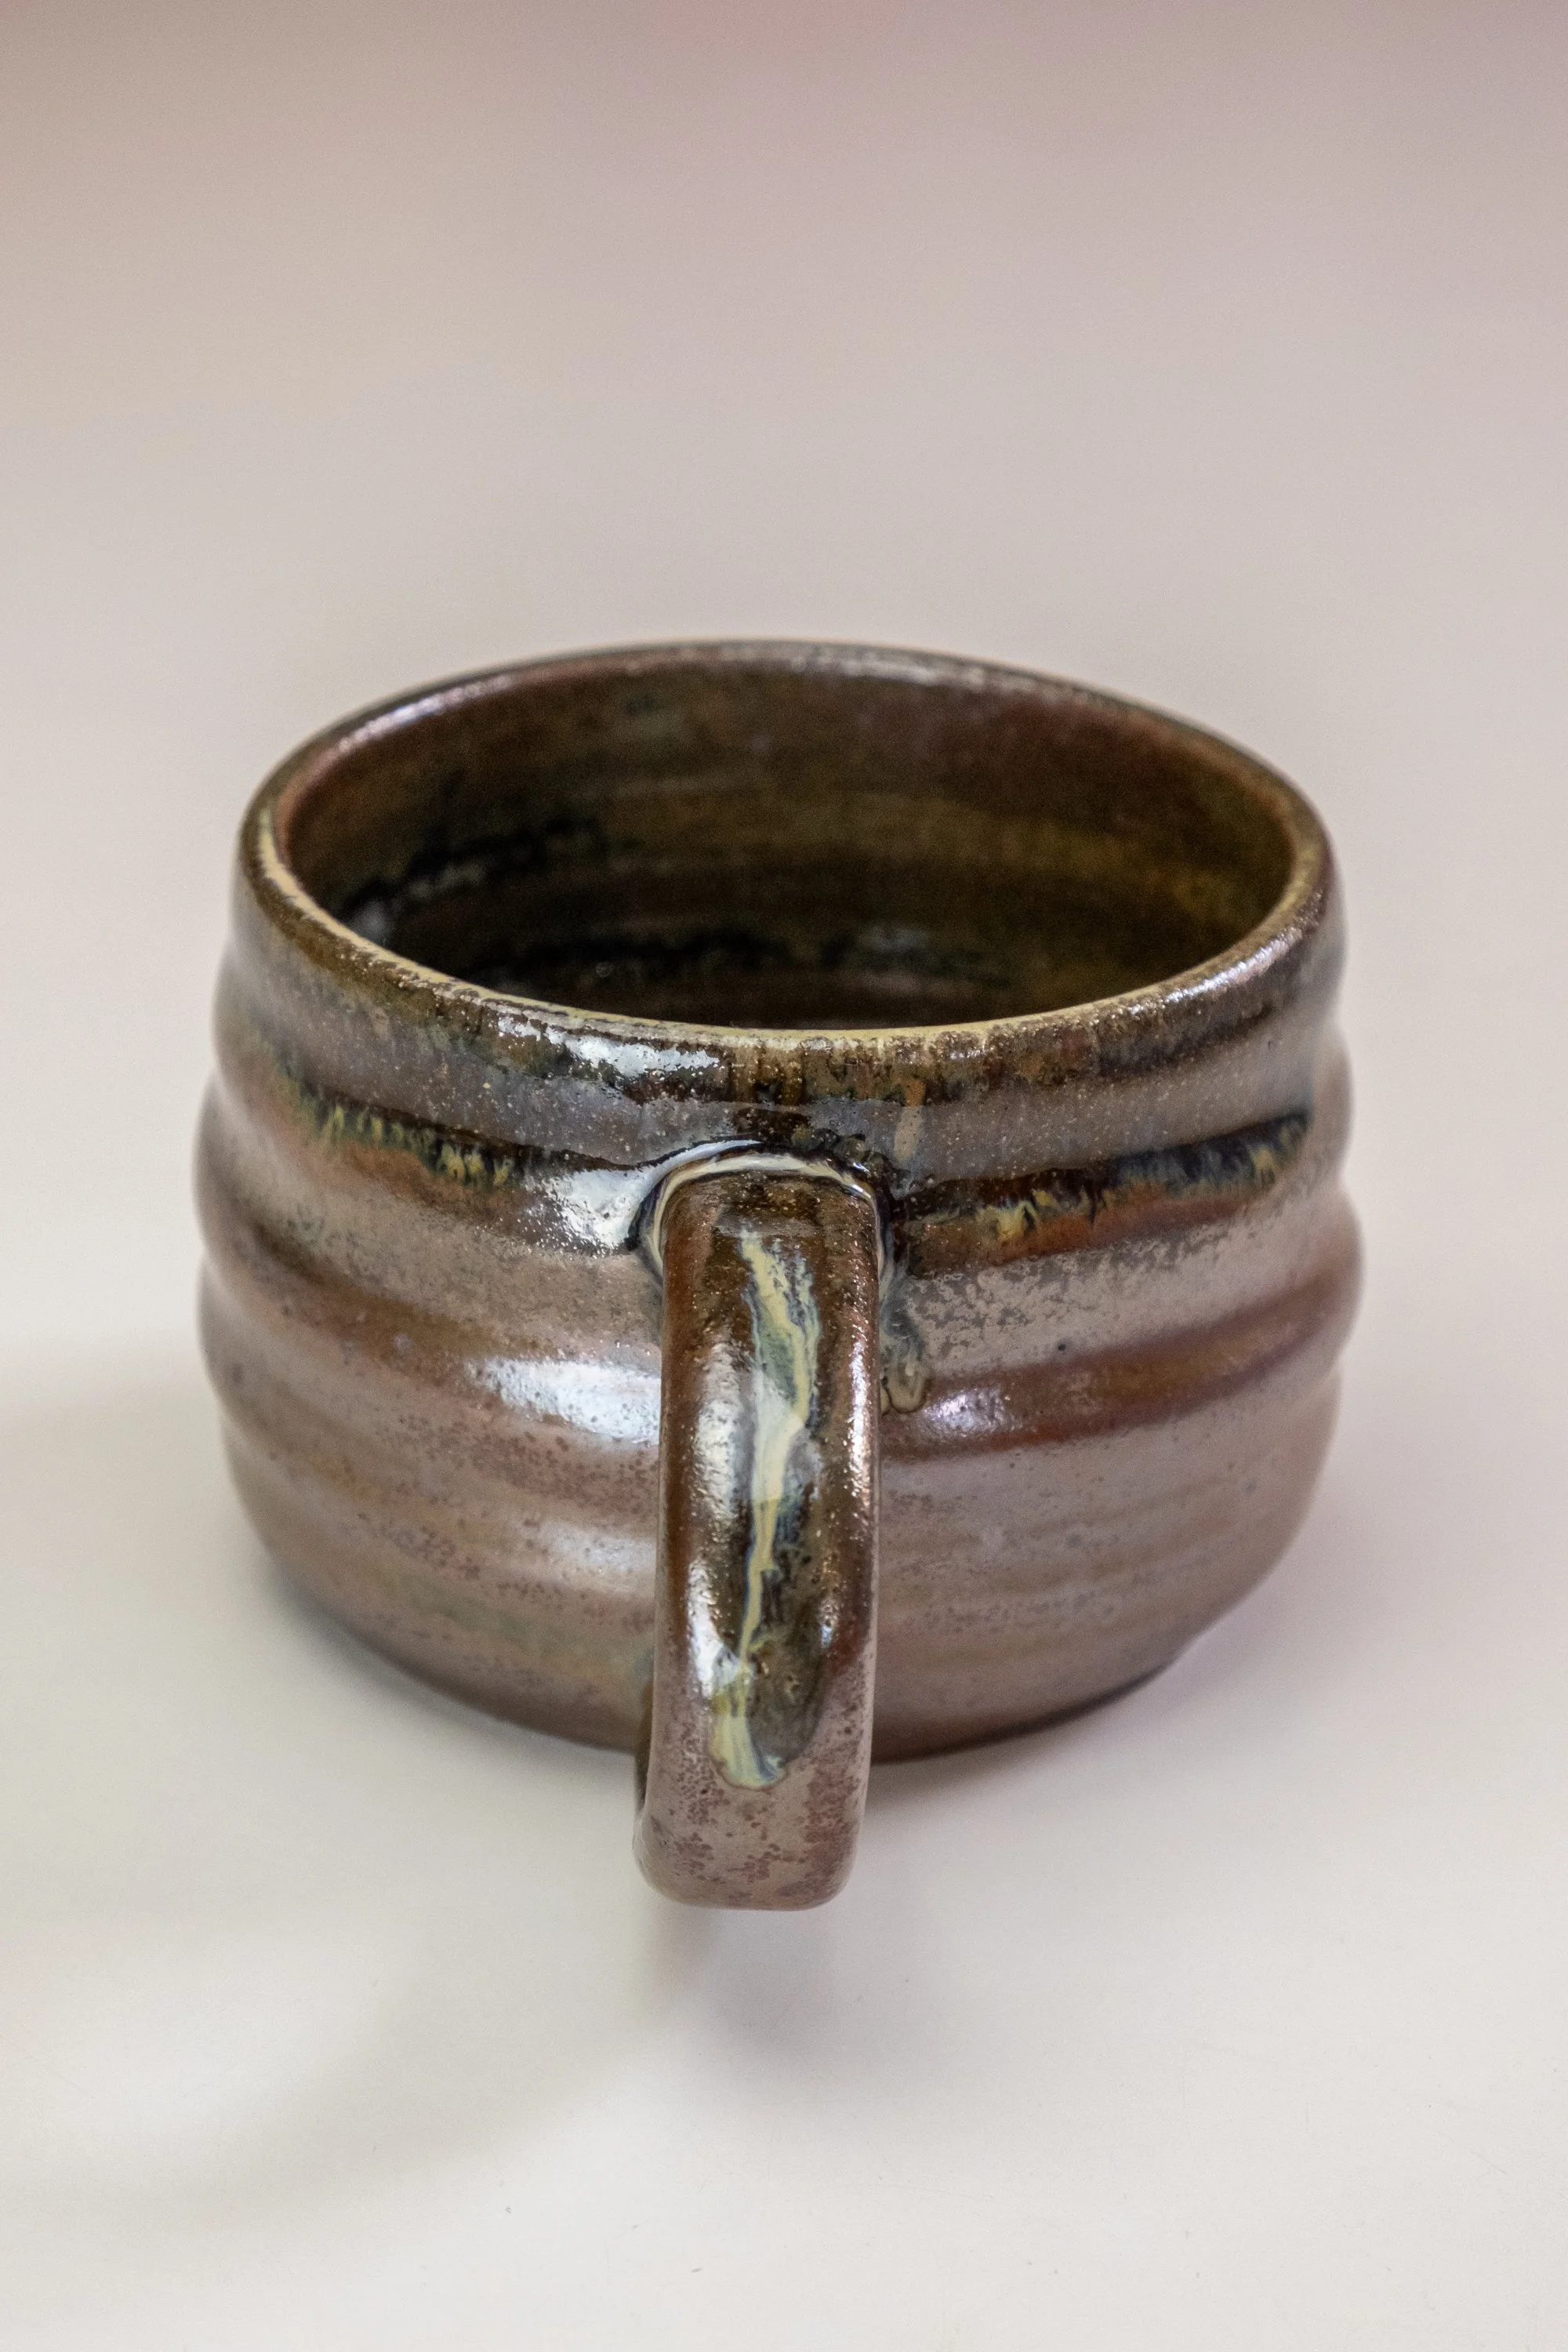
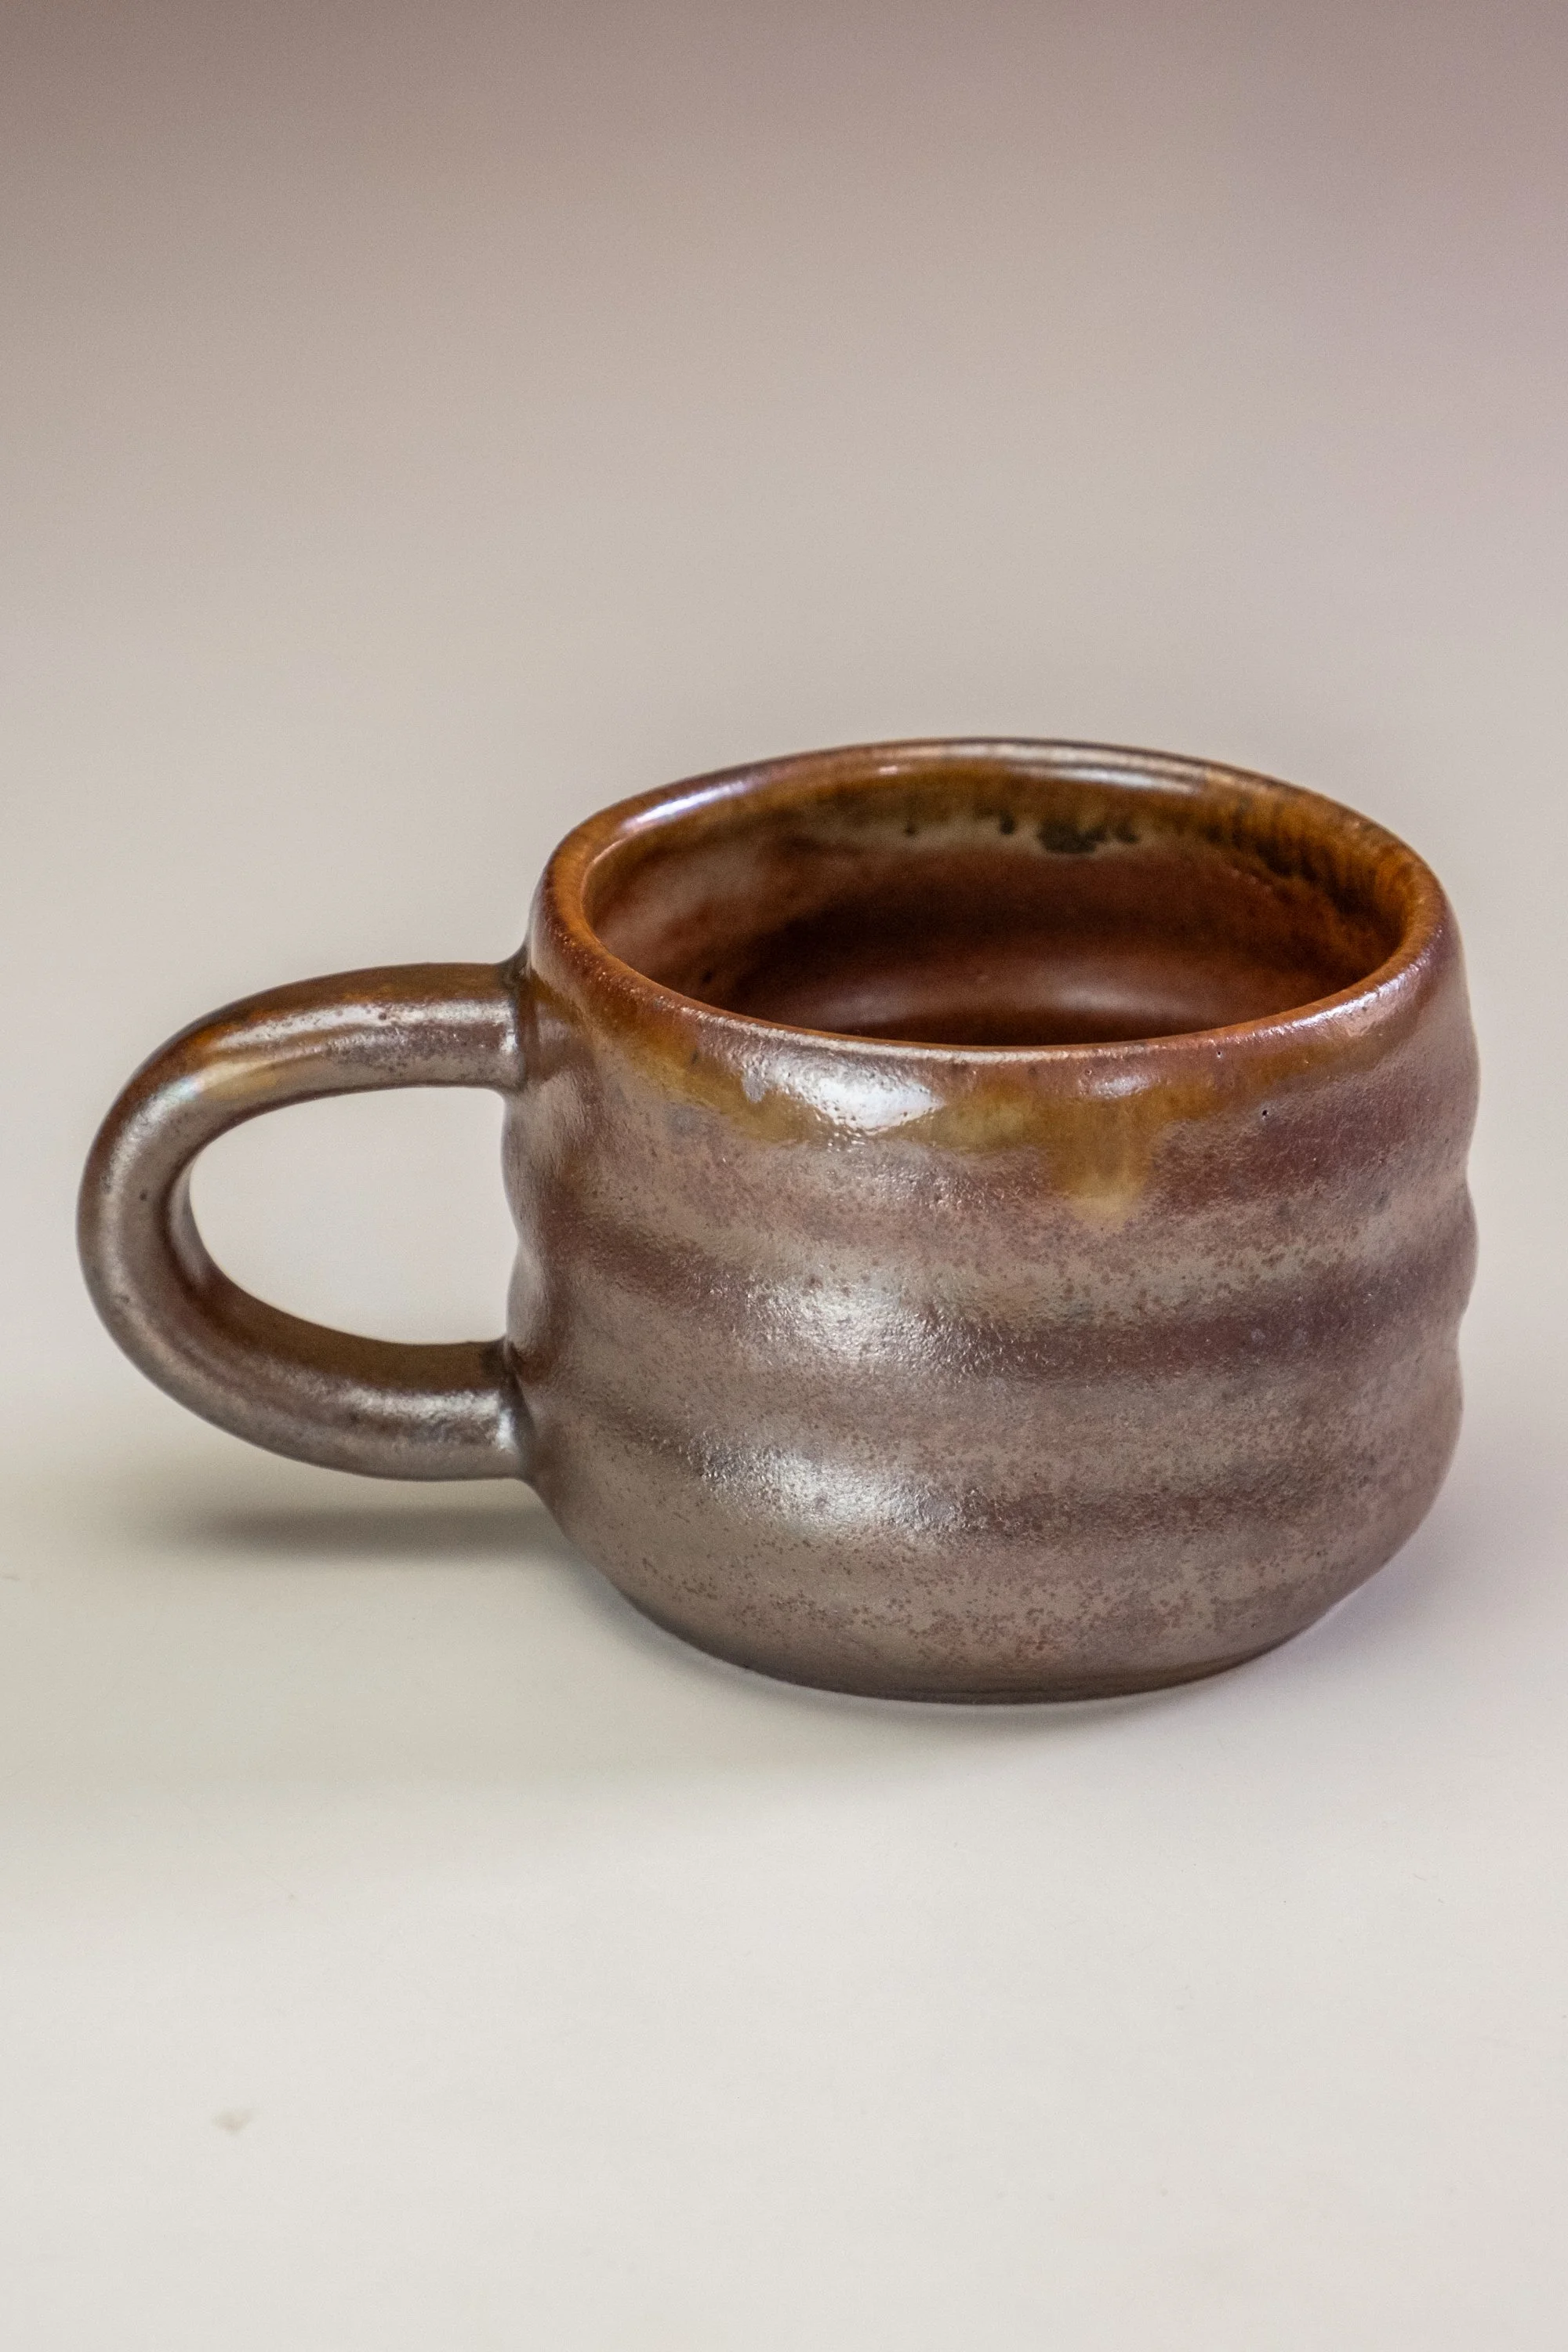
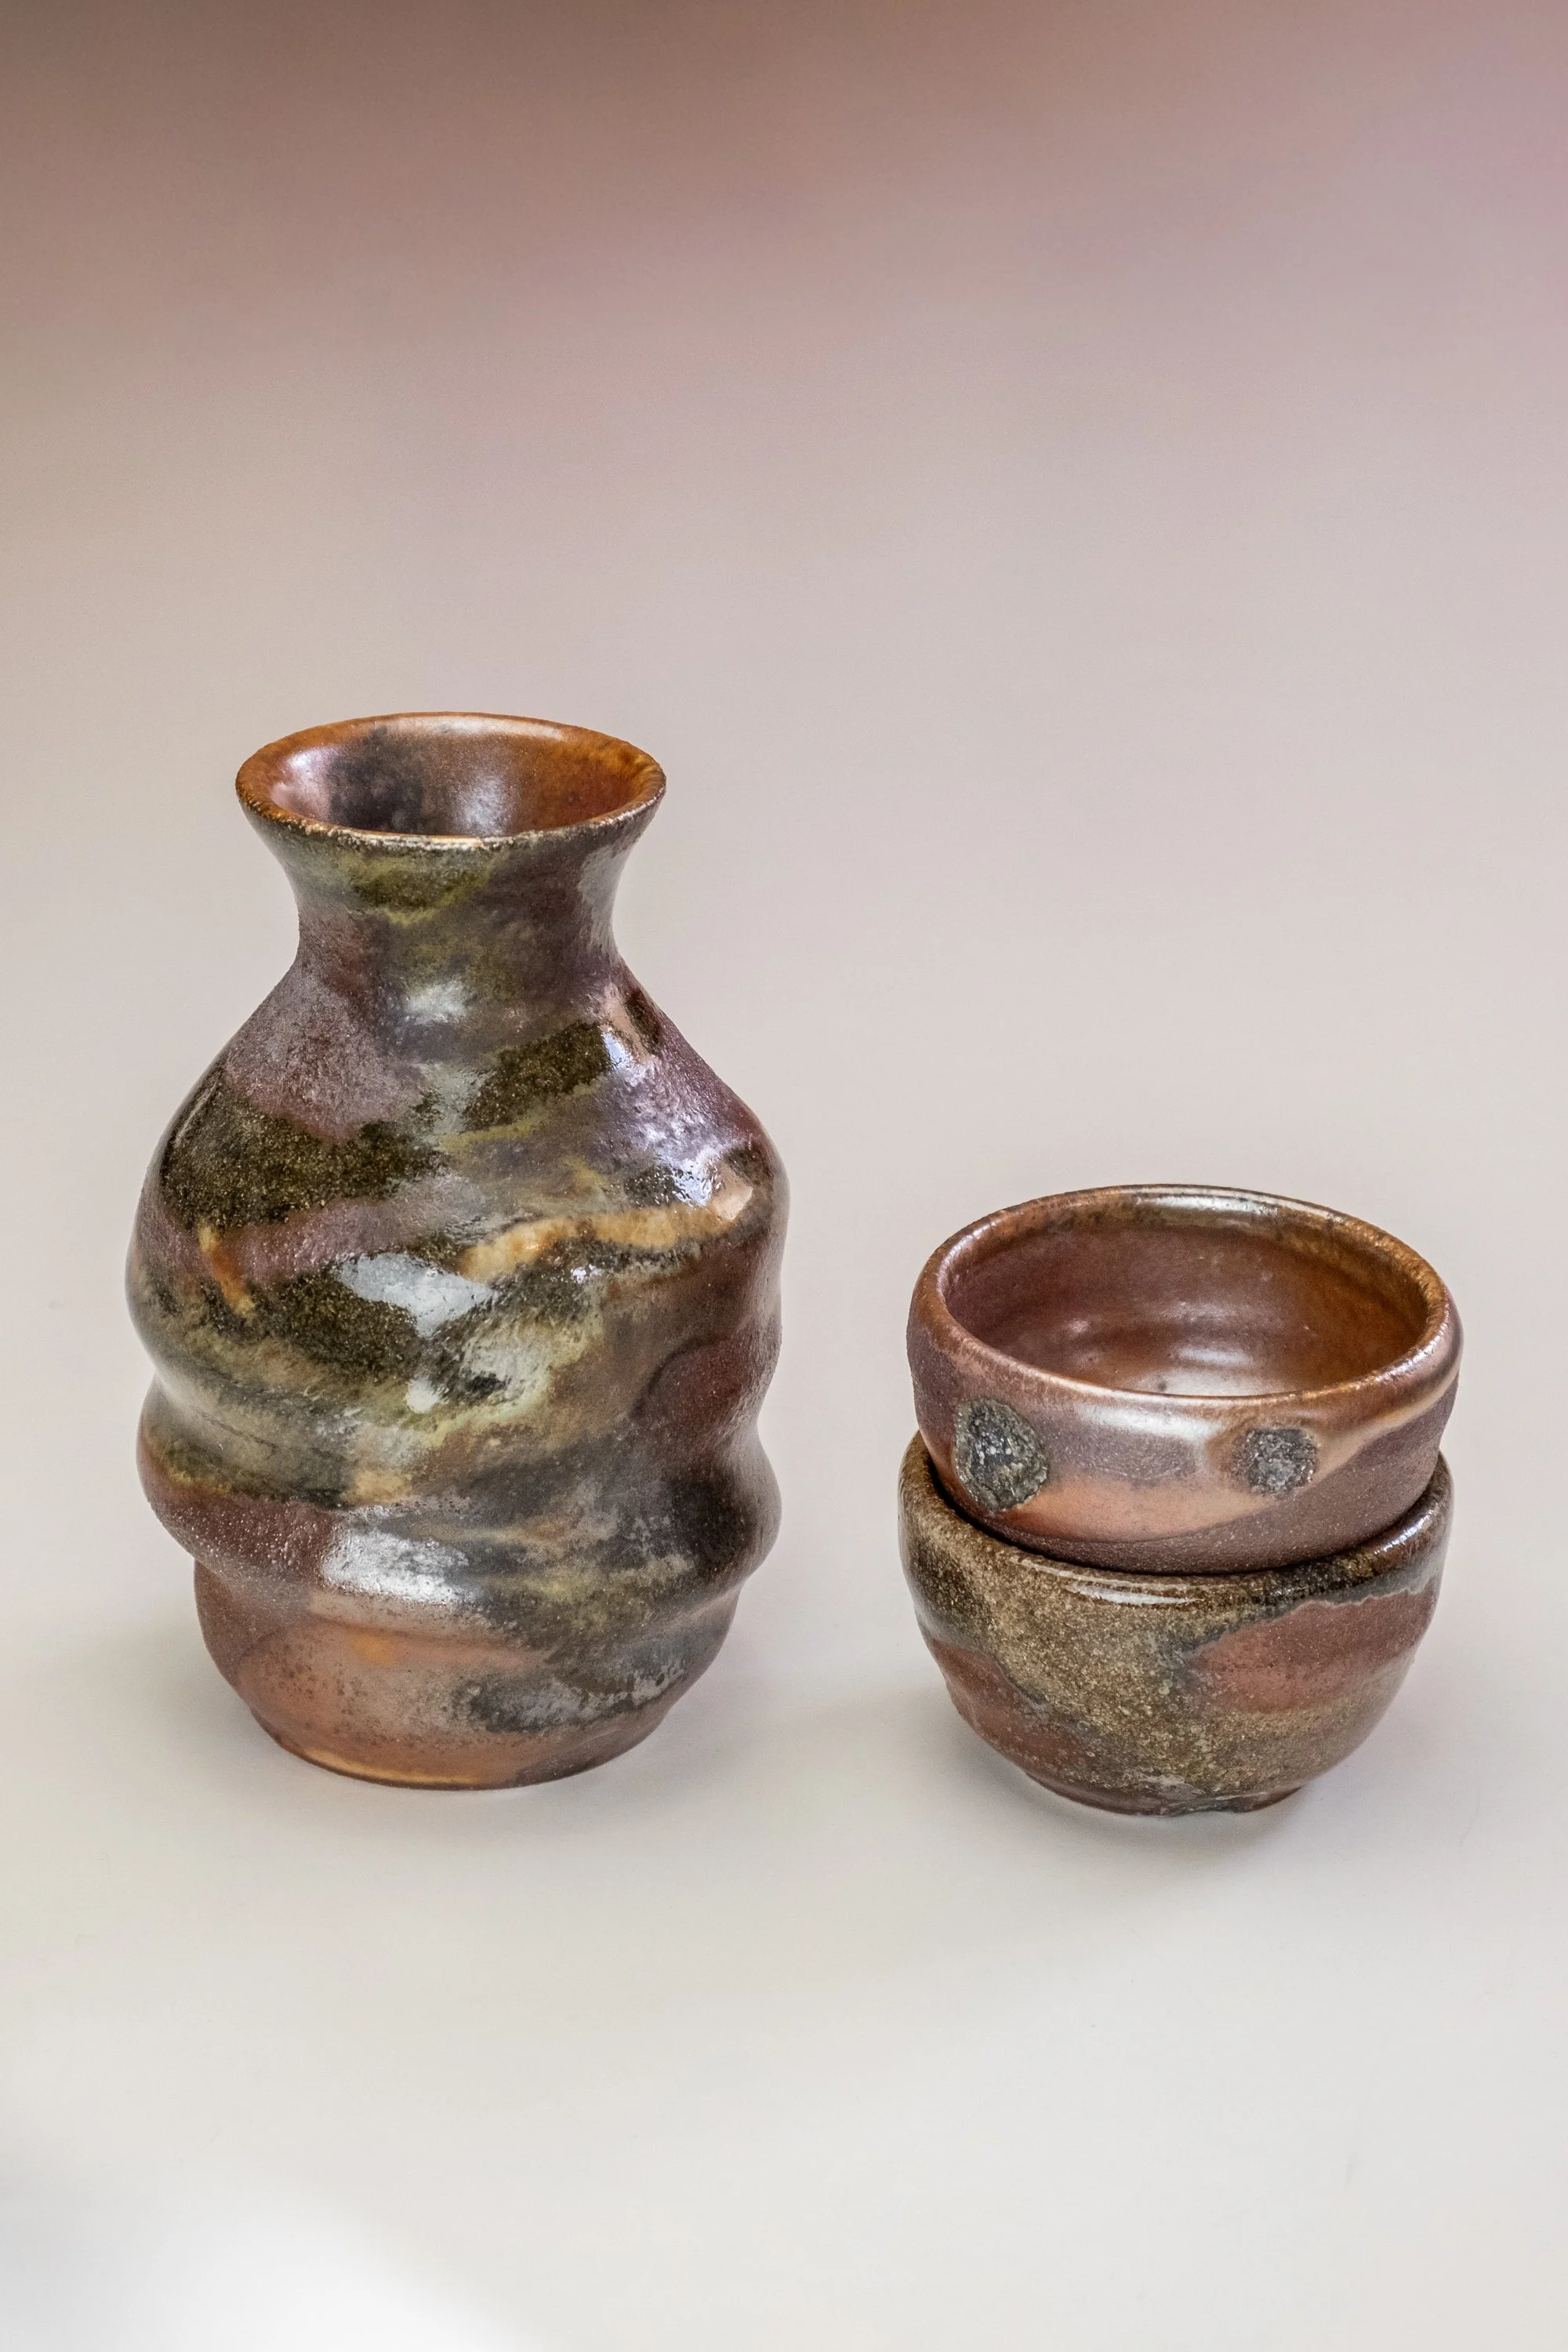
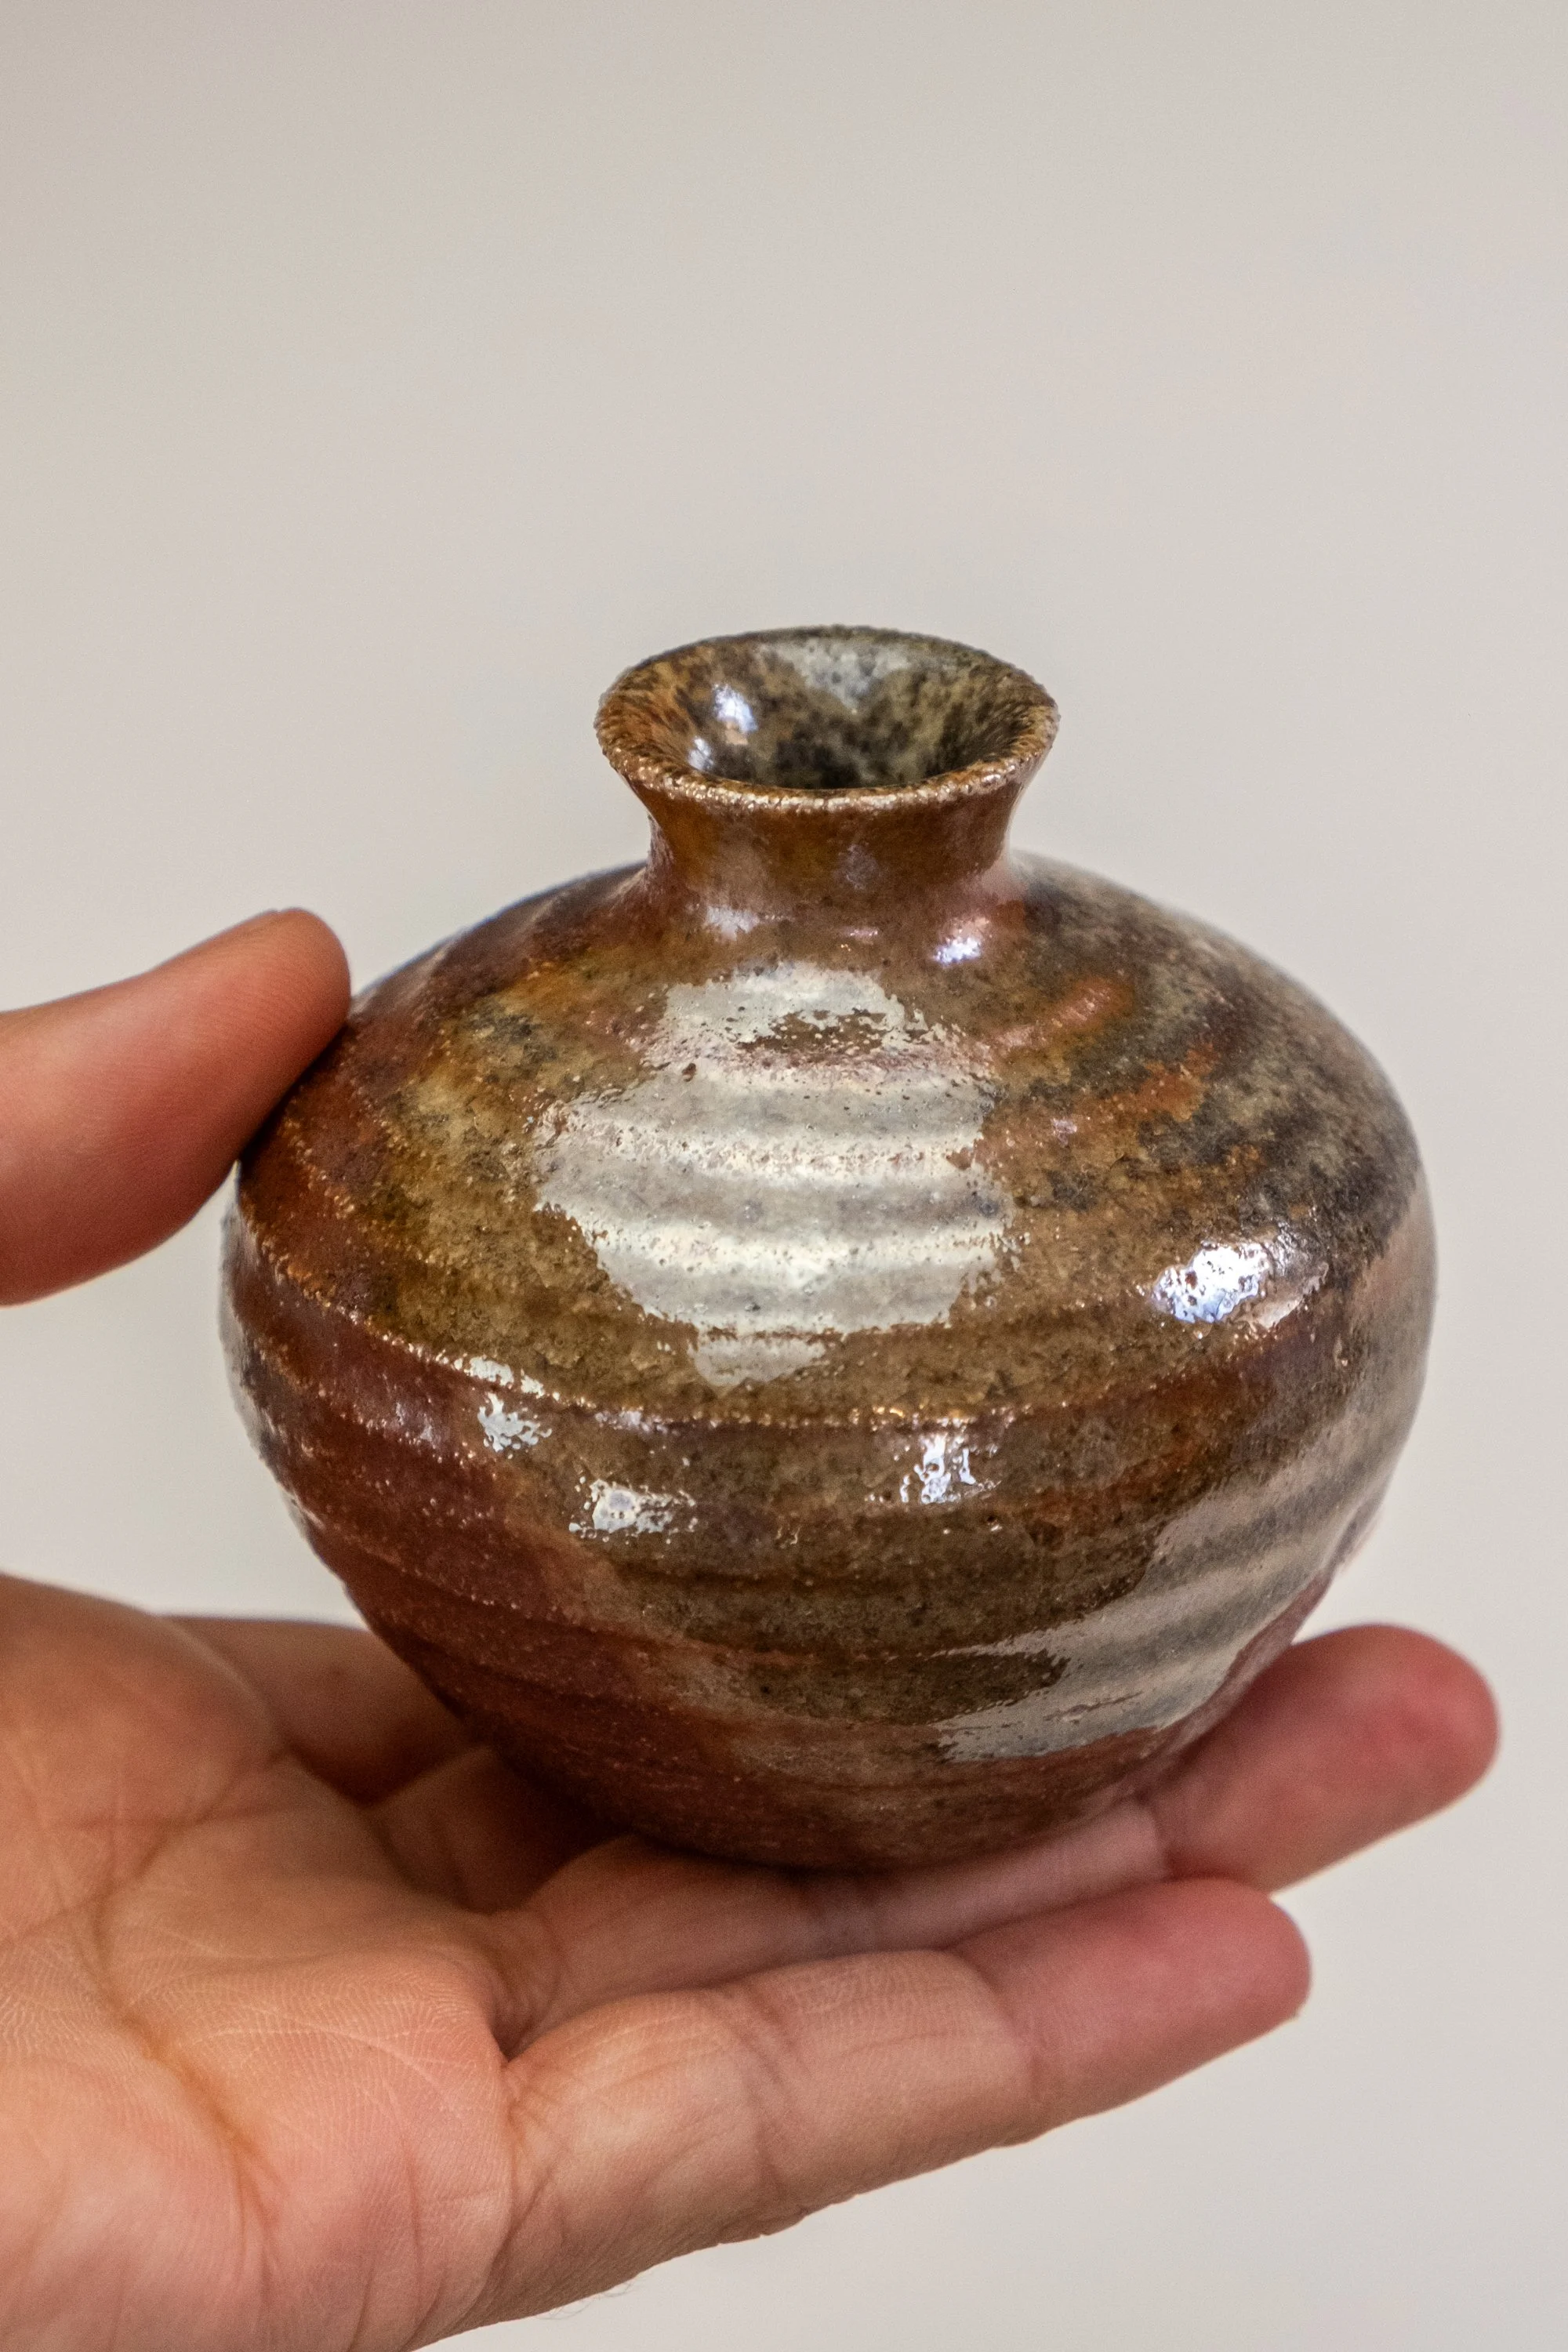
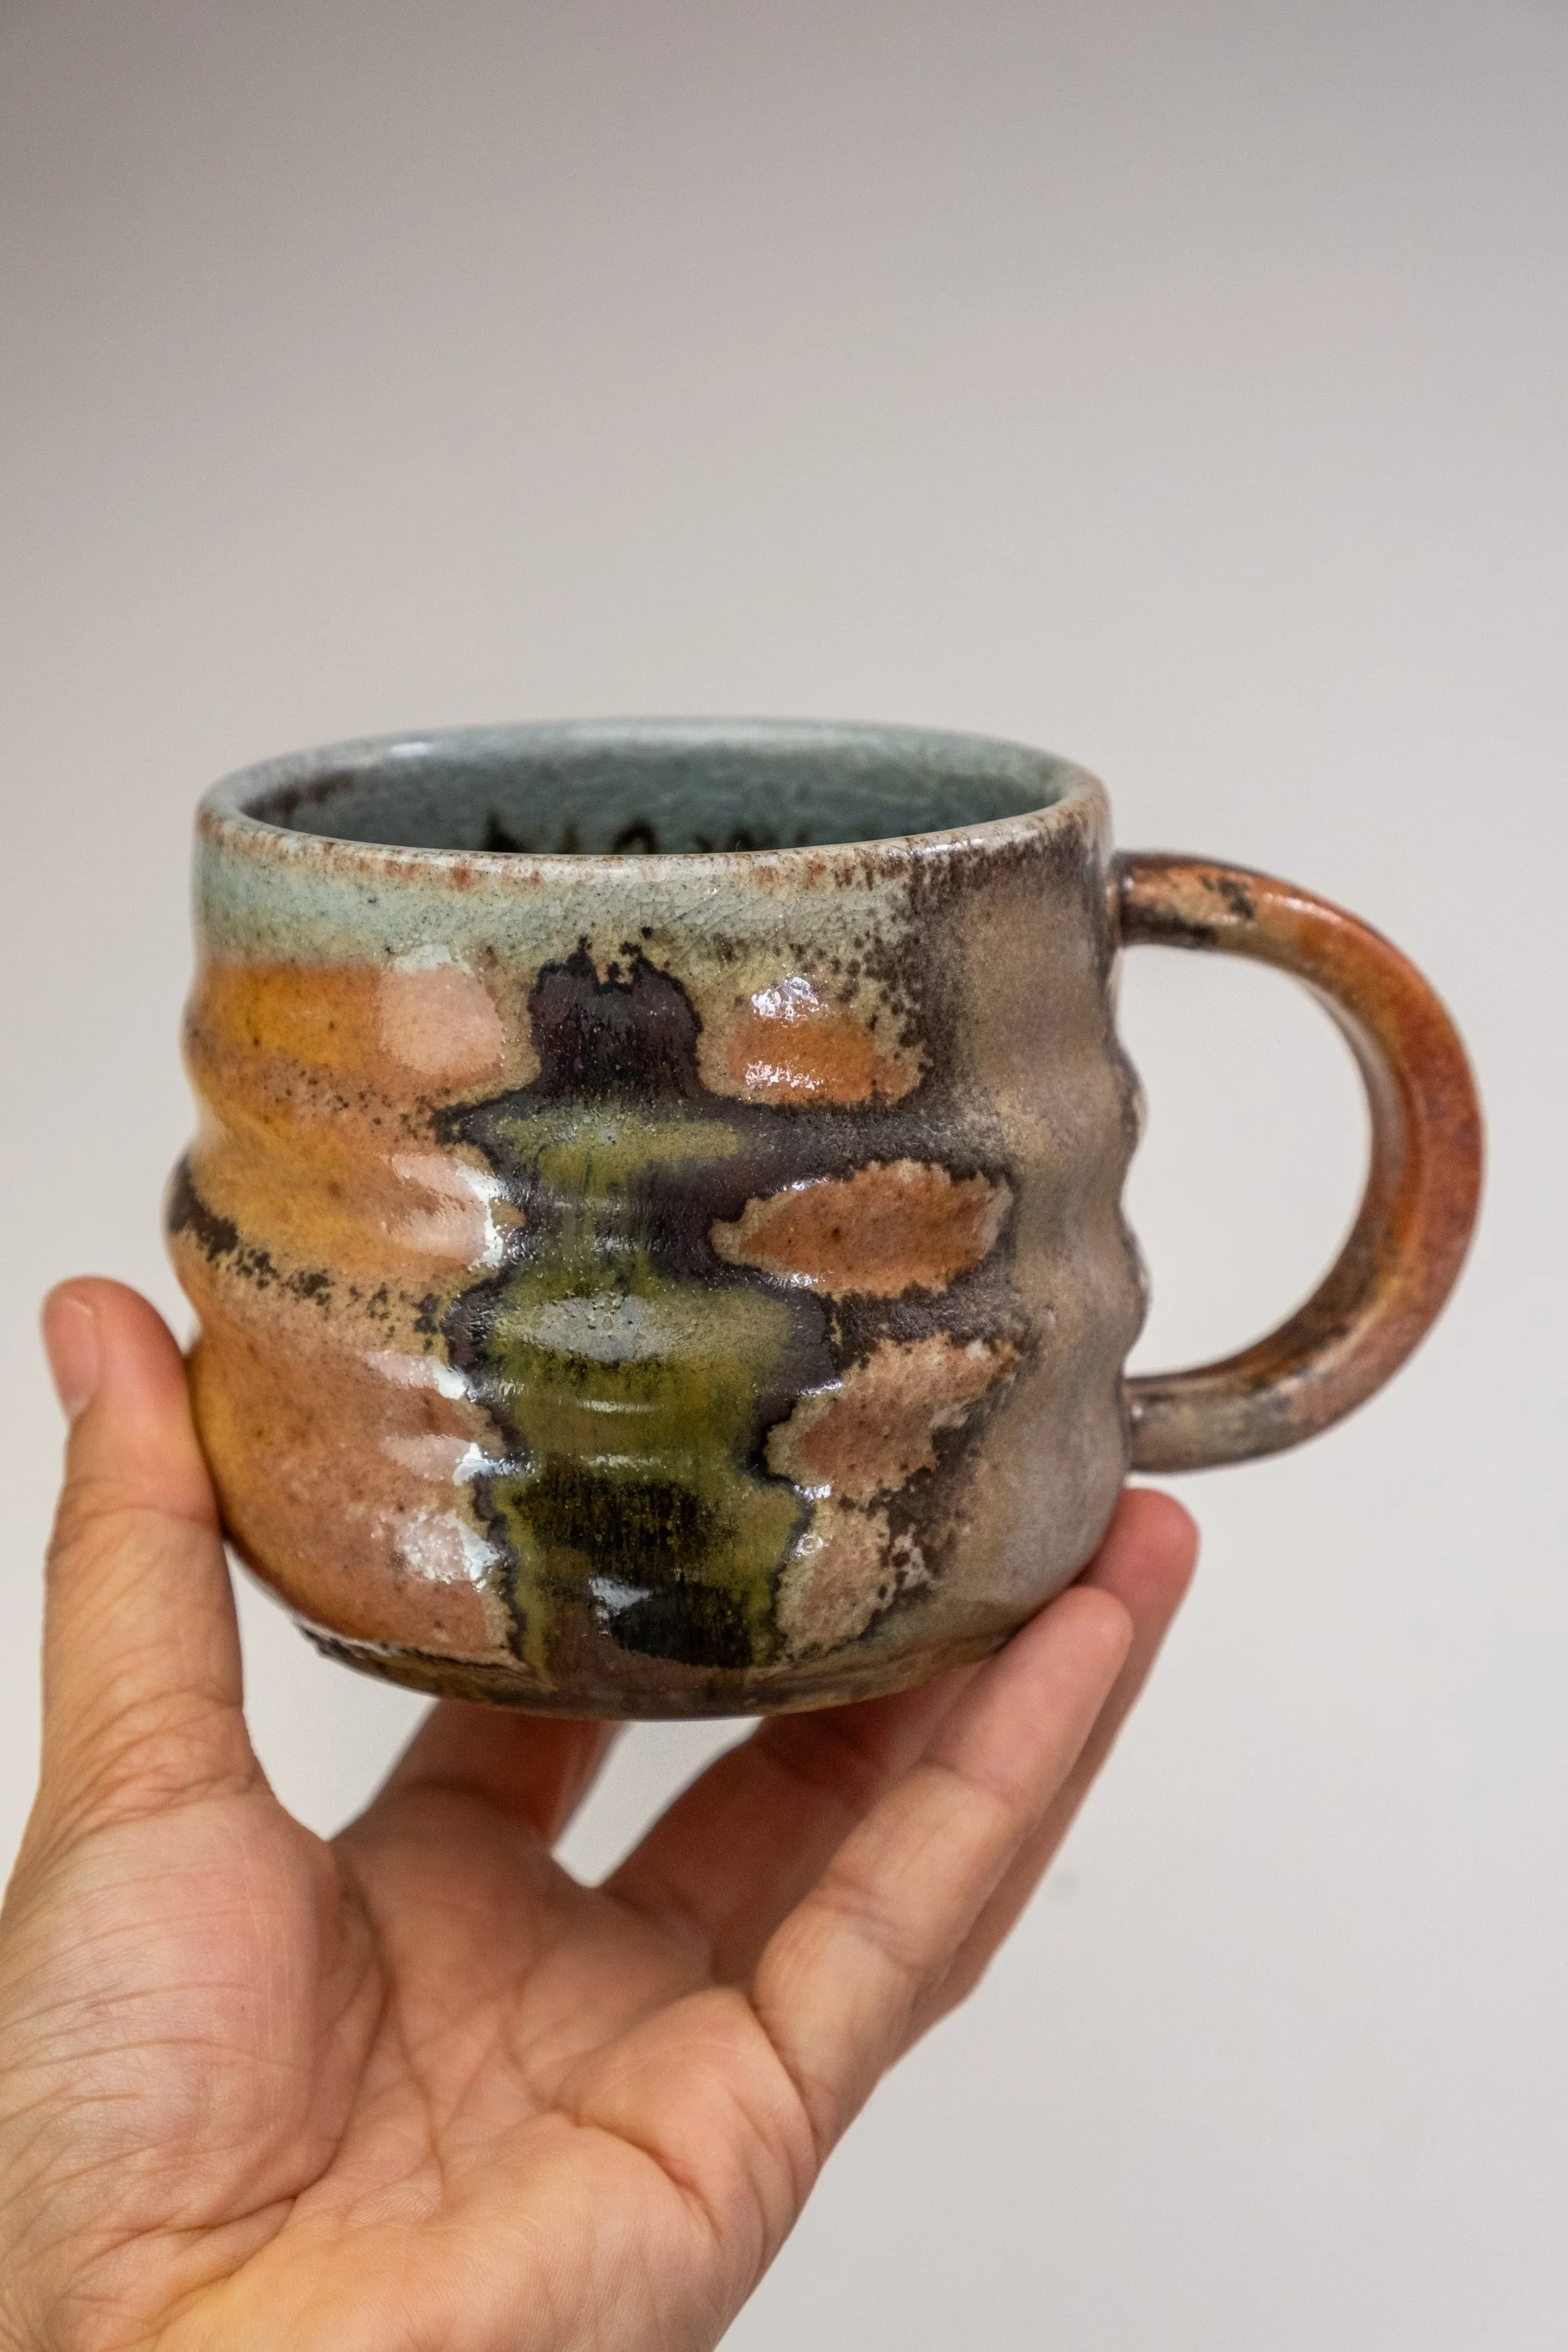
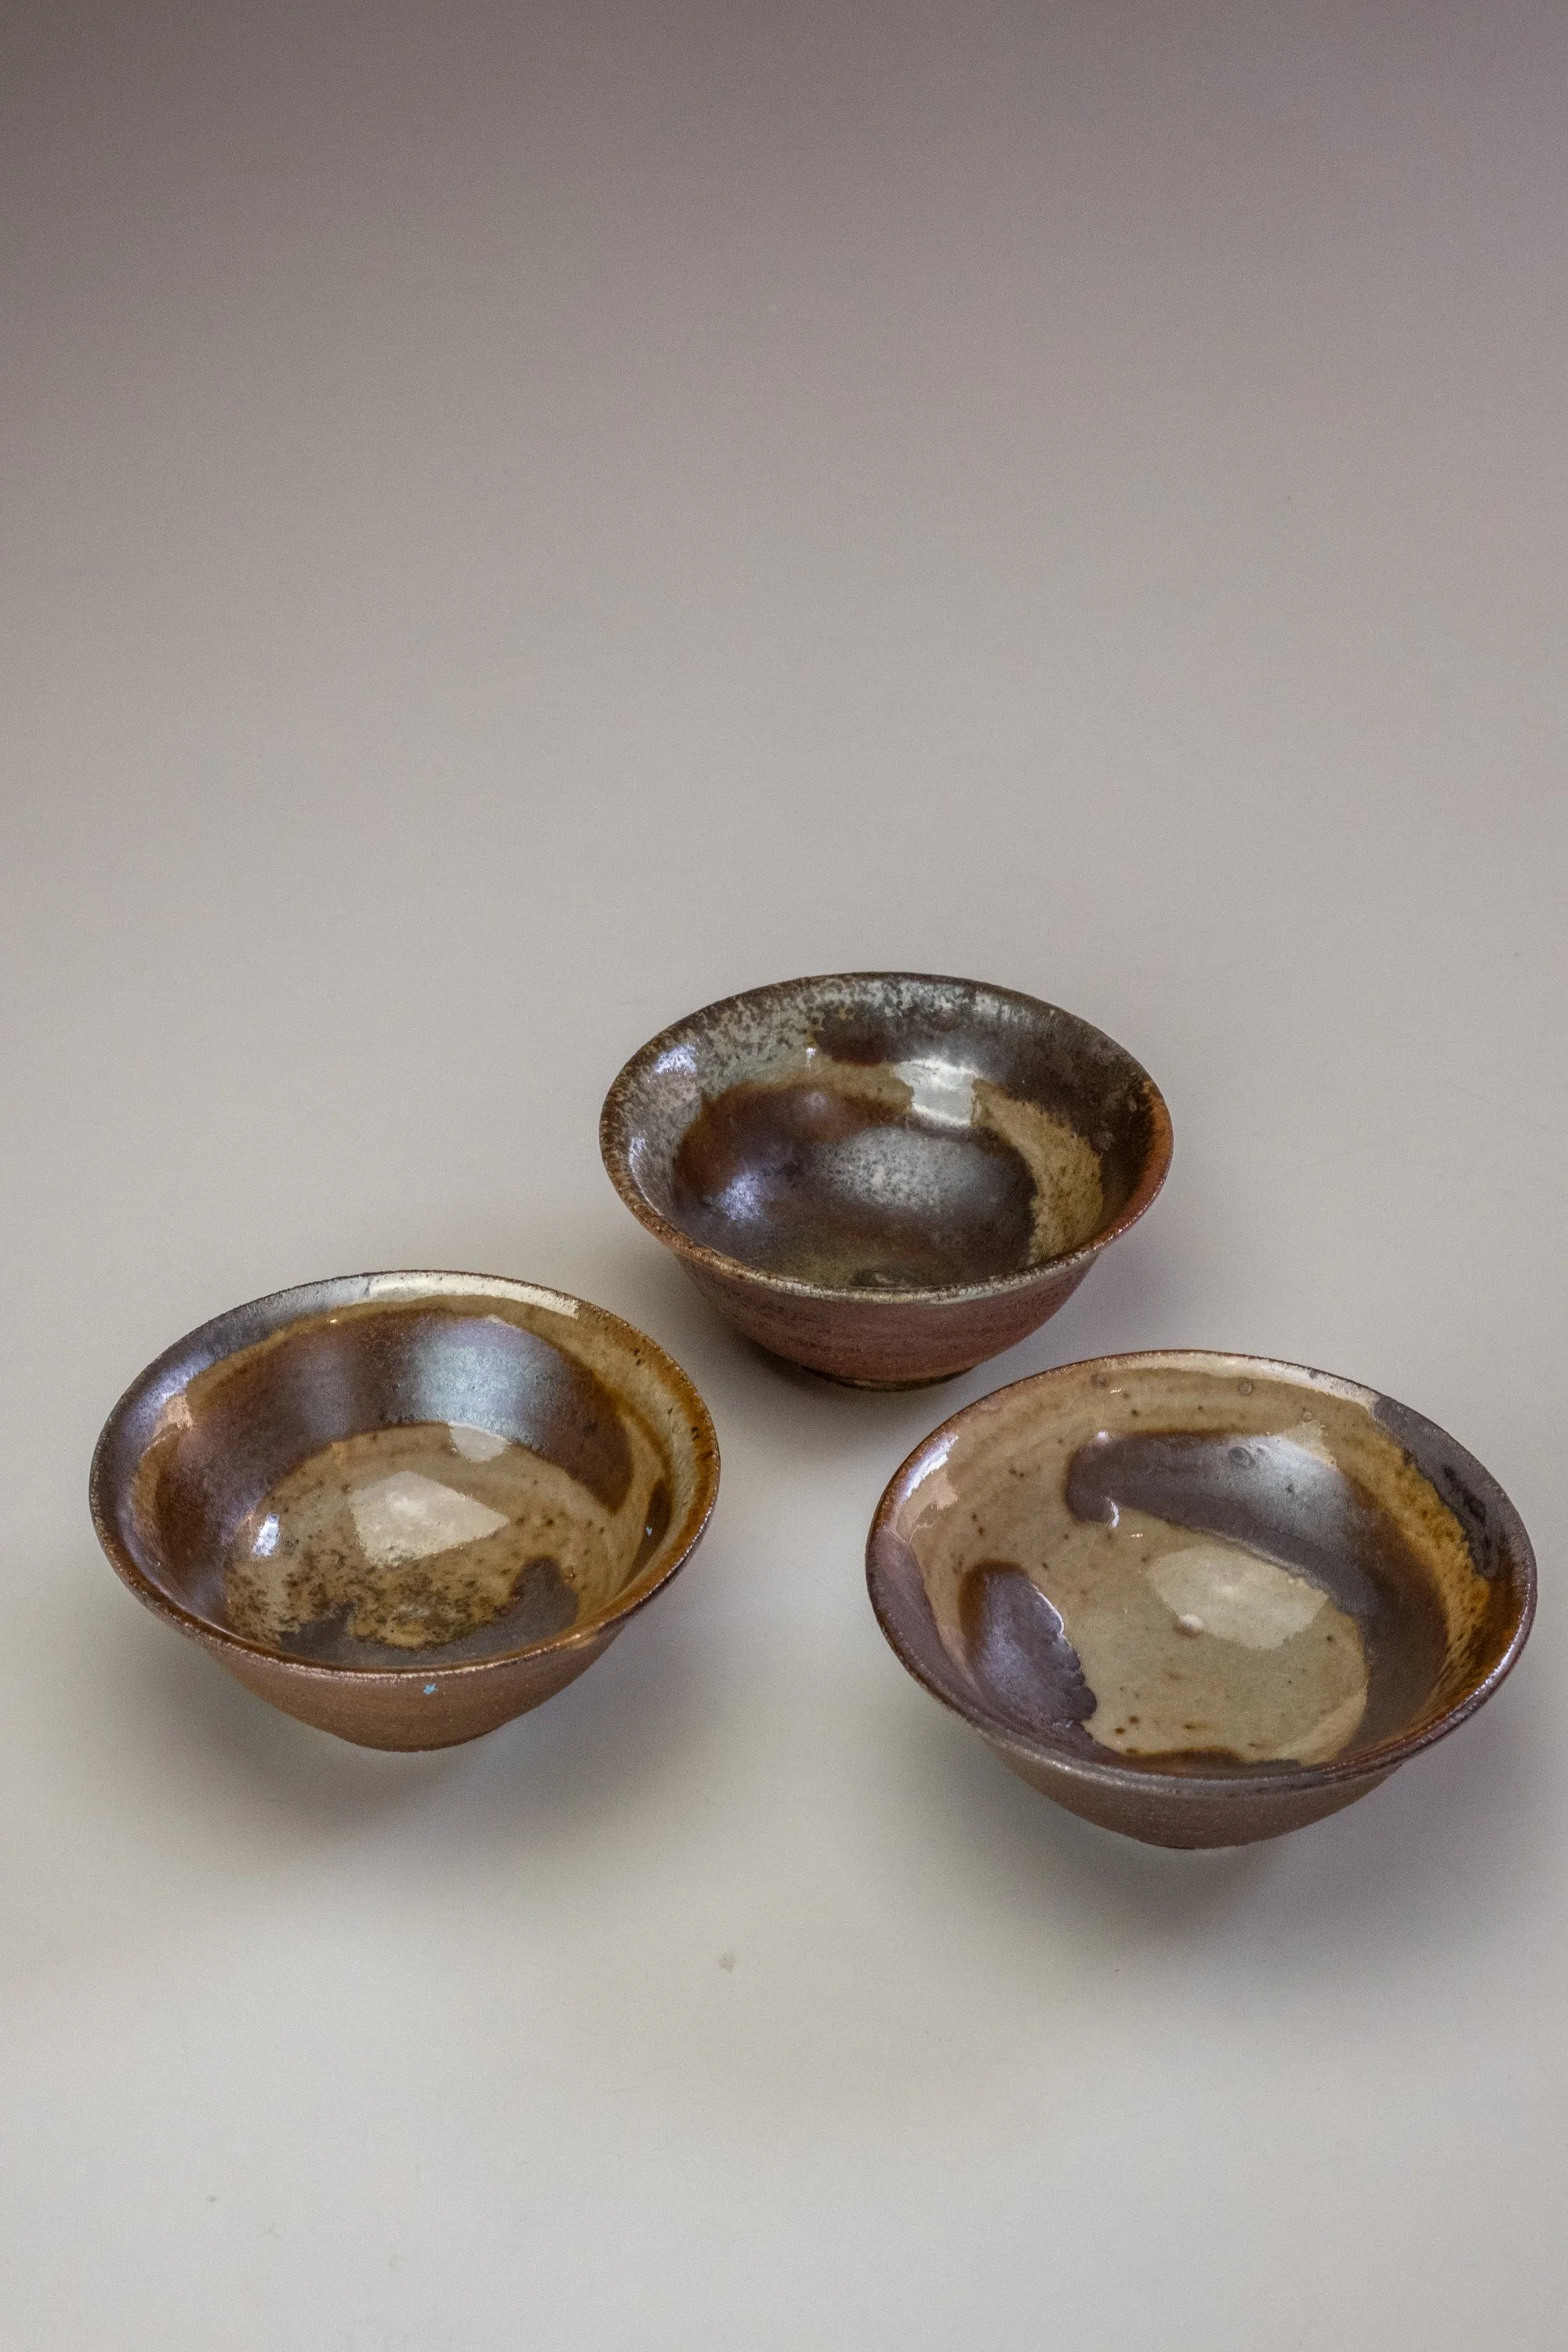
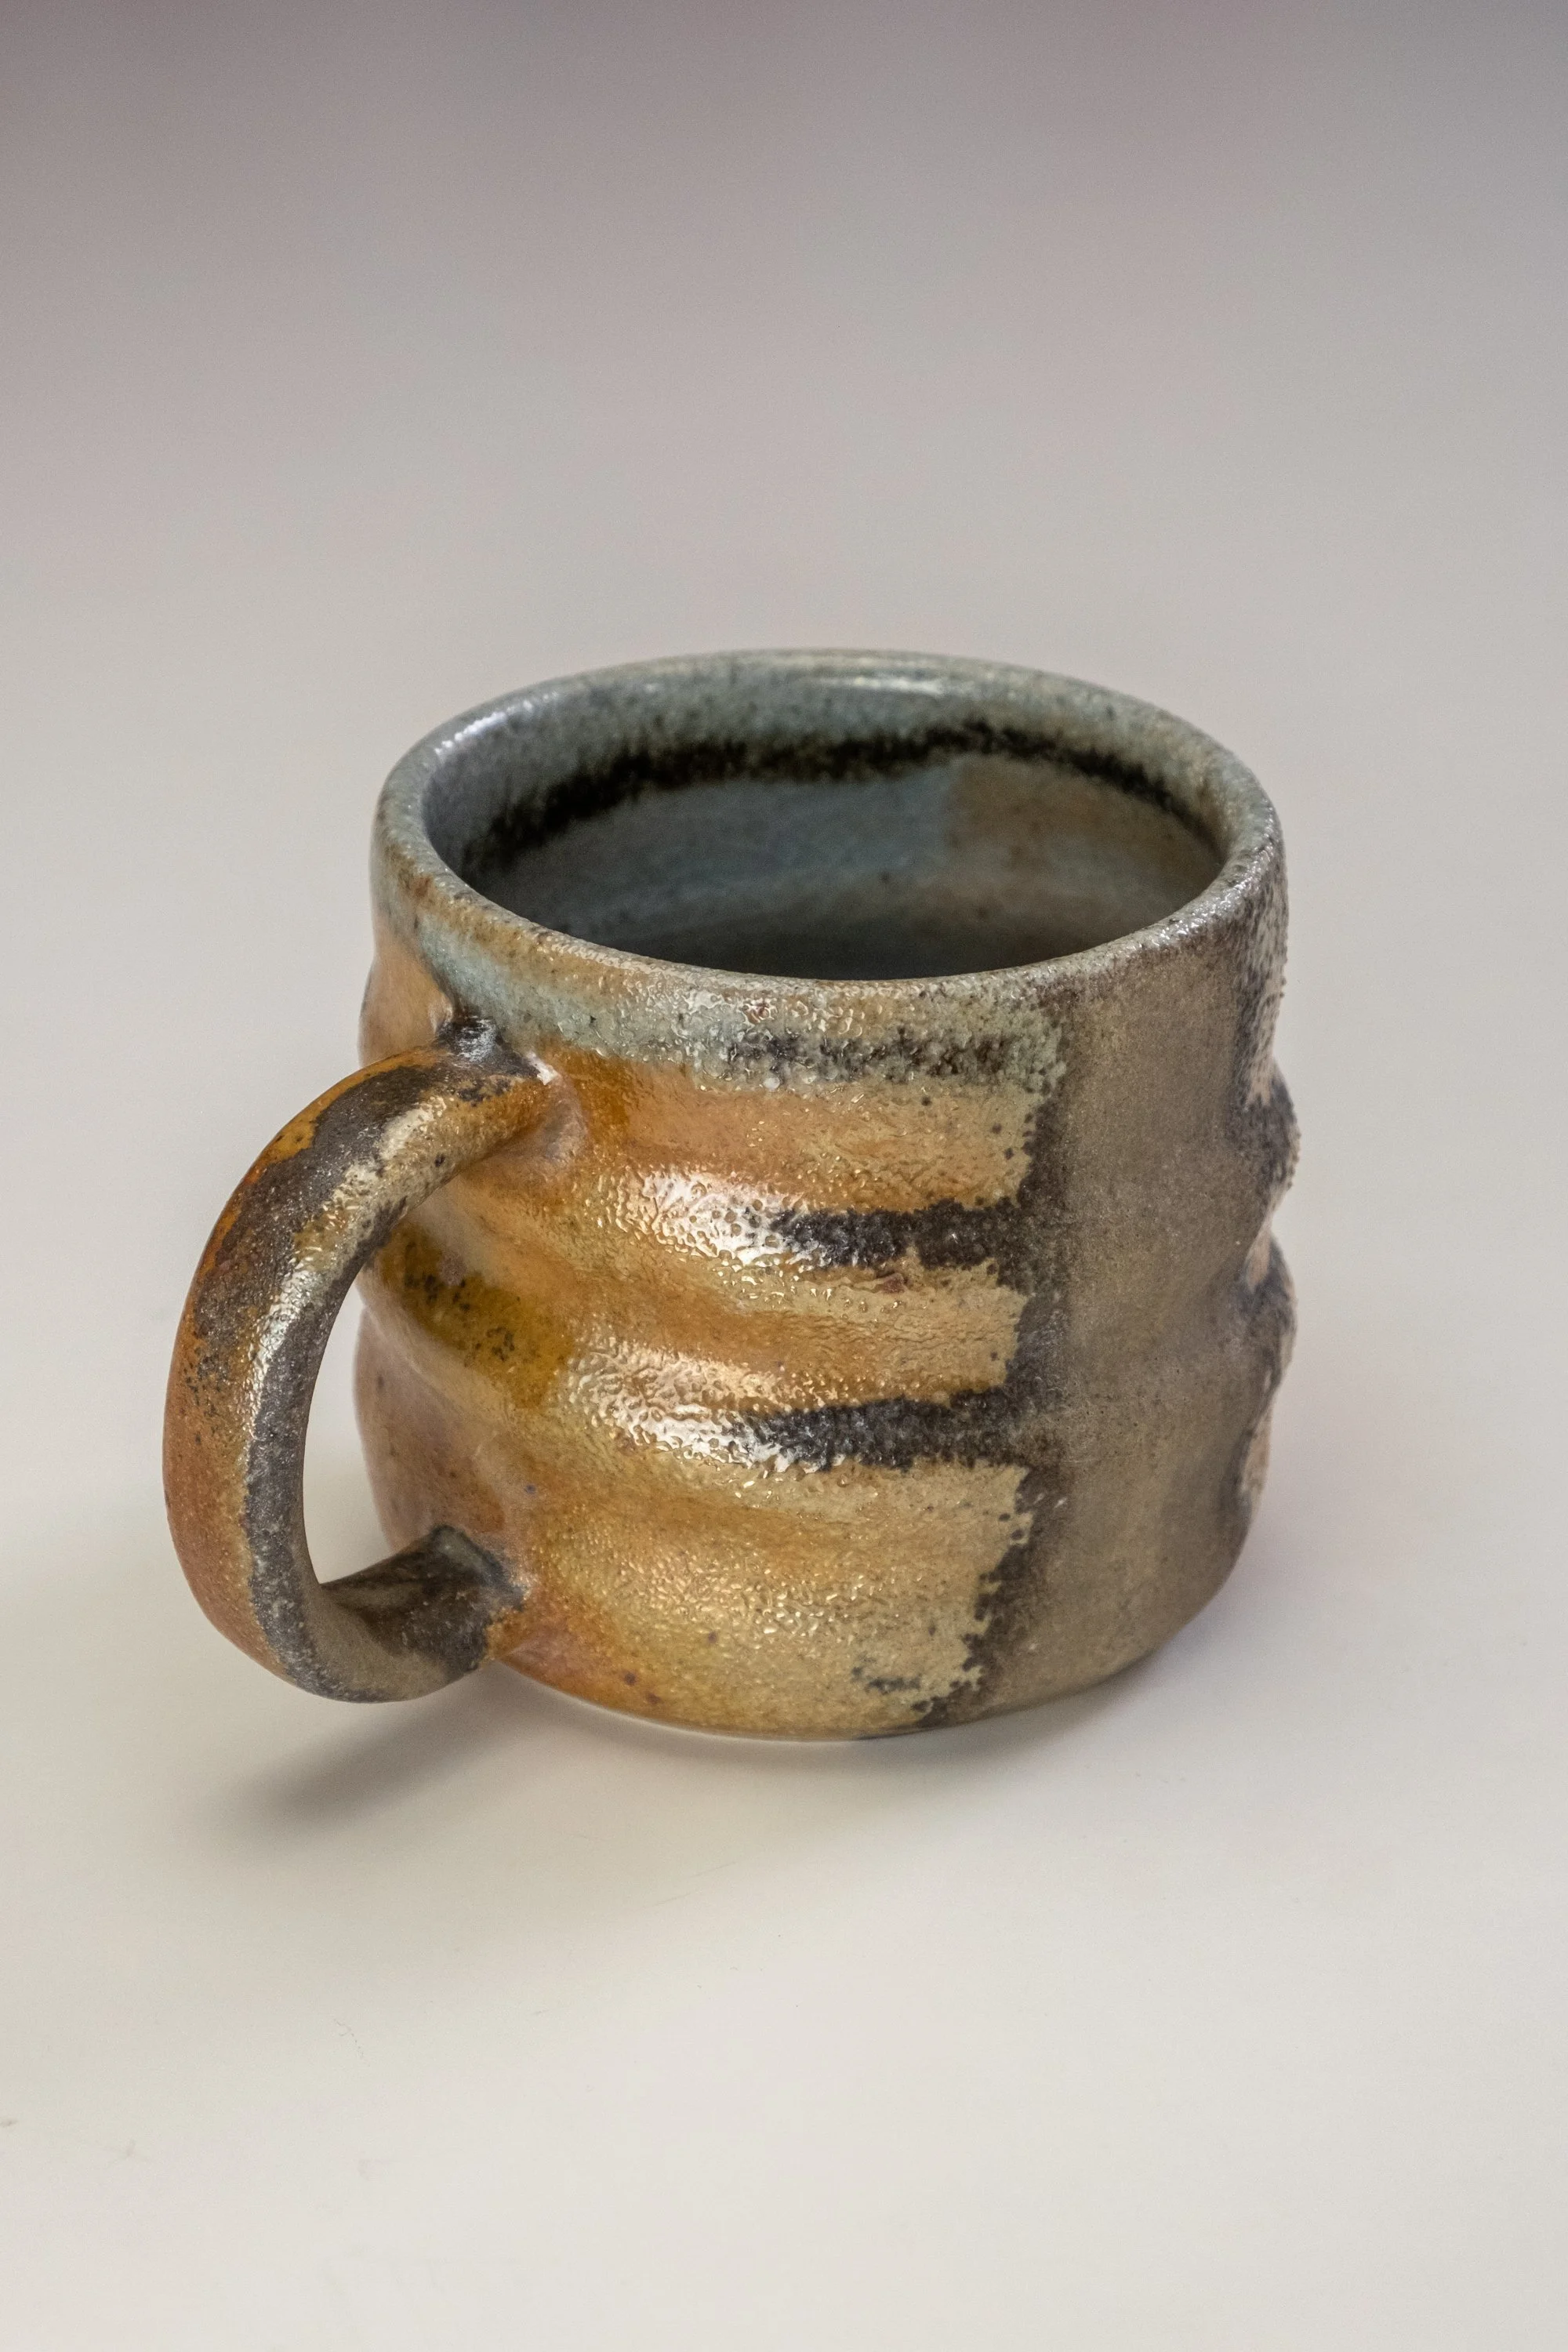
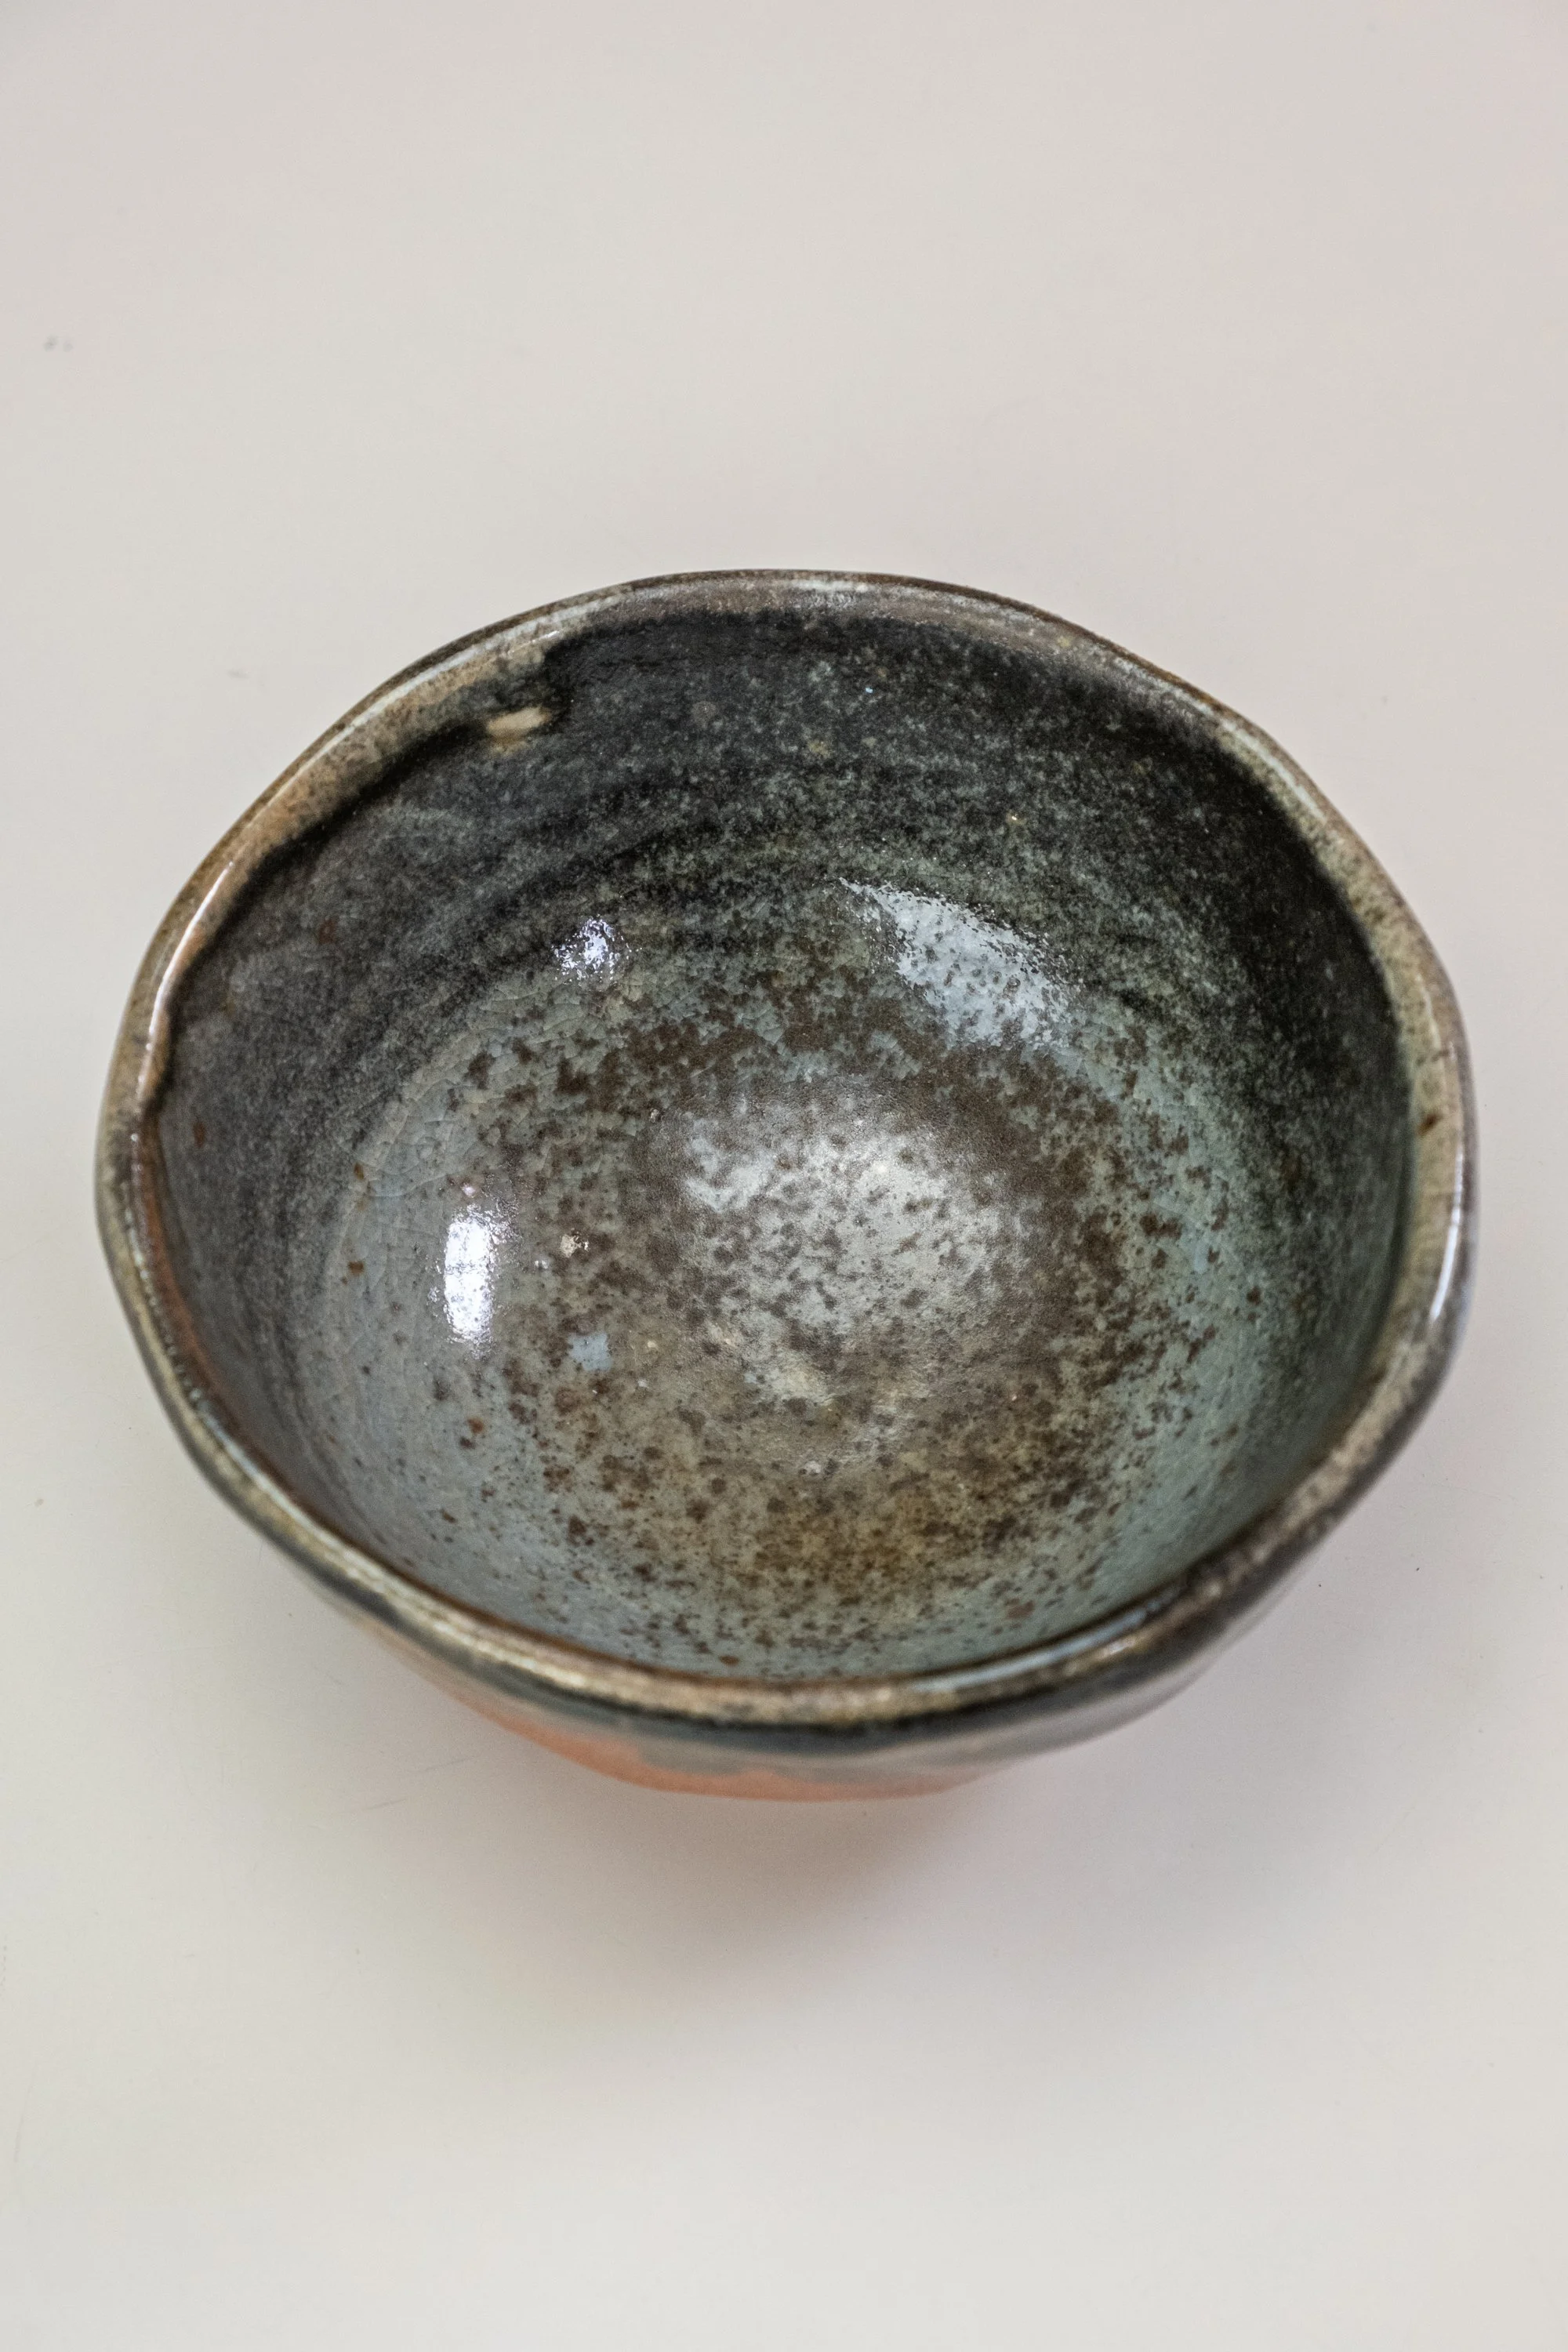
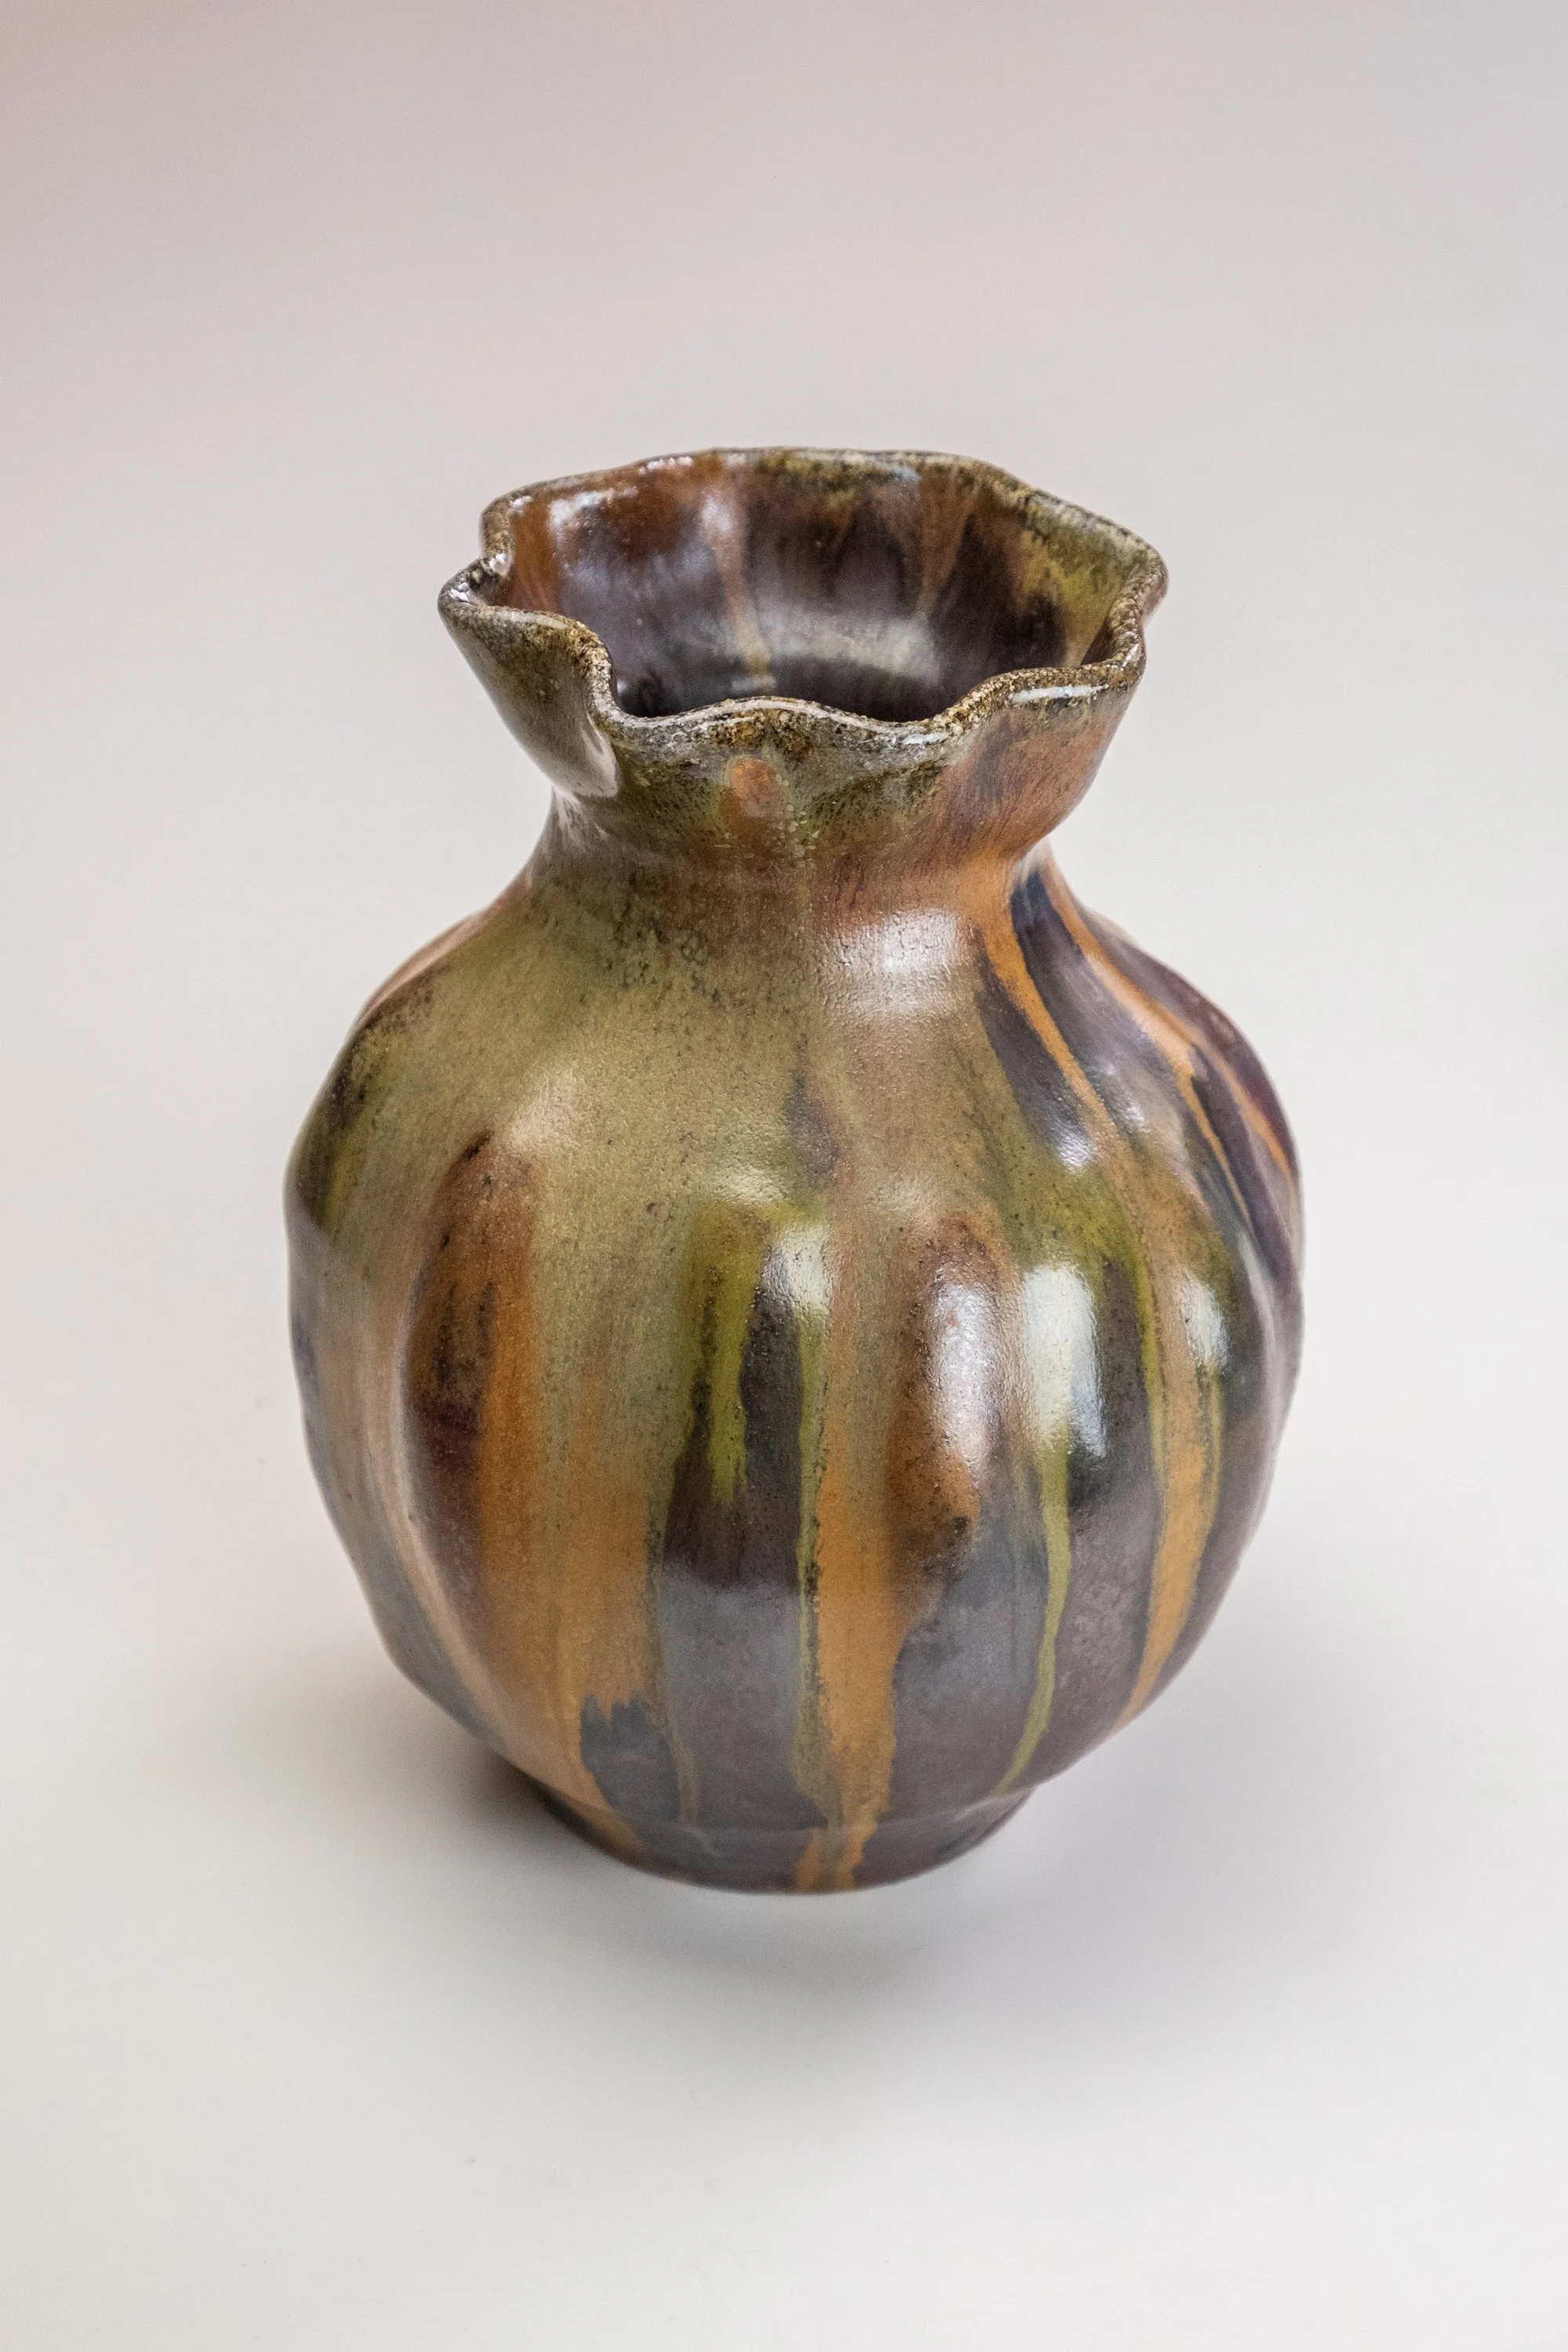
My wood-fired pieces after being cleaned up

A reminder of what everything looked like before
Reflections
If you are still reading this far, thank you. You must also really care about pottery, or maybe you enjoy witnessing the others’ experiences. I appreciate that.
I started teaching myself pottery in 2018 when I was feeling exhausted and sad being on a computer all the time at work. I needed something new, and wanted something to get excited about again. Clay has been the ever-evolving constant for me (not meant to be a contradiction) that has moved with me through many changes in the last few years.
It’s super inspiring in the opportunities I’ve had to intersect with the more “professional” world of clay, with artists and craftspeople who are all in on this field and who are masters. This also shakes me up and makes me play the comparison game a bit.
If you enjoyed this story, and connect with the idea that you are never too old to learn something new, and believe that some of the deepest joys and connections in life come when focused on creativity, I hope you can see value in these works.
I’m so excited to share this collection of pots with you all. These are my first wood-fired treasures, and if you couldn’t guess by now, these finishes and surfaces can never be replicated. These are one-of-a-kind objects infused with so much energy and passion, and I hope you can feel that.

Thank you for reading and connecting with me.
<3 Sarah aka “Waldo”
Video vlogs of my first wood-firing experience
Part one: arriving to Oki Doki Studio, loading kiln and stoking it.
Part 2: Unloading and Opening the Kiln